Door Locks turn on my dash lights :D

OP
OP
L

LaserRed95GT

Member
Joined
Jan 22, 2013
Messages
217
Reaction score
1
the switch is known to get warm and can melt. If that is your problem you will know it as soon as you pull the switch and wiring out.

One thing ttocs, I was checking out your build thread, there's some neat stuff in there! Some I love some I hate, but I was really curious about the lowering and highering thing, what exactly does it do? Is it electrical, and do you control it from inside? Like hydraulics on a pinto or something? PM me some deets on it!
 
OP
OP
L

LaserRed95GT

Member
Joined
Jan 22, 2013
Messages
217
Reaction score
1
Tomorrow is the day i've set a side for this. So I'll be heading into the dash.
I'm also more so obligated to now since I think a ground is failing that the the temp gauge uses. Its done this before (it's the ground that connects directly to the battery) so I'm going to inspect it and if it looks clean add another ground to see if that'll clear up the issue.

Seems like a lot of electrical componets are failing at this point, I recently put in an aftermarket controller since the fan one failed (it wasn't the relay or temp unit, the wires weren't carrying enough amps). But enough of that, I'm rambling.
 
OP
OP
L

LaserRed95GT

Member
Joined
Jan 22, 2013
Messages
217
Reaction score
1
IMG_0451_zps4dc3cfd2.jpg
Picture of the dash and ish out, it looks all good.
IMG_0452_zps6b2f68ee.jpg
Picture of the headlight switch, it's not the original and this one was cut in, but I don't see how this could be causing the issue with the locks. I couldn't see any further into the dash than that. I didn't do it, it was done years ago, according to my mom when she owned it.

thoughts? :(
 

MustangChris

Post Whore
SN95 Supporter
Joined
Aug 20, 2008
Messages
27,425
Reaction score
910
Location
Aurora, CO
geeeze....!


take off that electrical tape and start investigating. go to ace hardware, harbor freight, home depot, etc. etc. and get some shrink tube and do that stuff properly.
 
OP
OP
L

LaserRed95GT

Member
Joined
Jan 22, 2013
Messages
217
Reaction score
1
geeeze....!


take off that electrical tape and start investigating. go to ace hardware, harbor freight, home deot, etc. etc. and get some shrink tube and do that stuff properly.
I want to, but what if the wires are mixed up? The colors all match but they might not be with the right ones, such as the brown is a larger gauge on the headlight switch side, and the black wire connects to a black/orange wire. Of course they're the only ones alike but still.

I undid all of the electrical tape and black-black/orange crimp failed while undoing it, the rest are semi-sturdy.
 

MustangChris

Post Whore
SN95 Supporter
Joined
Aug 20, 2008
Messages
27,425
Reaction score
910
Location
Aurora, CO
post pics.

how are they attached? are they properly soldered? they use auto-zone clips? are they twisted?
 
OP
OP
L

LaserRed95GT

Member
Joined
Jan 22, 2013
Messages
217
Reaction score
1
IMG_0455_zps2c628a2a.jpg

Bam, mutli gauge plastic crimps.

The brown and brown/white on the headlight switch side were the ones with bigger gauge wire (I guess to help prevent that common melting issue).
 

MustangChris

Post Whore
SN95 Supporter
Joined
Aug 20, 2008
Messages
27,425
Reaction score
910
Location
Aurora, CO
you should properly solder that. and shrink wrap it.

but first, we'll get you wiring diagrams.
 
OP
OP
L

LaserRed95GT

Member
Joined
Jan 22, 2013
Messages
217
Reaction score
1
Wiring diagrams would be great, oh in my user name;) 95 lolololol.

Eh, I plan to shrink wrap it, solder though, well I've not tried my hand at it, yet. Supposedly it's easy, but I rather do testing and practice.
 

ttocs

Post Whore
Joined
Oct 9, 2009
Messages
32,831
Reaction score
5,728
Location
Evansville Indiana
I can tell by looking at the crimps that they were done with a very cheap/bad crimper. $20 says if you give them a good enough tug/pull that at a minimum they are loose, would not be suprised if one came out. Never ass-u-me that the previuos dude knew what was going on. Always assume the worst and you will be safer.

For soldering the biggest mistake people make is just taking the iron off 2 secs too early. Get a little solder on the tip of the iron, touch it to the connection and hold it for a sec(you should see the solder come off of the iron and go into the wire), then add more solder and hold for another 2 secs. If you are not adding enough heat it will not penitrate the wire and will not make a good connection.
 

MustangChris

Post Whore
SN95 Supporter
Joined
Aug 20, 2008
Messages
27,425
Reaction score
910
Location
Aurora, CO
laser, i dont have a 1995 wiring diagram book. im sorry :( i was hoping you would say 96/97/03/04...


I'll look this up for 1996, but NO promises they will be correct....
 
OP
OP
L

LaserRed95GT

Member
Joined
Jan 22, 2013
Messages
217
Reaction score
1
laser, i dont have a 1995 wiring diagram book. im sorry :( i was hoping you would say 96/97/03/04...


I'll look this up for 1996, but NO promises they will be correct....
It's the trouble with a 5.0 sn95, shunned by the foxbodys, and lack of material/knowledge from the fellow sn95 guys:p
It's okay though:p It's worth a shot

I can tell by looking at the crimps that they were done with a very cheap/bad crimper. $20 says if you give them a good enough tug/pull that at a minimum they are loose, would not be suprised if one came out. Never ass-u-me that the previuos dude knew what was going on. Always assume the worst and you will be safer.

For soldering the biggest mistake people make is just taking the iron off 2 secs too early. Get a little solder on the tip of the iron, touch it to the connection and hold it for a sec(you should see the solder come off of the iron and go into the wire), then add more solder and hold for another 2 secs. If you are not adding enough heat it will not penitrate the wire and will not make a good connection.
I agree, they were done at a salvage yard, apparently. The crimps have multiple bite marks into them to try and make them work, not just single solid ones. No idea if this is new or out of another mustang either.

I guess I will be digging out the soldering gun, wherever it's hiding. It's the unfamiliarity that's scary.
 
OP
OP
L

LaserRed95GT

Member
Joined
Jan 22, 2013
Messages
217
Reaction score
1
I recrimped them all and it works the same as before, which didn't really matter.

But now I have a new problem that I'm sure I caused! :/
The high-beam light icon on the dash is staying on, the high-beams aren't on and turning them on or off doesn't affect it.

My guess right now is that I might've messed or misaligned a pin on the back of the gauge cluster when I put it back in. So either I need to get a new gauge cluster or try to realign the pins (assuming thats it).

Any other thoughts are welcome!
 

ttocs

Post Whore
Joined
Oct 9, 2009
Messages
32,831
Reaction score
5,728
Location
Evansville Indiana
pull it back out and make sure you can see NO(zero/zilch/nada/nothing) copper/wiring around the crimps and that there are no loose ends that could stray.
 
OP
OP
L

LaserRed95GT

Member
Joined
Jan 22, 2013
Messages
217
Reaction score
1
I've got an update for you folk, 10 months later.

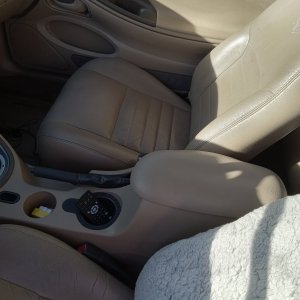
I'm working on an interior swap/fixing anything I came across. This is going to allow me access to all those never before seen wires. I paid for the interior of an entire car in full so I plan to grab the entire interior harness from the 02 I'm pulling things from. hopefully the locks are the same.

But anyways, today I was pulling off the driver side door panel when I noticed this little box and decided to open it up. To my surprise I see that had been water damage. I went down to the local junk yard and pulled a replacement from a 98 mustang. Changed it out. If anything this particular piece makes a clicking noise with the clicking of the windows. What does it do? I don't really know. relay maybe? Anyways, my locks no longer see to turn on the dash lights (seem, this isn't proven for sure yet). What has also developed is that my lock buttons don't seem to be doing anything now.
My left window still works in conjuction with either window button, however my driver side window does not, so I plan to pull the motor and open it up.
Ideas on fixing the locks or where to look next, though?


Also. Check out this sweet mustang. I wanted to post it somewhere.
http://9gag.com/gag/aWZ9oPn


Finally, I mentioned how my gauges were reading inaccurately (big surprise with this stock POS) but it was because the shop that did some work for me had possibly forgotten to bolt down the ground for it. Fortunately I found it and bolted it back down, but they're still pretty inaccurate so next I'm probably going to shorten the ground to see if that helps at all.

The high beam light was staying on because when I pulled the gauge cluster and put in back in the copper backings were starting to fray and cross eachothers paths, one next to it having power, turning the light on. lol.
 

ttocs

Post Whore
Joined
Oct 9, 2009
Messages
32,831
Reaction score
5,728
Location
Evansville Indiana
Pretty sure that is the one touch relay for the drivers side window but not sure how it has anything to do with the lights.

pry the switch out of the pass side switch and swap it with the drives side first. The problem you described could be the switch, or the motor. If swapping switches doesn't do anything then test for voltage at the switch.
 
OP
OP
L

LaserRed95GT

Member
Joined
Jan 22, 2013
Messages
217
Reaction score
1
Pretty sure that is the one touch relay for the drivers side window but not sure how it has anything to do with the lights.

pry the switch out of the pass side switch and swap it with the drives side first. The problem you described could be the switch, or the motor. If swapping switches doesn't do anything then test for voltage at the switch.
did the switch swap and the switch was still good for moving the passenger side window. I should also mention I can hear the driver side relay clicking when I press the driver side window button. In addition I tested the button for voltage and it had it, read what the battery reads.

I also tested the the lock switch for voltage and it also had voltage.

And I checked fuse number 12, along with all the other fuses under the dash, they're all fine, I should mention
 

FivepointSlow

Well-Known Member
Joined
Oct 22, 2013
Messages
2,646
Reaction score
60
Location
Enfield, CT, USA
That is indeed the one touch relay. I bypassed mine because Mine was missing and caused my windows to not work... However my pass window still doesn't work.


Crapatalkin' on the iPhone 5.0
 
OP
OP
L

LaserRed95GT

Member
Joined
Jan 22, 2013
Messages
217
Reaction score
1
So I went ahead and bought a simple low voltage test light to make testing easier and went back over the locks and actually got a no reading.
SOOOO I'm not getting power to the locks at all. This is more so my main focus, the locks since I can't go on with my interior swap until I fix this issue. The window issue I think I'll have resolved soon.

I'm going to pull the driver side window motor and replace the bushings as when the window was going out it was only in part, sometimes working and sometimes not working and also sometimes getting stuck a third of the way open.
I had already done the passenger window about 2 years ago, I should've done the driver at the same time but didn't. Anywho, I was feeling around and about to take the motor out before I noticed how it was bolted in, I for the life of me can't remember how I ever got the passenger one out without removing the window regulator, but if I did it then I'm sure I could do it now.
 

Latest posts

Forum statistics

Threads
77,597
Messages
1,505,571
Members
15,047
Latest member
nike04life

Members online

Top