ttocs
Post Whore
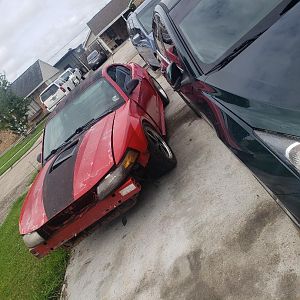
500 is a fair price. I would not feel bad asking that and not haggling. I have often wondered what mine might go for now after being ported/polished inside, polished outside of the upper and then ceramic coated them both.
I imagine it could go for quite a but then, polishing takes sooooo long to do. Have pictures of it?500 is a fair price. I would not feel bad asking that and not haggling. I have often wondered what mine might go for now after being ported/polished inside, polished outside of the upper and then ceramic coated them both.


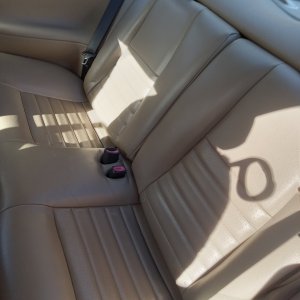
Yeah man, I'll do my best to take plenty of pictures. The tmi stuff is actually super nice, I am blown away how nice and soft the vinyl is.Can you take pictures and document how you put the skins on? I’ve don’t the hog ring stuff a couple times, but never threaded one. I’d like to see the process.
Can you take pictures and document how you put the skins on? I’ve don’t the hog ring stuff a couple times, but never threaded one. I’d like to see the process.


I'll give it another go when I find more string. Just picked up the upper seat frame and heatbgun so game on tomorrow and or Tuesday . I'll take more pics if I canVery cool! Thank you a bunch. Pictures are worth 1000 words.
Mas. So this is a step by stepVery cool! Thank you a bunch. Pictures are worth 1000 words.


Thanks a ton! You make it look so easy, lol. I’m going to keep all this info handy for when I do my seats.
I will take some photos of the hog ring operation as well. This is actually my first time fucking with this shit. Lol it's not terrible. Just wears on the forearms a little. I am trying to document as much of this project as possible. Thought about doing videos but I don't have patience for setting up video cameras and editing.funny I think that is the first time I have seen someone do that here. Seems like we have seen almost everything at one time or another.


") next up will be the rear seat back!
next up will be the rear seat back!Why thank you sir! So far I would definitely 10 out of 10 repeat. The 99-04s use stays and hog rings instead of glue so you can reuse the front foams if they are in good condition. So a 99-04 car it would be cheaper. But I will say the 94-98 seats are far more comfortable.Yes! Job well done! Id say job done by professional!