You are using an out of date browser. It may not display this or other websites correctly.
You should upgrade or use an alternative browser.
You should upgrade or use an alternative browser.
G36 Monkey's Resurrection Build. Number Tew. Update June 10, 2017
- Thread starter g36 monkey
- Start date
Tally_4.6
Well-Known Member
Probably because of that yellow piece a shit next to you.
1998cobrasvt
Well-Known Member
- Joined
- May 4, 2015
- Messages
- 1,531
- Reaction score
- 9
Yessss! Excited to see all the progress that has been made Jerry!! ------ That intake looks good black!
OP
OP
Nice!
Thank you!
Probably because of that yellow piece a shit next to you.
lmao!
Yessss! Excited to see all the progress that has been made Jerry!! ------ That intake looks good black!
Good is a stretch. I will definitely say it looks better lol
97_281gt
Active Member
- Joined
- Mar 6, 2011
- Messages
- 808
- Reaction score
- 0
Why was there no snap of car wash youz is slacken
Sent From Your Moms Phone
Sent From Your Moms Phone
97_281gt
Active Member
- Joined
- Mar 6, 2011
- Messages
- 808
- Reaction score
- 0
Also amazing job
Sent From Your Moms Phone
Sent From Your Moms Phone
OP
OP
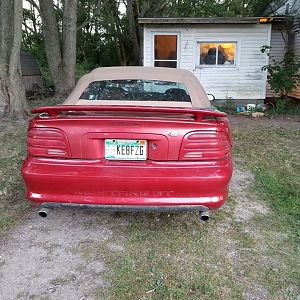
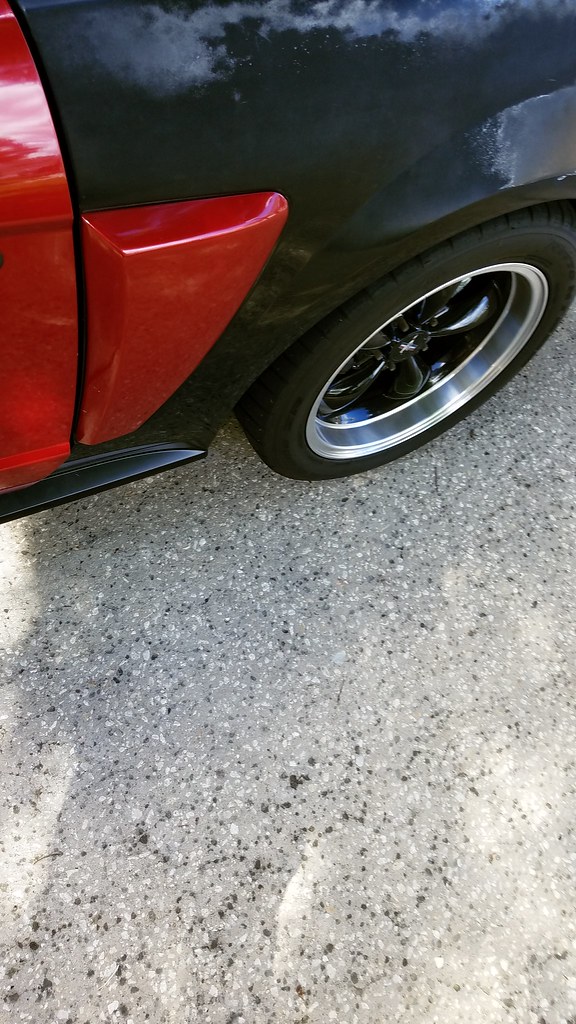
So, a little update. First picture I took by mistake, but I thought I would go ahead and post it because it's a nice shot of my side scoops. I love my side scoops. So:
Anyhow, finally got around to installing the Maximum Motorsports steering shaft. I will give a quick "walk through" just so people know what they are getting into.
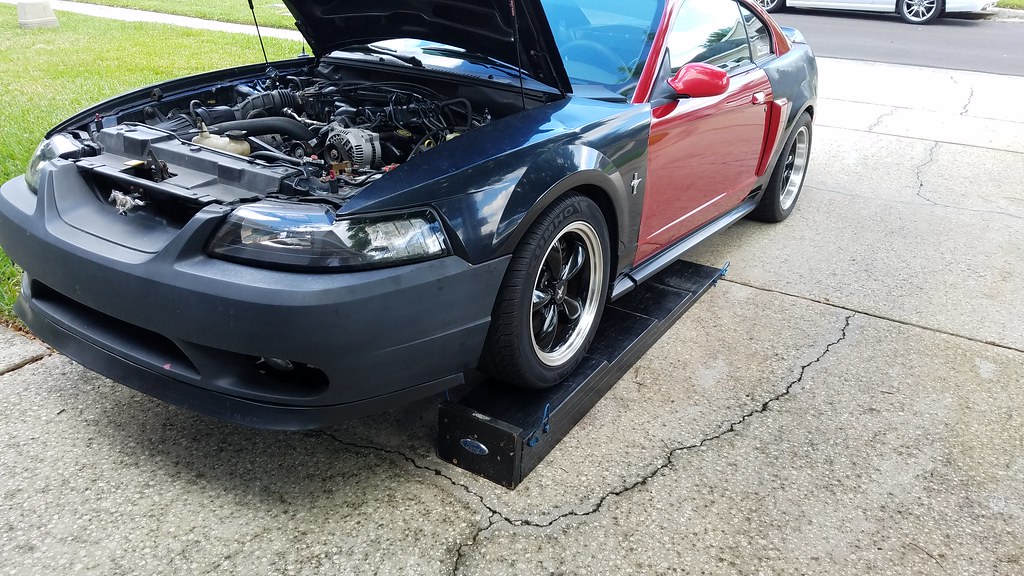
Instructions say to do the job on jack stands, I personally disagree. You want to limit the movement of the tires as much as possible once steering is disengaged. To do so, I drove up on my ramps. Obviously if you have a drive on lift, life would be easier. I hadn't used these bad boys in a while, so it was nice to break them out.
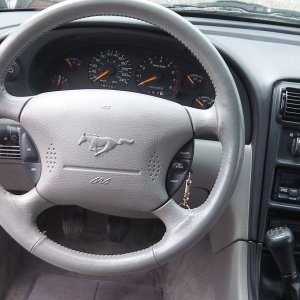
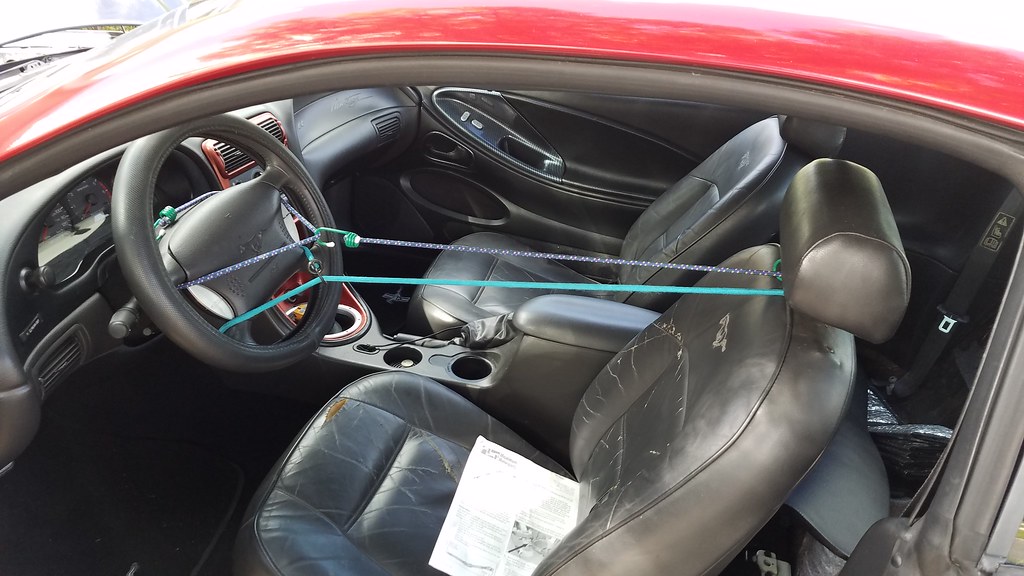
The next step is also pretty important. Stabilize the steering wheel. If you are at a shop you might have one of those fancy tools to do so. If not, I show you how to do it as a normal person with regular garage tools.
Once steering is disengaged, the steering wheel has the ability to spin, if it spins too much, you could sever the wires in the clock spring, which would make for a bad day. Taking 2 minutes to secure the wheel can prevent that.
I do not have pictures of the removal. Instructions are not exactly super useful on this portion either, they basically say, remove the shaft.
There is a bolt on the steering rack that pinches the end of the shaft. Remove this bolt and use your big boy hands to separate the shaft from the rack.
Under the dash, remove the pinch bolt on the steering shaft closest to the firewall. Then remove the shaft from the column. Then you will need to slide the shaft out of the firewall and figure out how to maneuver it out of the car. Luckily, I have tubular front suspension so it glided right out.
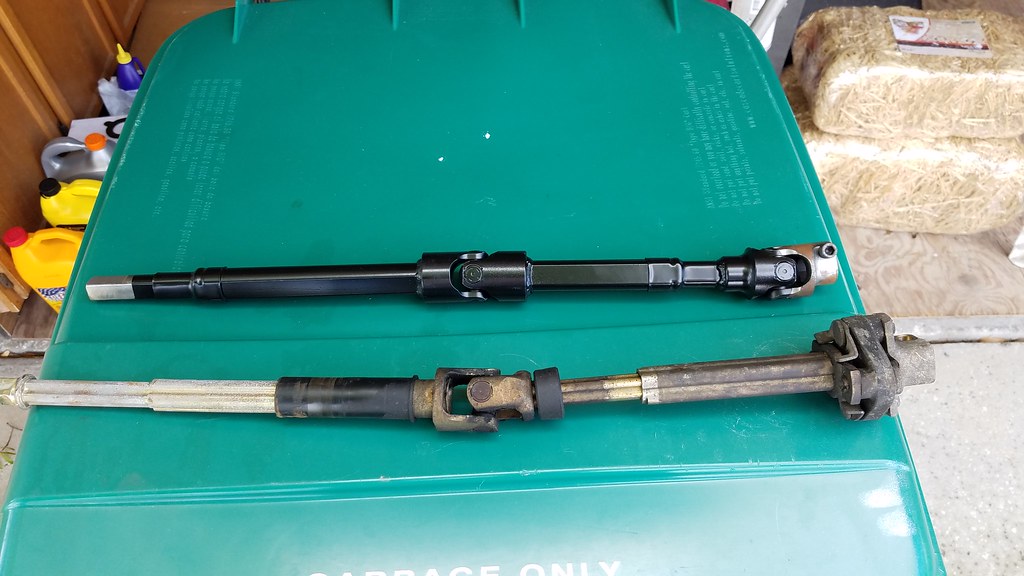
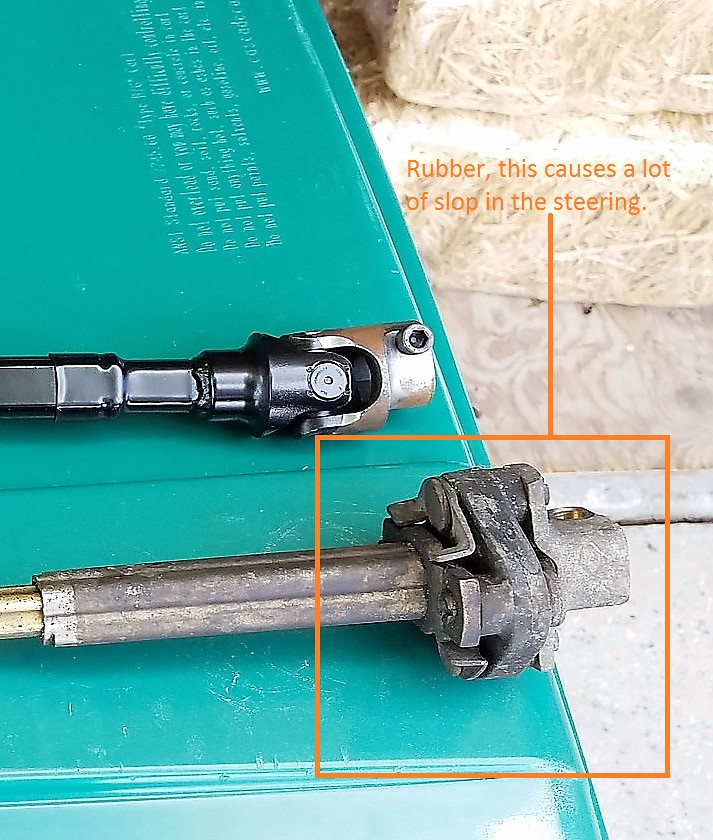
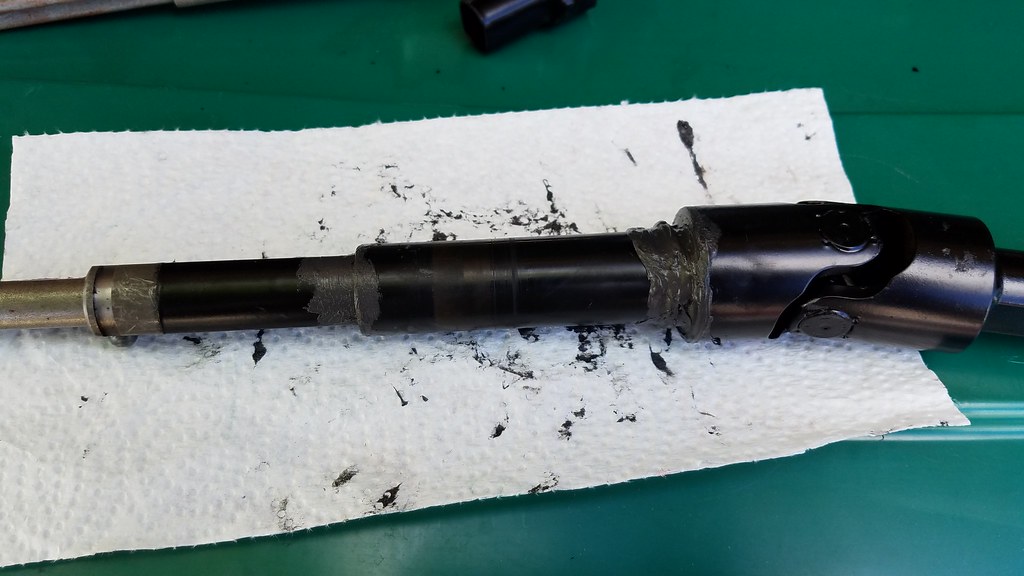
Below I have a pic of the old shaft with the new one side by side. Bear in mind I painted the shaft prior to installation. It is bare metal, without paint it will get a lot of surface rust. Essentially, collapse the ends halfway on either side, and tape the ends approximately 1" from the end then paint.
The big problem with this is the rubber.
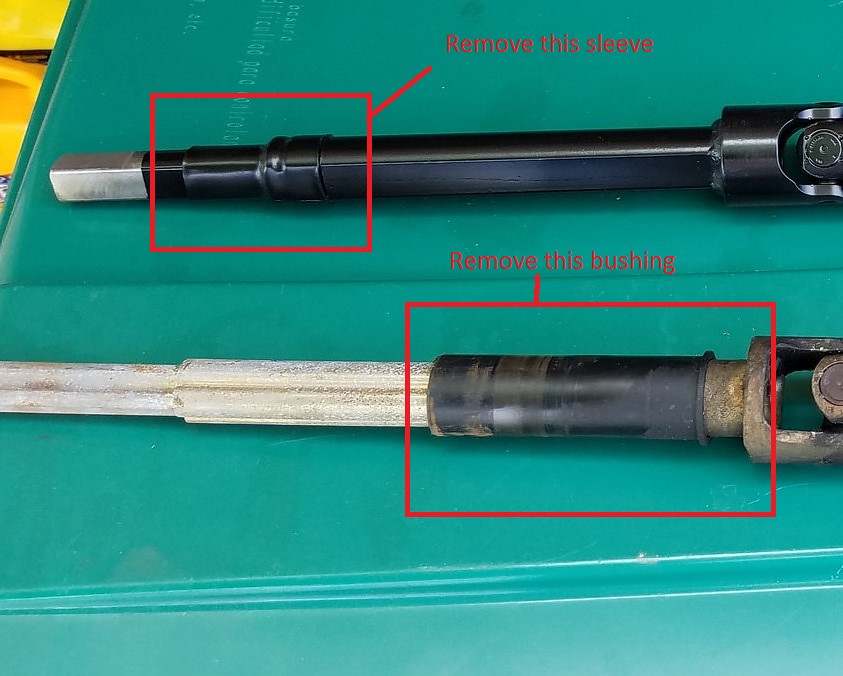
The next step is to slip off this plastic bushing and the rubber dust boot from the
new shaft. Be very careful, the plastic piece is no longer available. If you
damage it, you will have to hit the junk yard. The plastic sleeve I found
to come off very easily, while the dust boot took a bit more effort, probably
because it was painted over per the instructions provided.
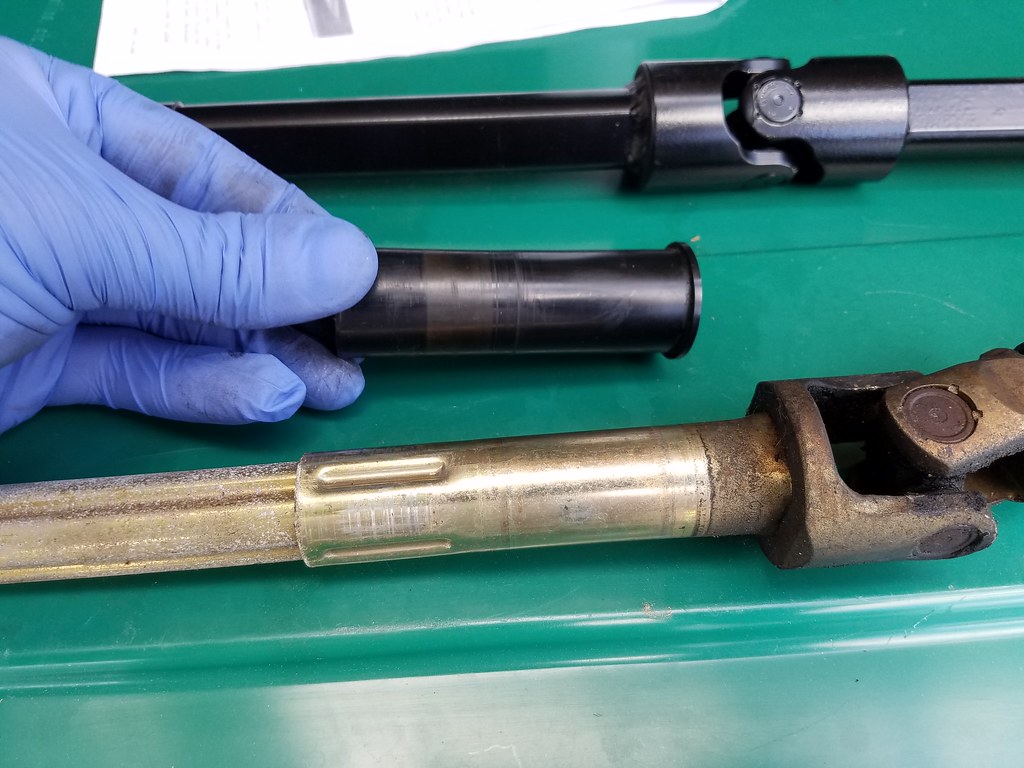
Clean the area on the new shaft where the plastic sleeve will slide onto, as well as the plastic sleeve. I used rubbing alcohol and a paper towel to clean both. I did not want to risk using a more aggressive solvent on the plastic sleeve because of its unavailability.
The next picture shows the area where the plastic sleeve will slip over. As I mentioned earlier, you need to remove the rubber dust boot before you can put the new sleeve on. In this picture that boot is not removed. Do not follow by example. Do as I say! If you do not remove the boot now, you will have a lot of headache on the next step.
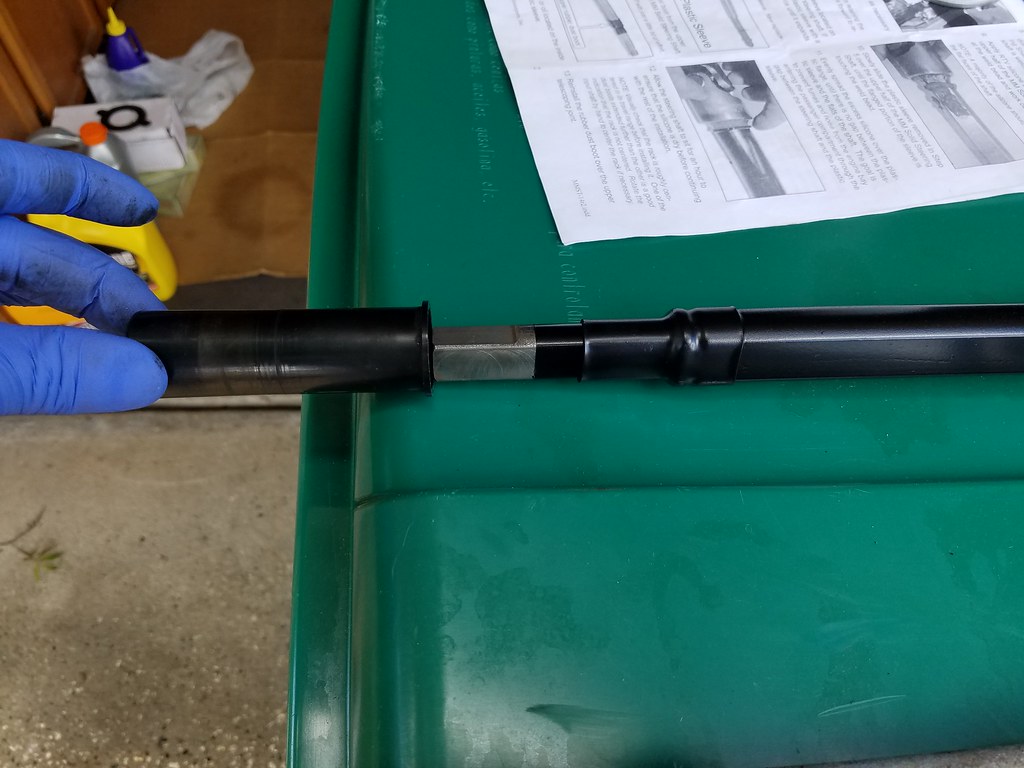
The next step is arguably the most time consuming and messiest part of the install. You will need to cover the shaft where the plastic sleeve sits in black RTV silicone. This sleeve fits into a bushing in the firewall, by sealing this area you are preventing noise and fumes from entering the cabin.
The area of focus is the welded bead and approximately 2 inches up the shaft. See the picture for an example. I used an entire small tube of silicone. I find it easier to apply more then remove as necessary to get a good seal. The instructions say to focus more on the flat areas of the shaft because the rounded edges seal quite well with the sleeve.
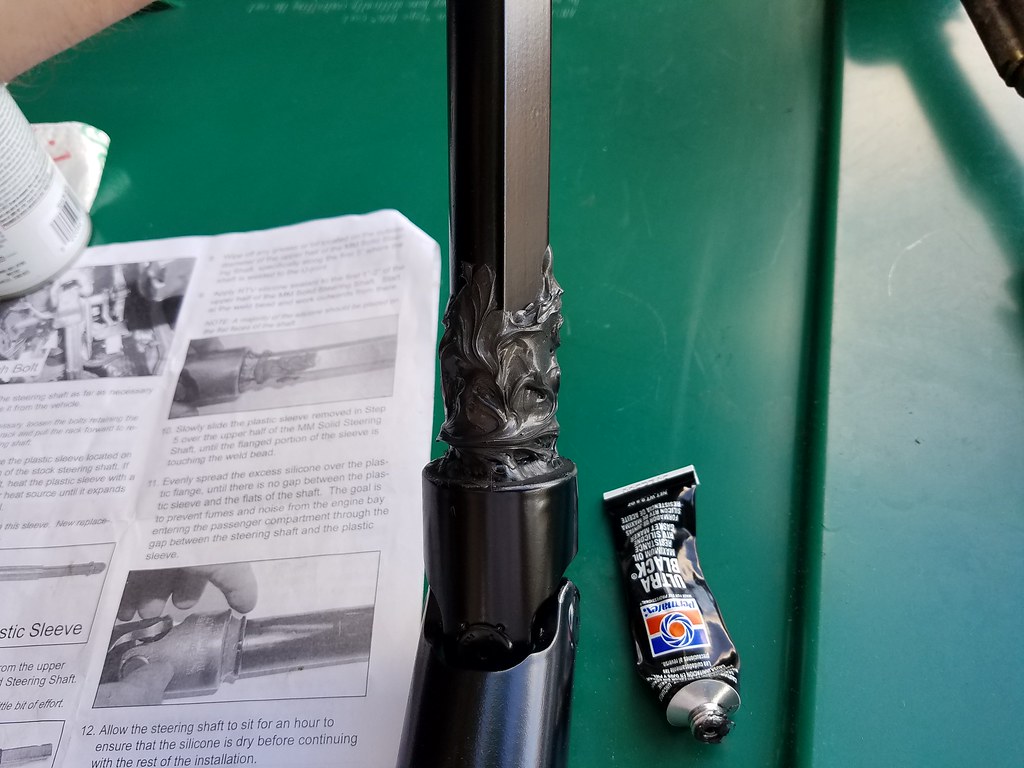
Once you have applied the silicone, go ahead and seat the sleeve. Then proceed by smoothing the silicone out, making sure to push into the sleeve a bit to seal up any air holes. Make sure to do so at both ends. Do your best to fill all the gaps with silicone.
If you manage to make it look pretty, my hat is off to you. Mine came out ugly as sin, but I know it is sealed!
Then you just let the shaft sit for about an hour before you start handling it. The install is fairly simple. Remove the new pinch bolt from the steering rack side of the shaft. Prior to attempting the install, I recommend collapsing and extending both ends a few times, just in case they got a little bound up from sitting for a while. This will be easier while outside of the car than underneath.
Go ahead and install the shaft onto the steering rack and slide it into position. Make sure the shaft is inserted into the firewall. If the shaft is not in the proper orientation or if it is not fully slid on, the pinch bolt cannot be installed.
Once the shaft is fully seated, and you are sure the other end is through the firewall, go ahead and install the new pinch bolt and tighten it to 23 foot pounds.
Relocate yourself to under the dash and find the shaft. Extend it to reinstall it to the steering column. Once you seat it in the original location, go ahead and reinstall the original bolt and tighten it to 23 foot pounds.
That’s it!
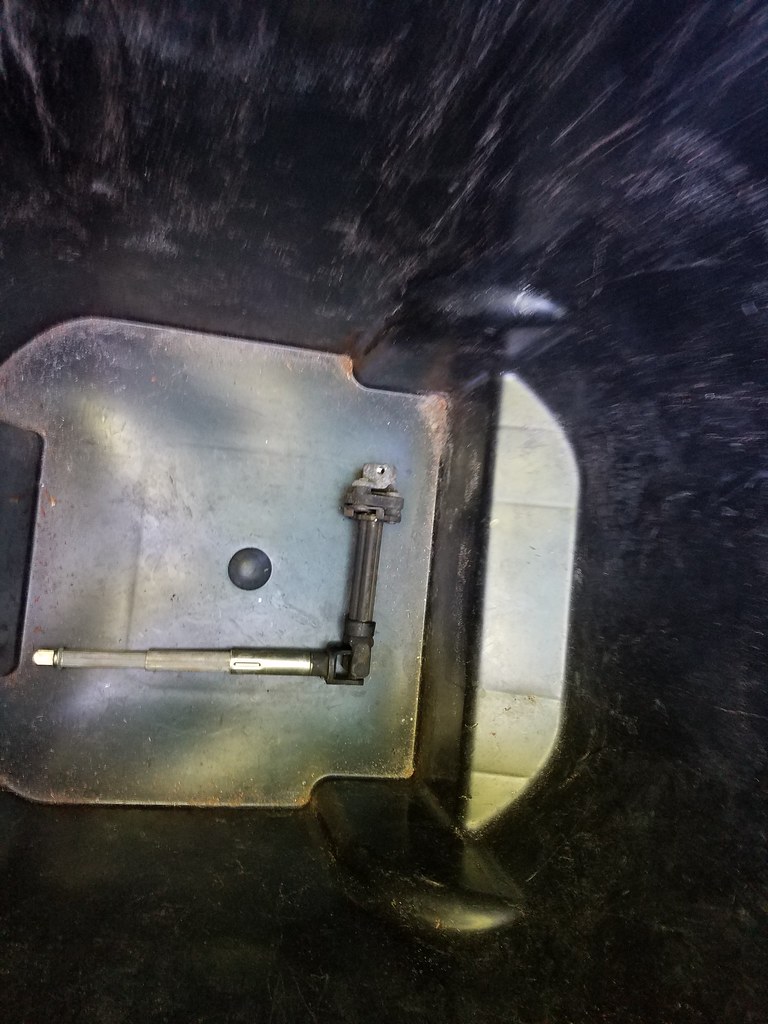
Now, properly dispose of the old junk:
Of course undo however you held the steering wheel, and then get the car safely on the ground. I noticed an immediate difference in steering response and had a lot less play in the wheel. This is a huge improvement over the stock unit and I highly recommend it.
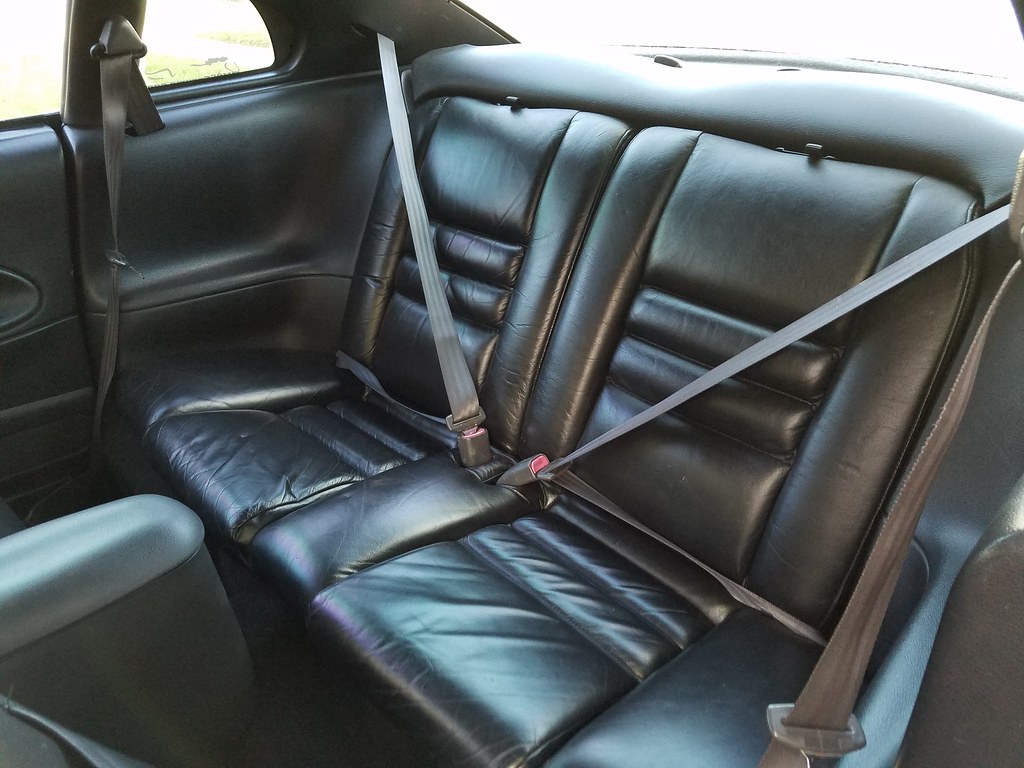
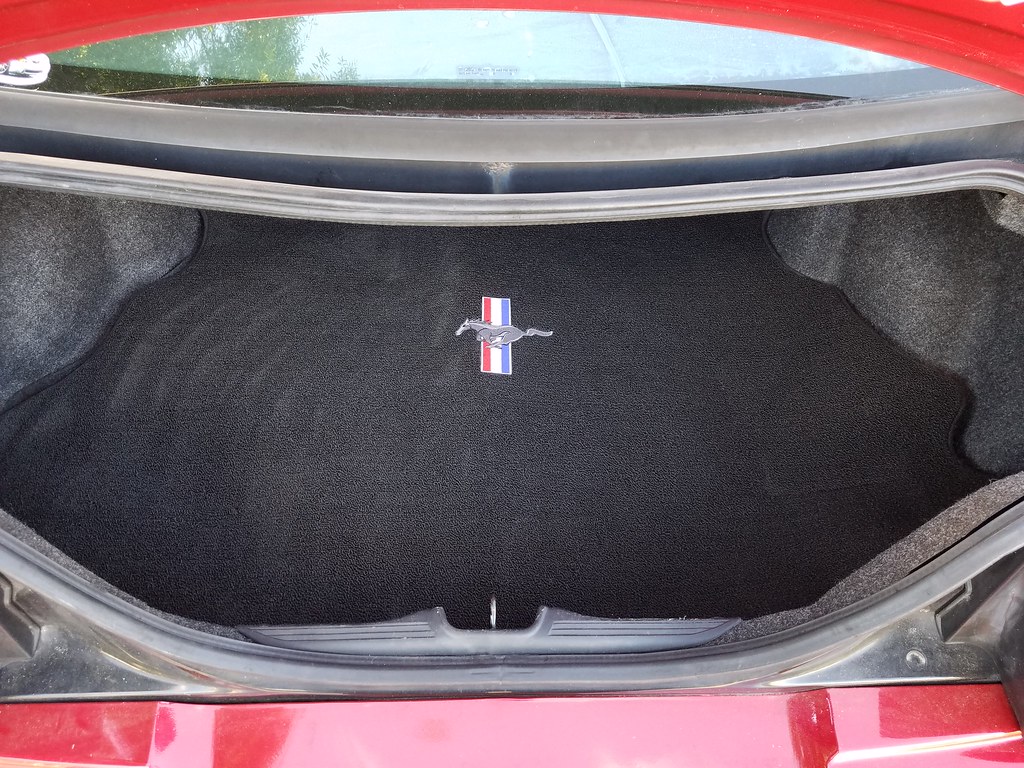
If you are like me, and you have some other little projects to take care of while the silicone dries, I would do it. While I was waiting I went ahead and reinstalled my back seat, as well as my trunk mat because I had a car show. Since the car will be stored indoors from now on, I am not too worried about the seats getting messed up. Anyhow, pics of that stuff!
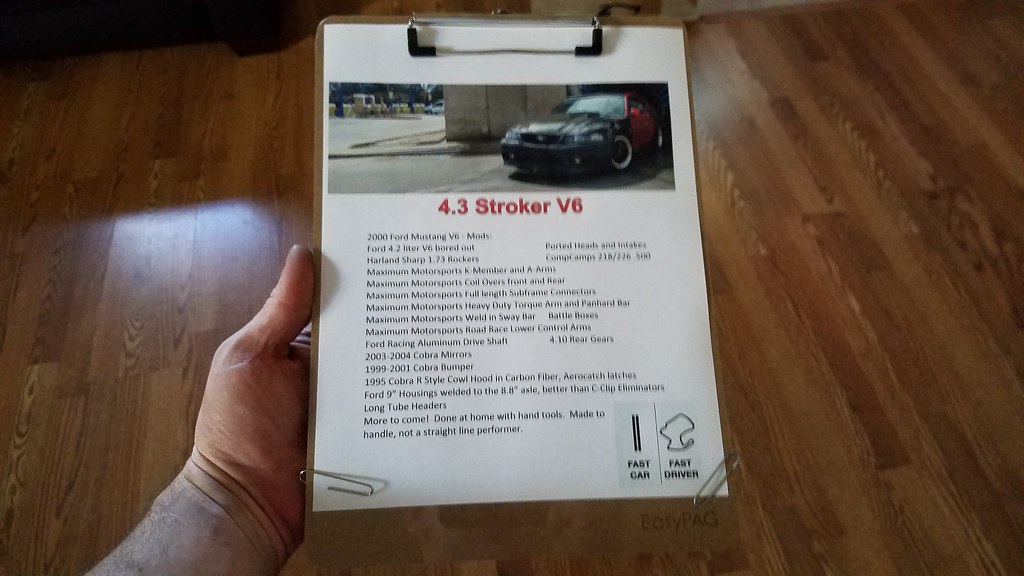
I also made a quick little mod list for the car show. It was not all inclusive but hit on most of the good things. In the future I will obviously make up a nicer one. This was just a quick and dirty.
Thank you all for looking!
Anyhow, finally got around to installing the Maximum Motorsports steering shaft. I will give a quick "walk through" just so people know what they are getting into.
Instructions say to do the job on jack stands, I personally disagree. You want to limit the movement of the tires as much as possible once steering is disengaged. To do so, I drove up on my ramps. Obviously if you have a drive on lift, life would be easier. I hadn't used these bad boys in a while, so it was nice to break them out.
The next step is also pretty important. Stabilize the steering wheel. If you are at a shop you might have one of those fancy tools to do so. If not, I show you how to do it as a normal person with regular garage tools.
Once steering is disengaged, the steering wheel has the ability to spin, if it spins too much, you could sever the wires in the clock spring, which would make for a bad day. Taking 2 minutes to secure the wheel can prevent that.
I do not have pictures of the removal. Instructions are not exactly super useful on this portion either, they basically say, remove the shaft.
There is a bolt on the steering rack that pinches the end of the shaft. Remove this bolt and use your big boy hands to separate the shaft from the rack.
Under the dash, remove the pinch bolt on the steering shaft closest to the firewall. Then remove the shaft from the column. Then you will need to slide the shaft out of the firewall and figure out how to maneuver it out of the car. Luckily, I have tubular front suspension so it glided right out.
Below I have a pic of the old shaft with the new one side by side. Bear in mind I painted the shaft prior to installation. It is bare metal, without paint it will get a lot of surface rust. Essentially, collapse the ends halfway on either side, and tape the ends approximately 1" from the end then paint.
The big problem with this is the rubber.
The next step is to slip off this plastic bushing and the rubber dust boot from the
new shaft. Be very careful, the plastic piece is no longer available. If you
damage it, you will have to hit the junk yard. The plastic sleeve I found
to come off very easily, while the dust boot took a bit more effort, probably
because it was painted over per the instructions provided.
Clean the area on the new shaft where the plastic sleeve will slide onto, as well as the plastic sleeve. I used rubbing alcohol and a paper towel to clean both. I did not want to risk using a more aggressive solvent on the plastic sleeve because of its unavailability.
The next picture shows the area where the plastic sleeve will slip over. As I mentioned earlier, you need to remove the rubber dust boot before you can put the new sleeve on. In this picture that boot is not removed. Do not follow by example. Do as I say! If you do not remove the boot now, you will have a lot of headache on the next step.
The next step is arguably the most time consuming and messiest part of the install. You will need to cover the shaft where the plastic sleeve sits in black RTV silicone. This sleeve fits into a bushing in the firewall, by sealing this area you are preventing noise and fumes from entering the cabin.
The area of focus is the welded bead and approximately 2 inches up the shaft. See the picture for an example. I used an entire small tube of silicone. I find it easier to apply more then remove as necessary to get a good seal. The instructions say to focus more on the flat areas of the shaft because the rounded edges seal quite well with the sleeve.
Once you have applied the silicone, go ahead and seat the sleeve. Then proceed by smoothing the silicone out, making sure to push into the sleeve a bit to seal up any air holes. Make sure to do so at both ends. Do your best to fill all the gaps with silicone.
If you manage to make it look pretty, my hat is off to you. Mine came out ugly as sin, but I know it is sealed!
Then you just let the shaft sit for about an hour before you start handling it. The install is fairly simple. Remove the new pinch bolt from the steering rack side of the shaft. Prior to attempting the install, I recommend collapsing and extending both ends a few times, just in case they got a little bound up from sitting for a while. This will be easier while outside of the car than underneath.
Go ahead and install the shaft onto the steering rack and slide it into position. Make sure the shaft is inserted into the firewall. If the shaft is not in the proper orientation or if it is not fully slid on, the pinch bolt cannot be installed.
Once the shaft is fully seated, and you are sure the other end is through the firewall, go ahead and install the new pinch bolt and tighten it to 23 foot pounds.
Relocate yourself to under the dash and find the shaft. Extend it to reinstall it to the steering column. Once you seat it in the original location, go ahead and reinstall the original bolt and tighten it to 23 foot pounds.
That’s it!
Now, properly dispose of the old junk:
Of course undo however you held the steering wheel, and then get the car safely on the ground. I noticed an immediate difference in steering response and had a lot less play in the wheel. This is a huge improvement over the stock unit and I highly recommend it.
If you are like me, and you have some other little projects to take care of while the silicone dries, I would do it. While I was waiting I went ahead and reinstalled my back seat, as well as my trunk mat because I had a car show. Since the car will be stored indoors from now on, I am not too worried about the seats getting messed up. Anyhow, pics of that stuff!
I also made a quick little mod list for the car show. It was not all inclusive but hit on most of the good things. In the future I will obviously make up a nicer one. This was just a quick and dirty.
Thank you all for looking!
OP
OP
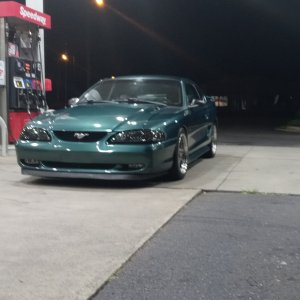
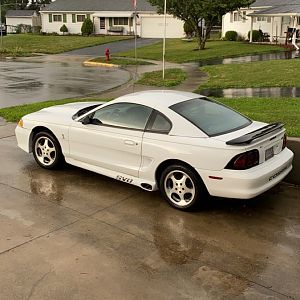
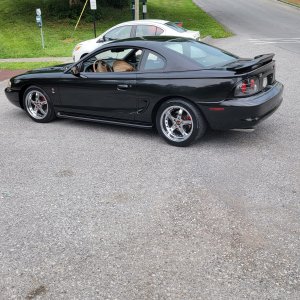
Quick shot from someone who can make even this ugly turd look good!
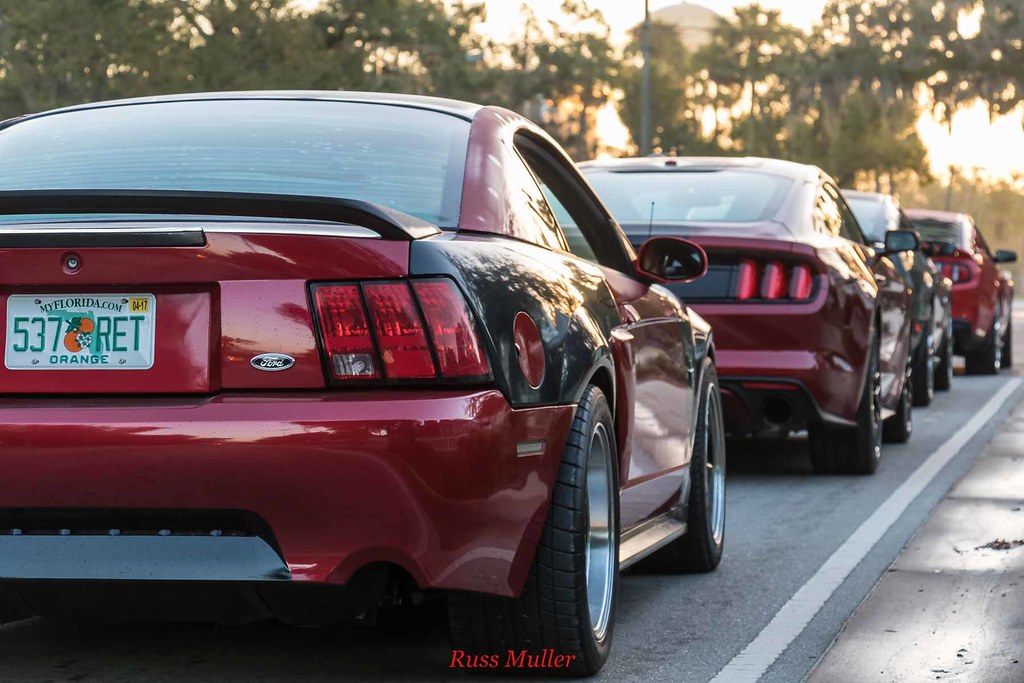
More to come soon!
More to come soon!
Tally_4.6
Well-Known Member
Take that thing to autoX on sunday.
OP
OP
I don't have time to do that just yet, and I want to finish a few more odds and ends in the coming weeks, then do some autox
Tally_4.6
Well-Known Member
Fine, i'll cover for you.
Oh yeah, clean trash can btw.
Oh yeah, clean trash can btw.
OP
OP
Fine, i'll cover for you.
Oh yeah, clean trash can btw.
I was lucky, it was trash day ;p
And thank you for covering for me. We will go together once I get some stuff sorted out lol. And I have all these cool mods and will probably get slaughtered still.
Tally_4.6
Well-Known Member
Riiiiiiiiiight
OP
OP
Alright, so a little update with more to follow:
Finally got some time, and some help from my neighbor and my girly. Neighbor let me borrow some room in his garage.
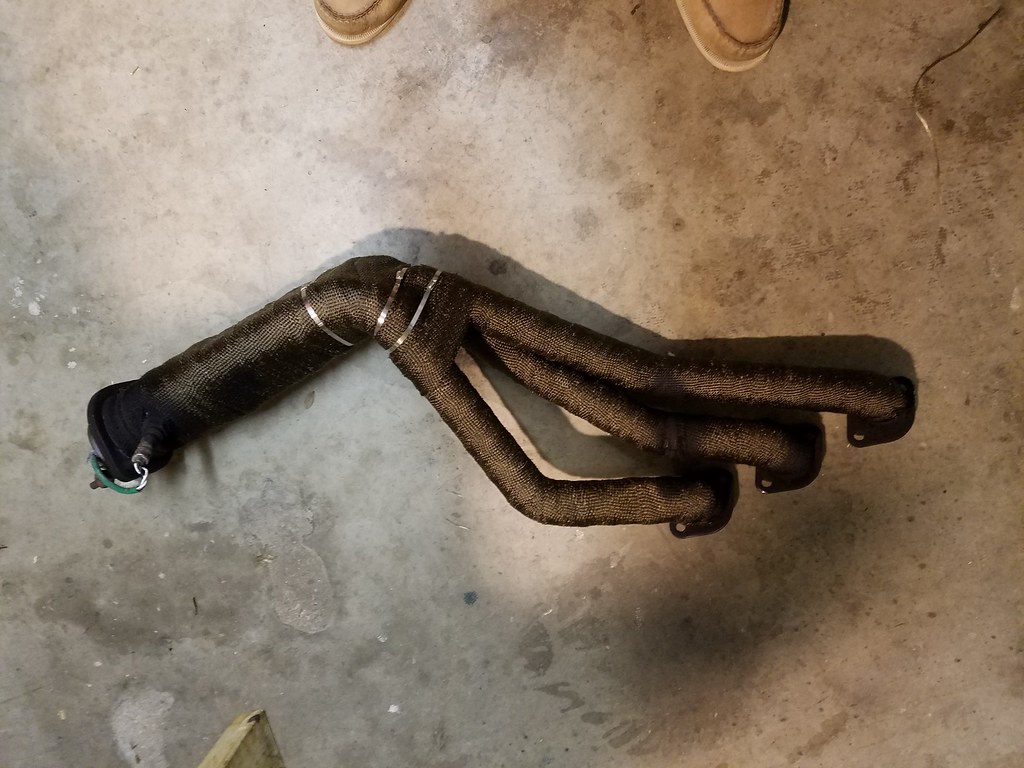
Basically we went ahead and pulled the headers to wrap them, since I've been wanting to do that for a while.
But, to get the driver's side header off, it was easier with all the brake stuff out of the way. So, of course, may as well replace the booster and master cylinder. They're 17 years old, so it's not a bad idea. With all this stuff out of the way, we put some di-electric grease on all of plug wires to help conduct. I have been experiencing a bit of an intermittent miss, and I believe it's spark related. So, I was hoping this would help.
I painted the headers first, more for rust prevention than anything, not to mention I had white header paint I got a bargain on that I needed to get rid of.
With all the brake stuff out, we installed the Willwood proportioning valve since I have the larger rear brakes now. I would never have been able to make that install look so smooth without my neighbors help.
I would like to point out for any V6 or 5.0 guys who are trying to do the brake booster without pulling the motor, do yourself a favor, grab a drill, and wallow the holes out just a bit. We fought with the booster for more than an hour. Spent 17 seconds wallowing the holes out, and had the booster in about a minute later. It's the little things.
Got everything back together and I heard a tick. I was a bit furious because I bought some high dollar Percy's header gaskets, and used a sealant as recommended by my usual exhaust guy, but I thought there was a tick. Come to find, the tick was just the dip stick tube not being totally seated. Phew!
So, first impressions of the wrap. Very neat. I cannot tell a heat difference yet because I have not driven the car and felt it yet. It did take away a lot of the "metallic" sort of noise in the exhaust, and it overall sounds cleaner. Sort of hard to explain.
On the to-do list (which will hopefully be taken car of tomorrow evening) :
Stainless front brake lines
Bleed the brakes
Front spindles, bump steer kit, change springs, bend frame rail out of the way
Look into making the e-brake functional again
Possibly do drive shaft safety loop
After that I need to go get it aligned, then drop it off with the exhaust guy to see if he can work some magic to get pipes out the back of the car again. Then just enjoy it for a bit and do some autox before parking it. It should not sit so long anymore!
Also, starting to look into wheels. That will take some time though.
Anyhow, here are some pics. More to follow:
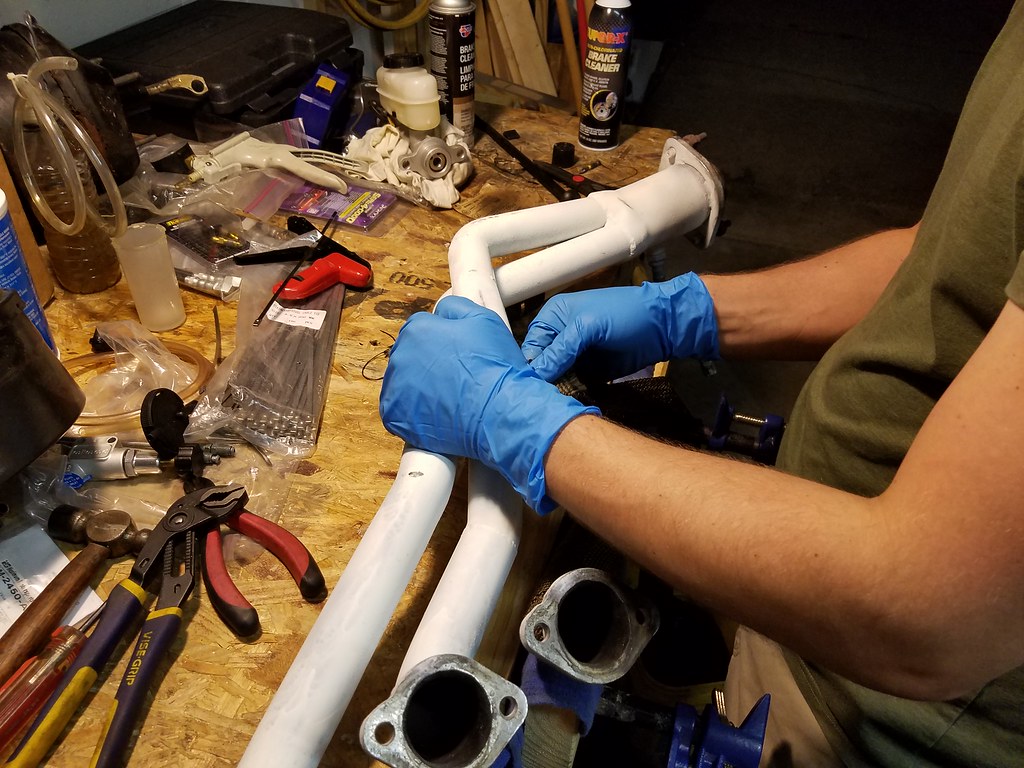
Bare header

Doing some measuring
One side all taken care of

Painted over the clamps and exposed metal areas with some black header paint
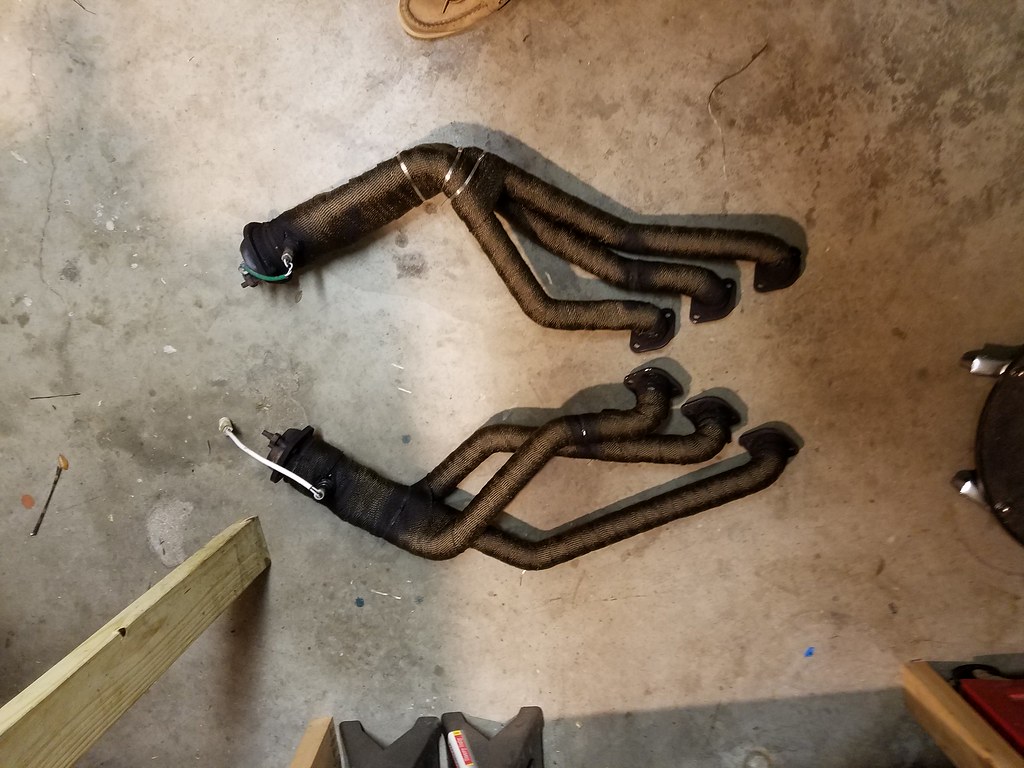
Friends all bundled up!
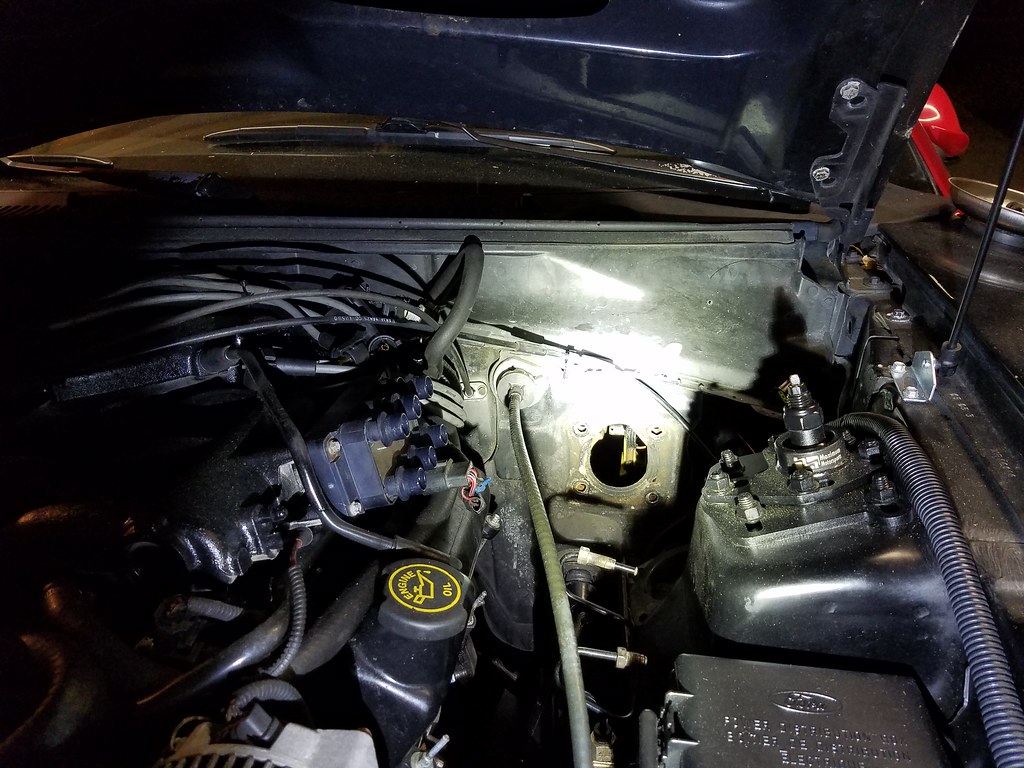
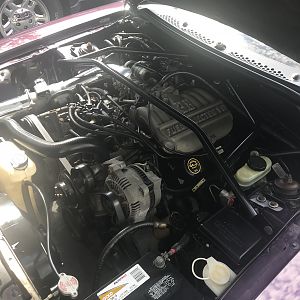
So much more room without that pesky brake stuff!

The Percy's header gasket

We had to totally remove the factory distribution block to get to the stock proportioning valve (a spring and pin with a nut) because it was in there "real good." Was good to flush this piece out with brake parts cleaner. Funny, I never use brake parts cleaner on brake parts")
Anyhow, thanks for reading. Should have more tomorrow!
Finally got some time, and some help from my neighbor and my girly. Neighbor let me borrow some room in his garage.
Basically we went ahead and pulled the headers to wrap them, since I've been wanting to do that for a while.
But, to get the driver's side header off, it was easier with all the brake stuff out of the way. So, of course, may as well replace the booster and master cylinder. They're 17 years old, so it's not a bad idea. With all this stuff out of the way, we put some di-electric grease on all of plug wires to help conduct. I have been experiencing a bit of an intermittent miss, and I believe it's spark related. So, I was hoping this would help.
I painted the headers first, more for rust prevention than anything, not to mention I had white header paint I got a bargain on that I needed to get rid of.
With all the brake stuff out, we installed the Willwood proportioning valve since I have the larger rear brakes now. I would never have been able to make that install look so smooth without my neighbors help.
I would like to point out for any V6 or 5.0 guys who are trying to do the brake booster without pulling the motor, do yourself a favor, grab a drill, and wallow the holes out just a bit. We fought with the booster for more than an hour. Spent 17 seconds wallowing the holes out, and had the booster in about a minute later. It's the little things.
Got everything back together and I heard a tick. I was a bit furious because I bought some high dollar Percy's header gaskets, and used a sealant as recommended by my usual exhaust guy, but I thought there was a tick. Come to find, the tick was just the dip stick tube not being totally seated. Phew!
So, first impressions of the wrap. Very neat. I cannot tell a heat difference yet because I have not driven the car and felt it yet. It did take away a lot of the "metallic" sort of noise in the exhaust, and it overall sounds cleaner. Sort of hard to explain.
On the to-do list (which will hopefully be taken car of tomorrow evening) :
Stainless front brake lines
Bleed the brakes
Front spindles, bump steer kit, change springs, bend frame rail out of the way
Look into making the e-brake functional again
Possibly do drive shaft safety loop
After that I need to go get it aligned, then drop it off with the exhaust guy to see if he can work some magic to get pipes out the back of the car again. Then just enjoy it for a bit and do some autox before parking it. It should not sit so long anymore!
Also, starting to look into wheels. That will take some time though.
Anyhow, here are some pics. More to follow:
Bare header
Doing some measuring
One side all taken care of
Painted over the clamps and exposed metal areas with some black header paint
Friends all bundled up!
So much more room without that pesky brake stuff!
The Percy's header gasket
We had to totally remove the factory distribution block to get to the stock proportioning valve (a spring and pin with a nut) because it was in there "real good." Was good to flush this piece out with brake parts cleaner. Funny, I never use brake parts cleaner on brake parts
Anyhow, thanks for reading. Should have more tomorrow!
Tally_4.6
Well-Known Member
AutoX in daytona may 5-6th.
OP
OP
AutoX in daytona may 5-6th.
If the exhaust and everything is squared away I might actually be able to do that!
97stanger
Legend
- Joined
- Mar 22, 2006
- Messages
- 5,880
- Reaction score
- 100
Looks great! Awesome work man
OP
OP
Looks great! Awesome work man
*Finally* some needed updates! Nice job!
Thank you both! Two huge inspirations of mine!
Quick update from tonight:

Lifted up, let the magic begin

So I've been hearing this awful pinging and ponging ever since getting the coil overs on this car. After speaking with Maximum Motorsports about this, they said there was a special tool that they sell to bend a protruding lip on the frame rail out of the way. I guess when my buddy helped install the K-member and such, he never read the instructions about doing that, so I've been dealing with the noise for a great while.
That noise is the spring hitting that piece. And causing the rust you see in this picture. I normally would have tried to sell this set of springs but I tossed them. I don't want any chance of someone getting potentially hurt because this spring may have extra abuse.

As you can tell, my neighbor is a carpenter for fun.
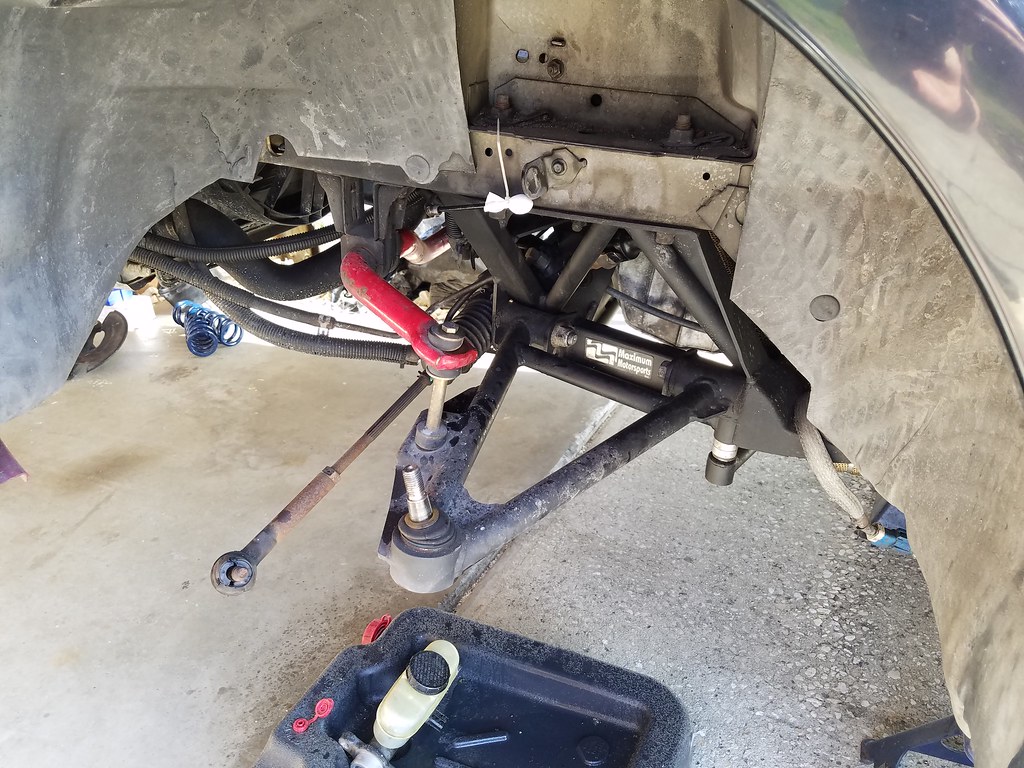
Everything all taken out. About the protruding frame rail: we found the Maximum Motorsports tool to be a little cumbersome and mostly ineffective. I believe this may be because the spring had been rubbing there so much for so long. We went ahead and used and angle grinder, cut off wheel and hammer to massage it out of the way. No pics of these steps though because we were busy. Painted it with rust preventative satin after all of that. So far, seems to have totally done the trick
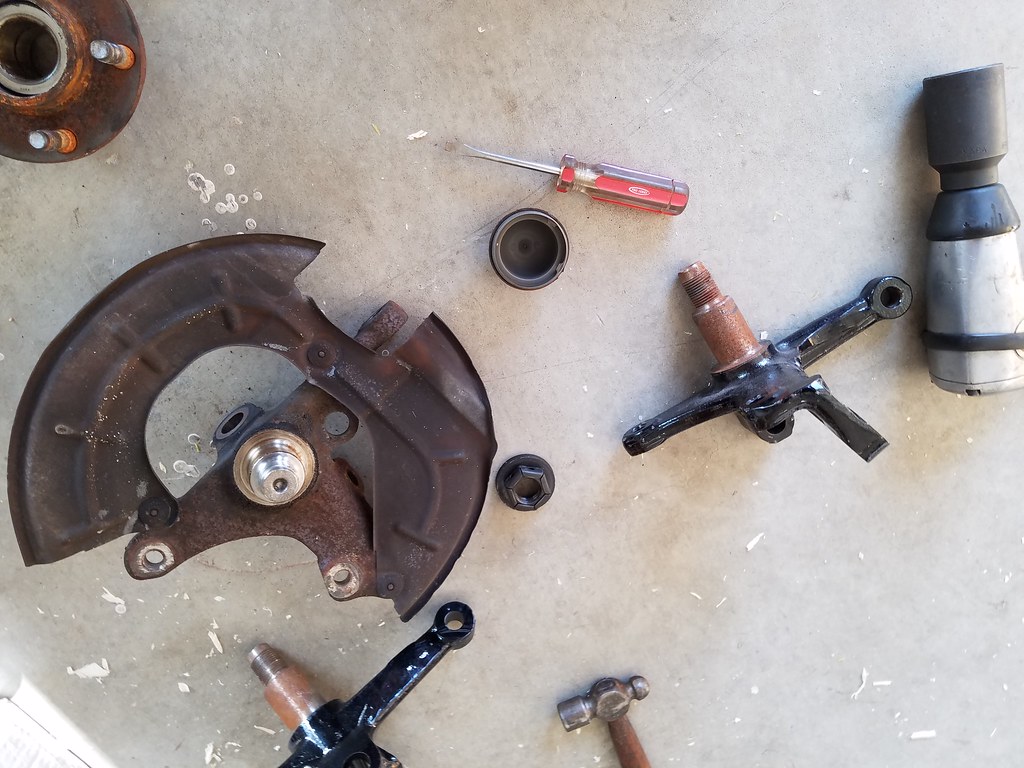
Old spindle (dust shields) next to my nice new powder coated ones. Knocked off all of that surface rust before reassembling. This part of the project has been many years in the making. My powder coater had these on his shelf for a long time waiting for me to pick them up!

All back together. You can see the heim joint tie rod ends. I will hopefully be getting it aligned on Sunday, then figuring out how to drop it off to the exhaust guy sometime during the week. I am hoping the alignment shop knows how to do bumpsteer!
I am half debating taking the old man route on this and having a shop take a look at it and diagnose and maybe fix some of the leaks. It would be nice to not be so leaky all the time!
I will get some pics of the brake proportioning valve all installed as soon as I can.
As of now, car feels very good. I think the new booster aids a great deal with vacuum, and it seems to run much better. The brakes feel better than they have in ages, but a brand new master and stainless lines all around surely helped with that!
Anyhow, as usual, still more to come! Thanks
EDIT:
Also, thanks to [MENTION=9209]ReplicaR[/MENTION] I have decided on going with 17x10 Enkei RPF1s. I will probably start out with some less than stellar tires, and then work my way up to some R-Compounds. But first step is getting the wheels. Thanks again for the advice!