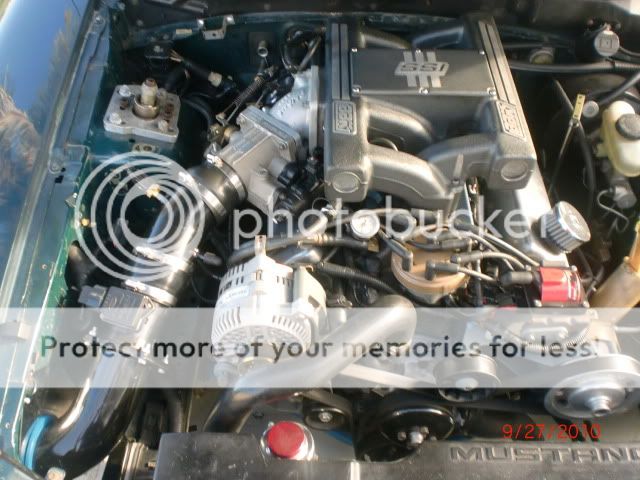
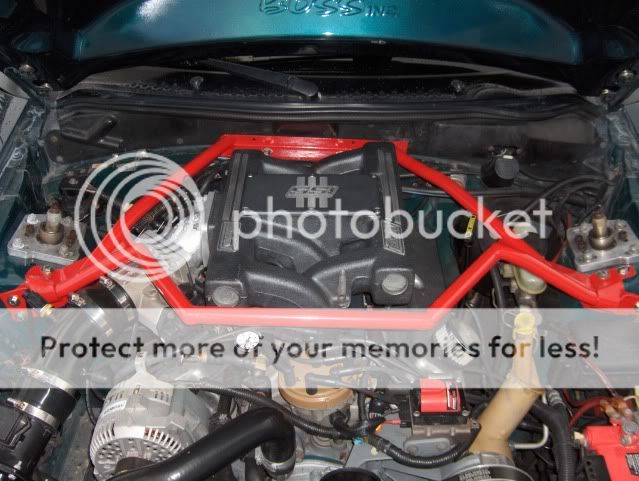
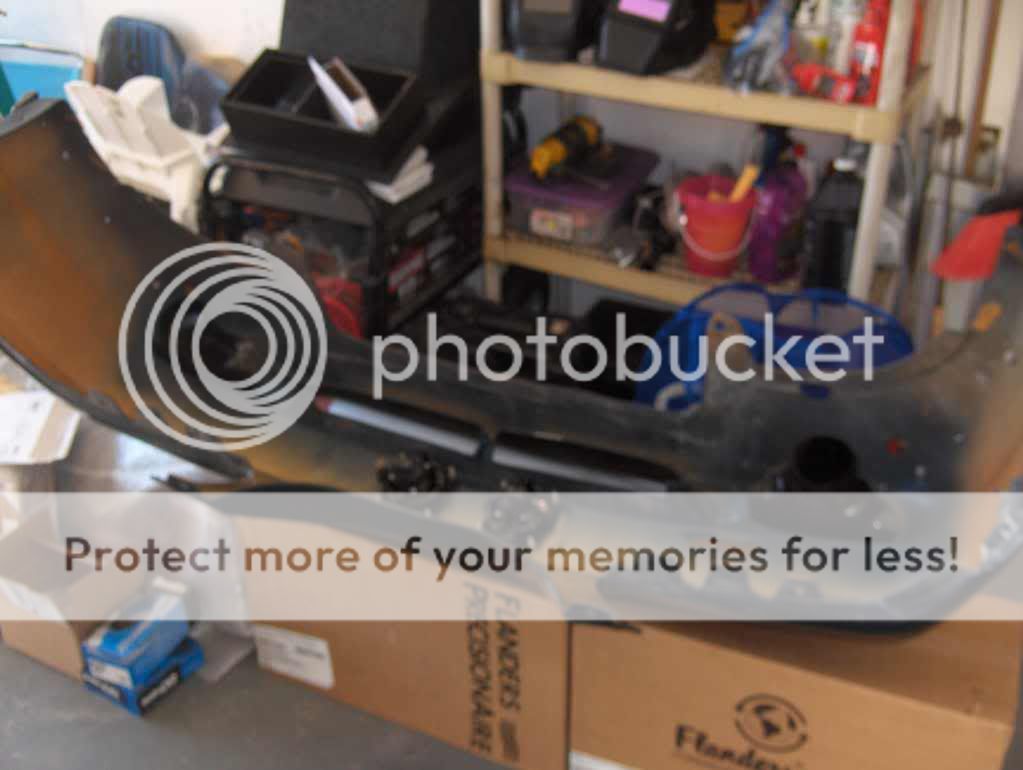
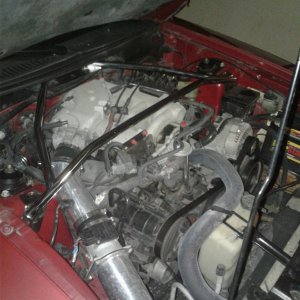
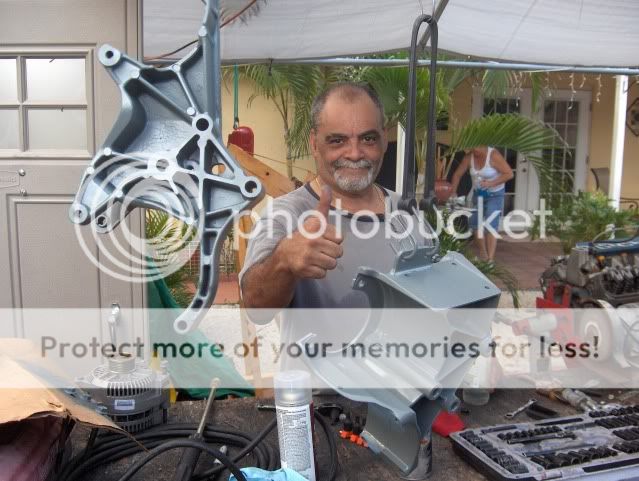
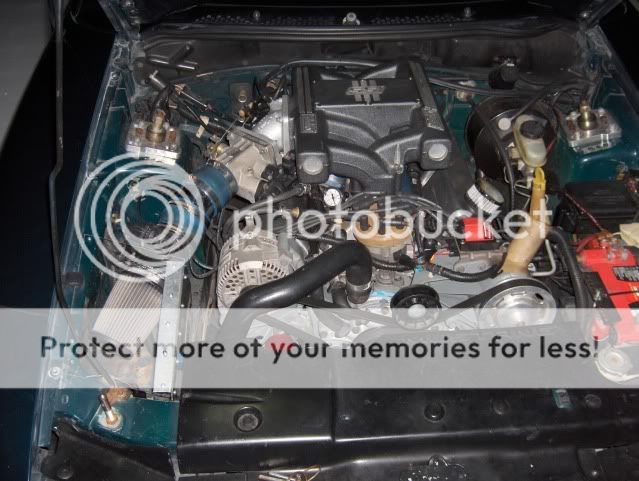
Today we finished up the engine. The reconditioned injectors got here today also so that was a plus. Before I got to dealing with the fuel rails Manny convinced me to clean and paint the brackets that hold all the accessories along with cleaning and if needed, painting some of the pulleys. I don't have before pics of how dirty the brackets were but take my word for it, they lost like a half pound of grit and grim from almost 20 years of use. Both main brackets were washed and painted along with any other part on the engine. After everything was dry we installed it on the block and then we dealt with the pain in the ass BBK fuel rails. Tricky little things and they have to line up perfect for them to fit rite. Tomorrow we drop it back into the bay and start connecting everything. If all goes well we plan on fire up Sat.
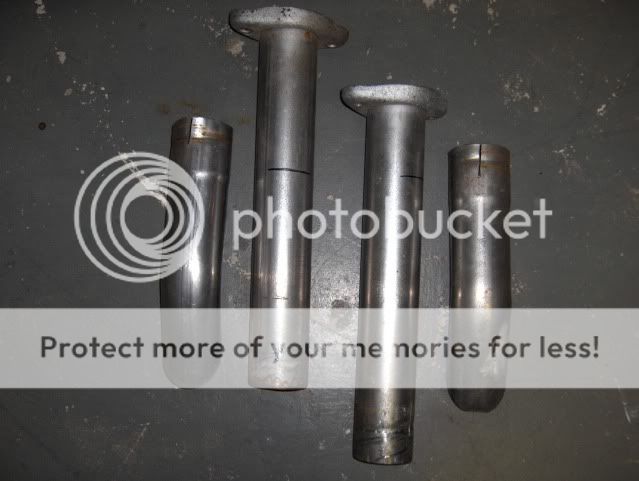
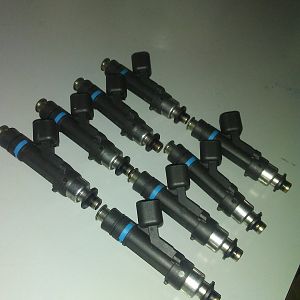
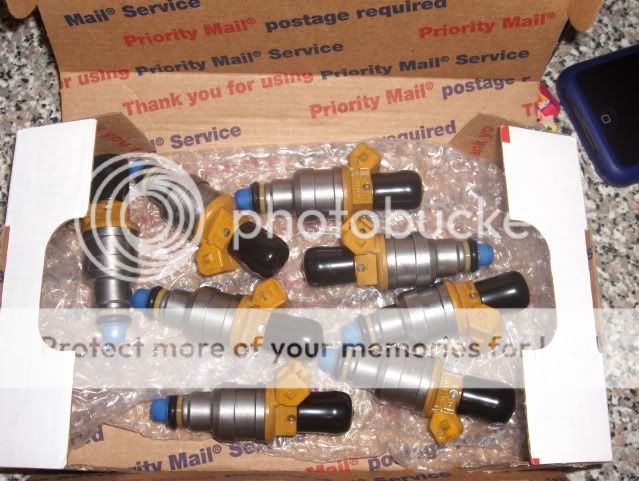
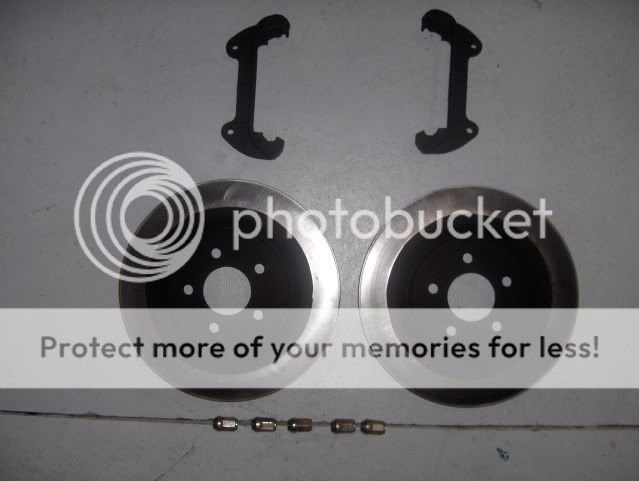
Reconditioned 19# injectors
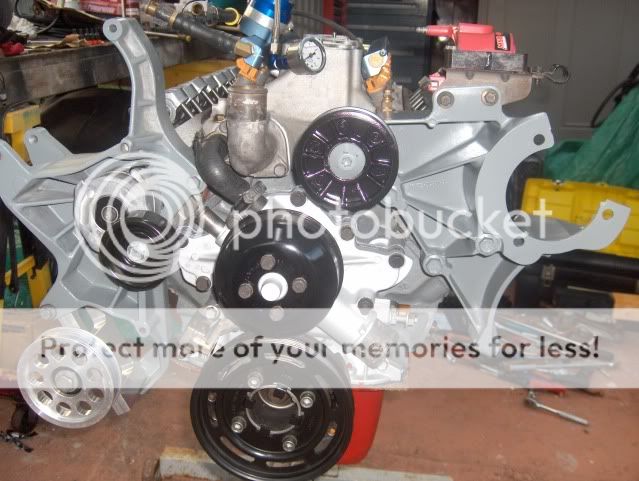
Crazy Old Cuban=Manny posing in front of completed brackets
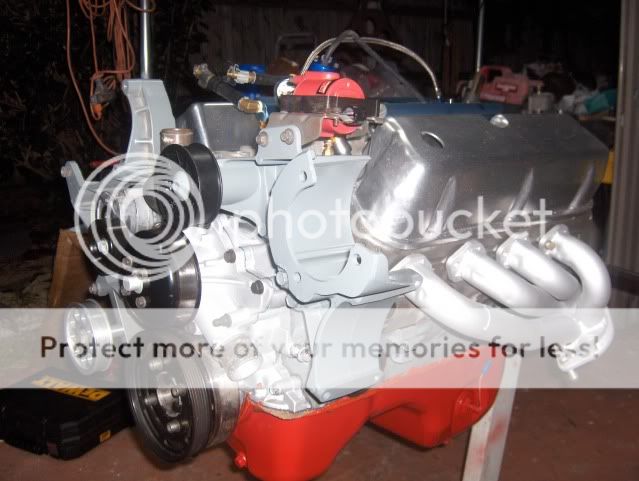
Belt drive minus Alt and P/S
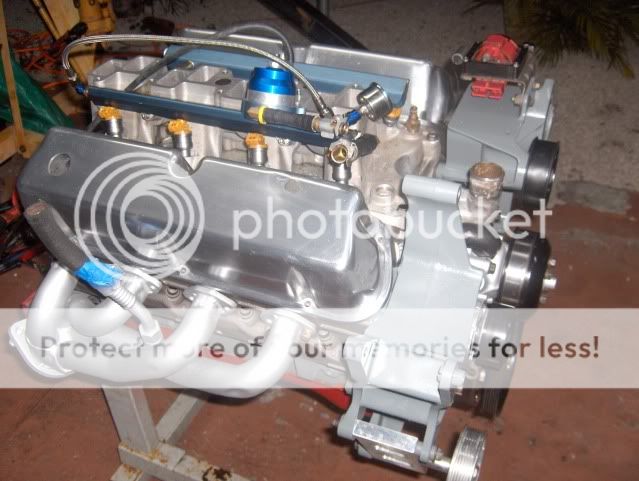
Mock up of valve covers and headers
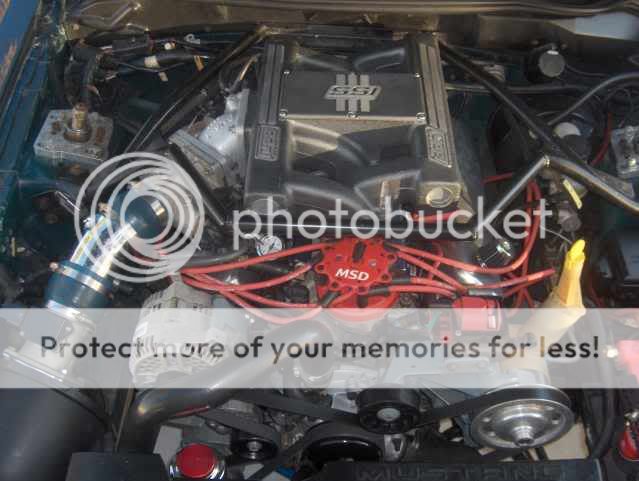
It looks purdy. I didn't care about painting everything but I'm glad I did cause it came out real nice and more importantly to me, clean. __________________
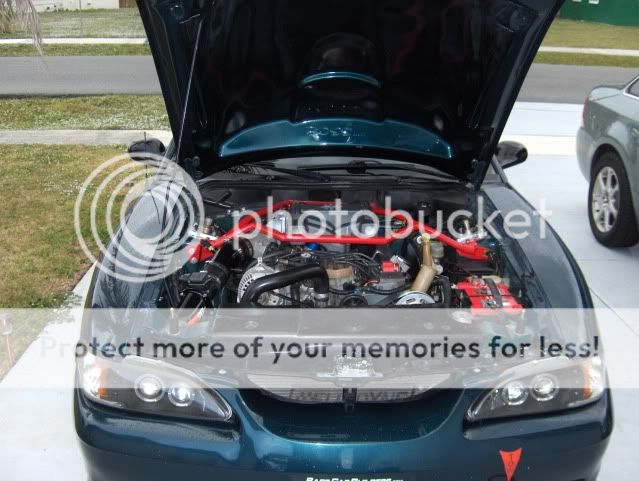
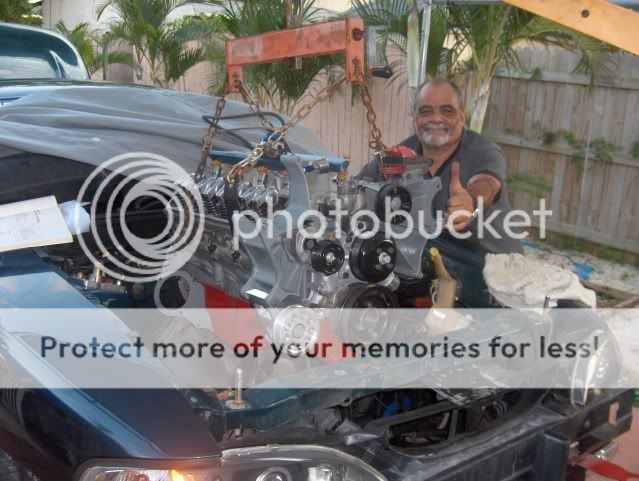
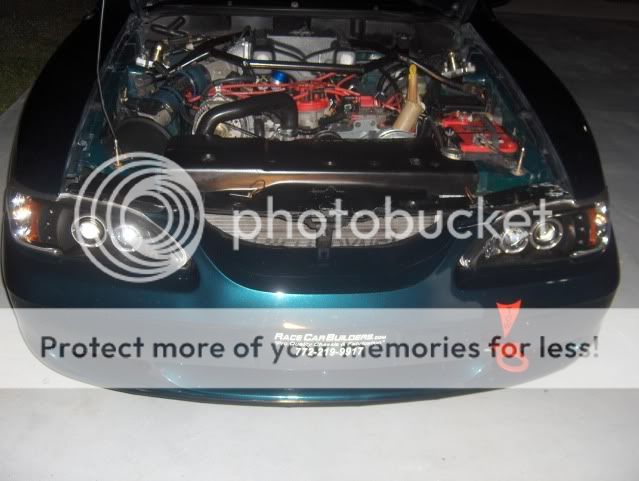
Gettin real close now. Today we hoisted the engine off the stand and into the bay. We got all the hard crap out of the way. The wiring was all routed and connected and the exhaust was bolted all up. Engine is in place and bolted down. All that's left is the radiator with hoses, fill with oil and fluids, prime oil pump, check for leaks, install distributor and upper intake with all connections and fire it up. Fingers crossed.
On a side note, god i hate my headers with the individual flanges. Their a ***** to put on.
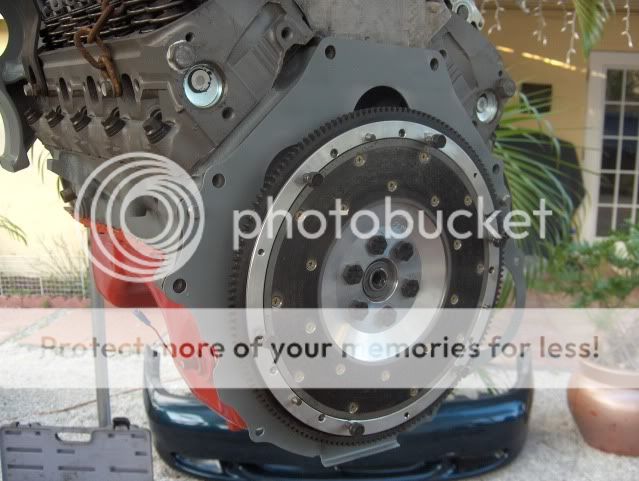
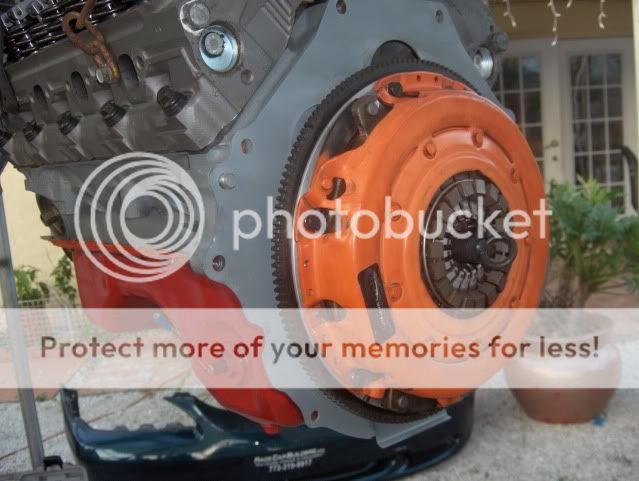
Here's a few pics of the motor on the hoist and getting the flywheel and clutch put on. And of course Manny posing for pics as engine was placed in it's home.
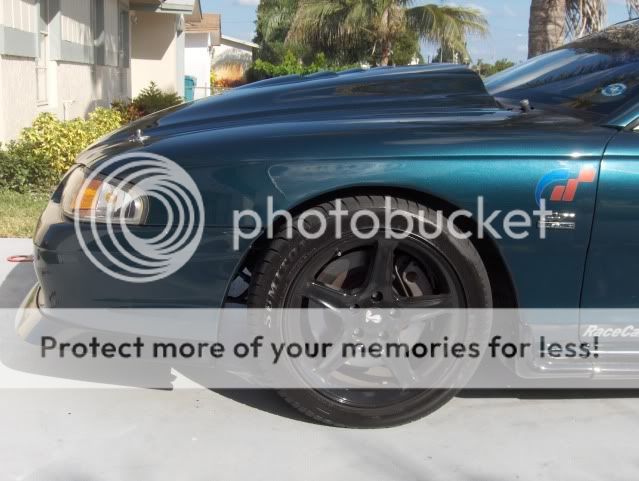
Thanks for the kind word guys. Did a little tweaking on some things tonight. I was board so one of the things I decided to do was remove my rusty looking rotors and caliper brackets, sand them down and paint with high heat flat black along with the backside of the rims just for the hell of it.
Those cheap rims I have didn't come with allot of paint on the back side from the factory and has worn off leaving a faded black look.
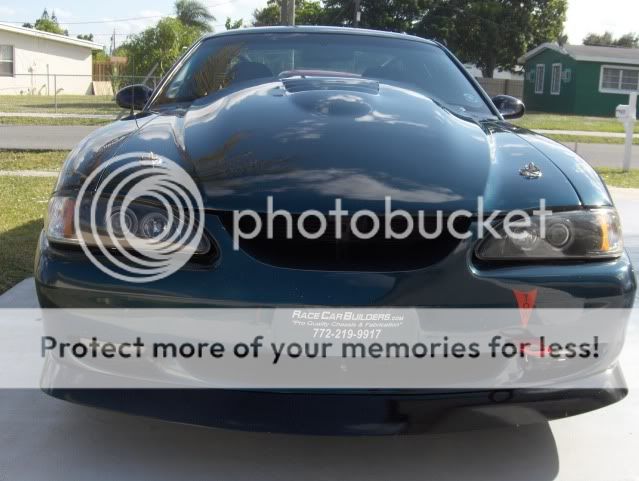
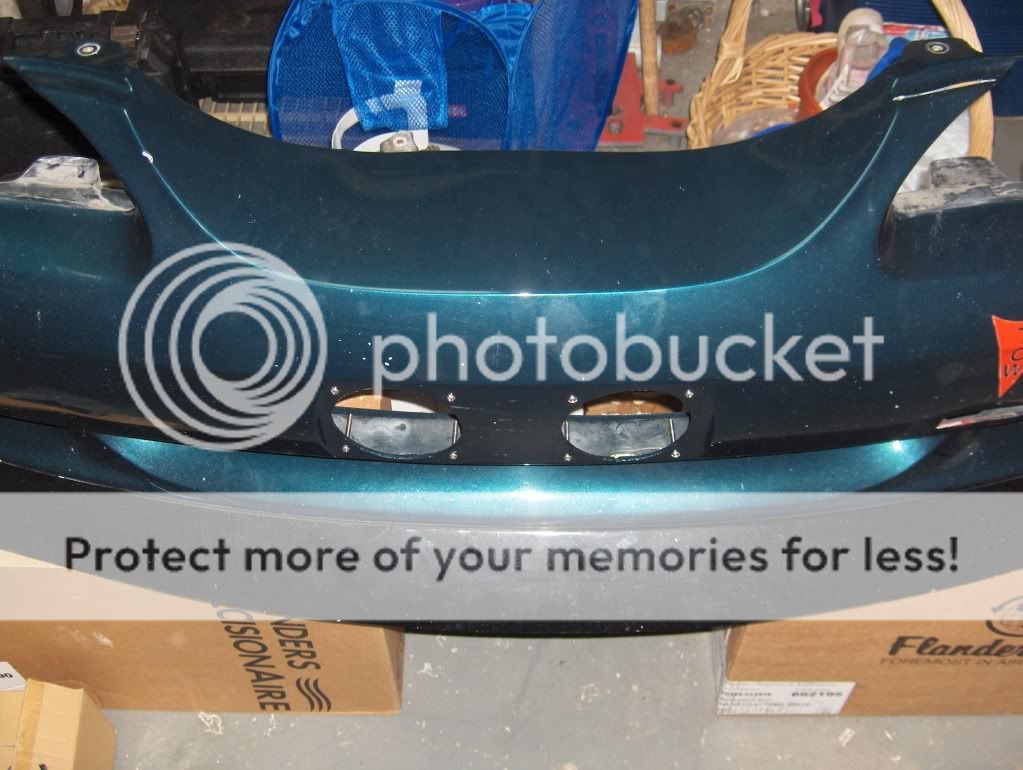
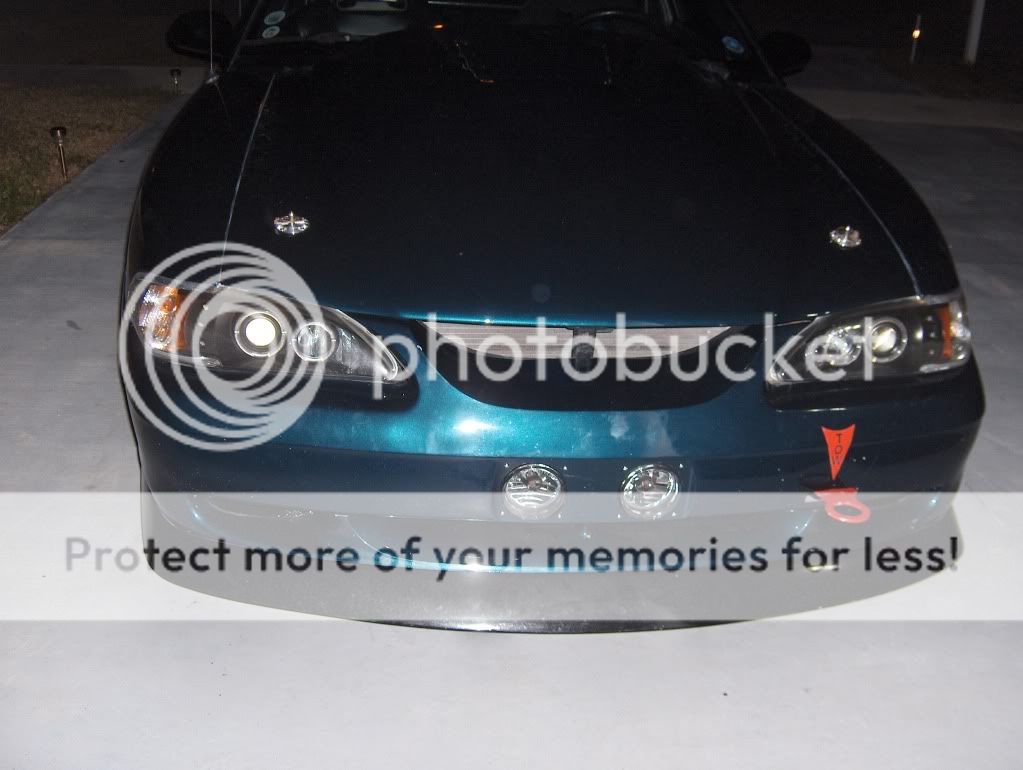
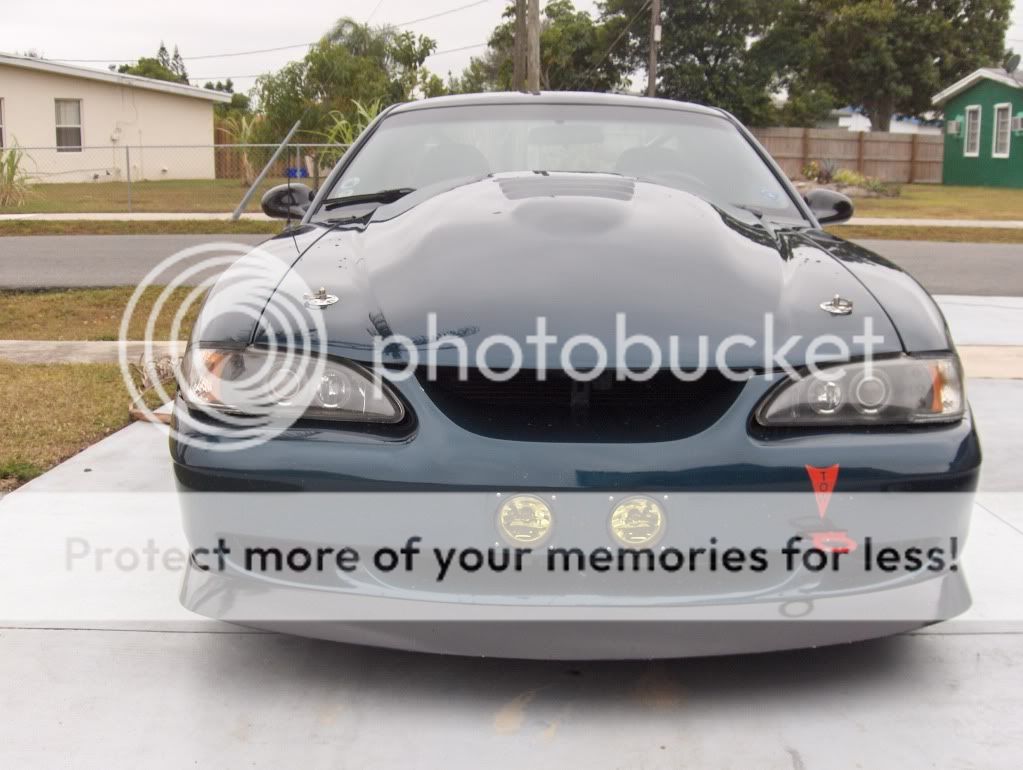
Also finished up the front bumper by customizing it a little. Had to grind off some more of where the tow hook sticks out to allow more room for it. While I had the bumper off I grinded off those two thick tabs that lock themselves in place under the headlights after you install the bumper, making it almost impossible for one person to remove it later, and those two rivets that hold the top had to be drilled out to remove the bumper so I installed these little things that allow me to now use a bolt to secure the top of the bumper. Why, you ask. My car is low in the front. Every time I've had to have my car towed, the driver never brings planks, even a few times when I've asked for it, nothing. They end up tying to something not meant to hold the weight of the car and when the cable starts to pull it rises up and starts to destroy my chin spoiler. This way if and when I'll need a tow, I can quickly unbolt the bumper for loading and reinstall once the car is in place. I've seen lots of guys at the track do this because of how low some of those cars are. Oh, and my little TOW arrow stickers came in too.
Ahhh, looks professional or what.
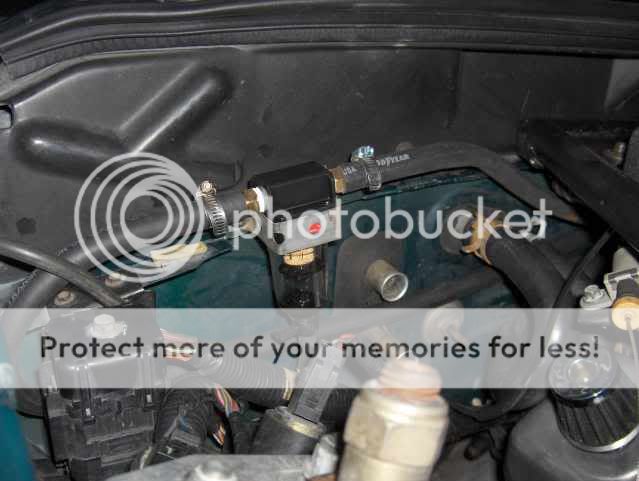
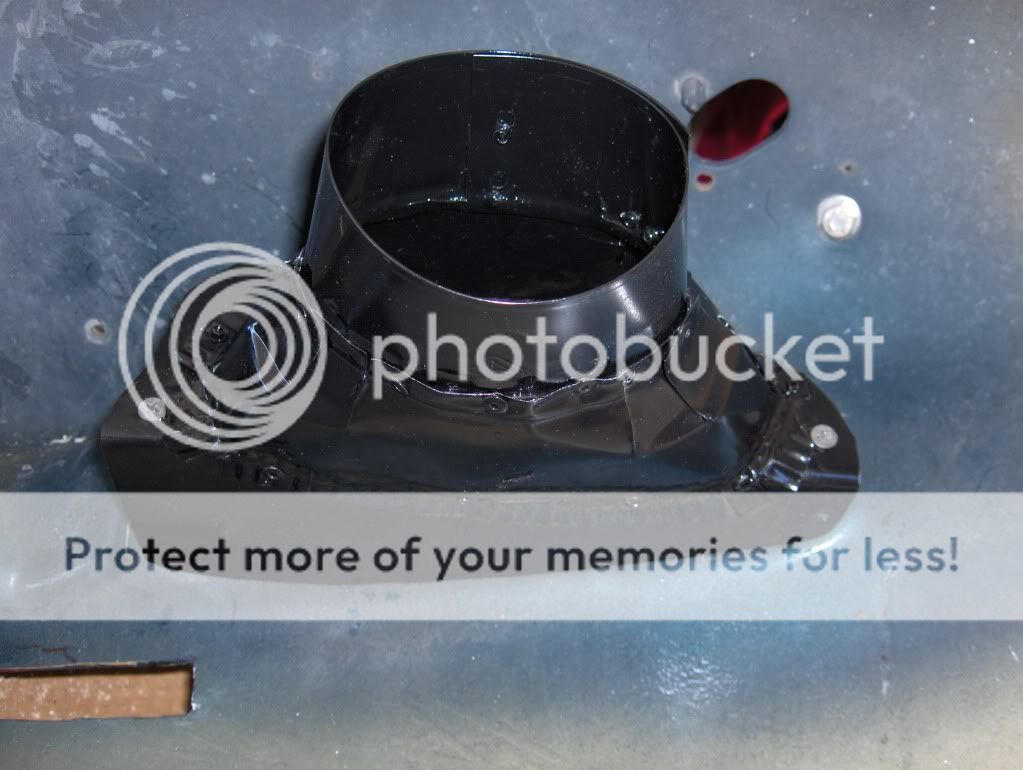
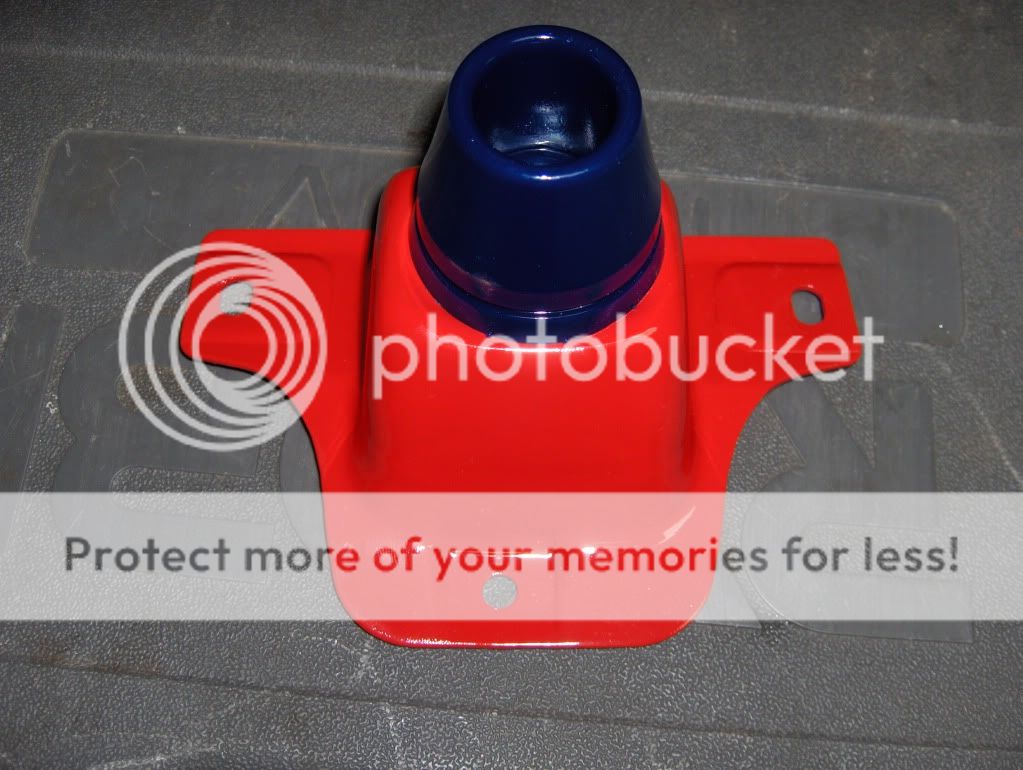
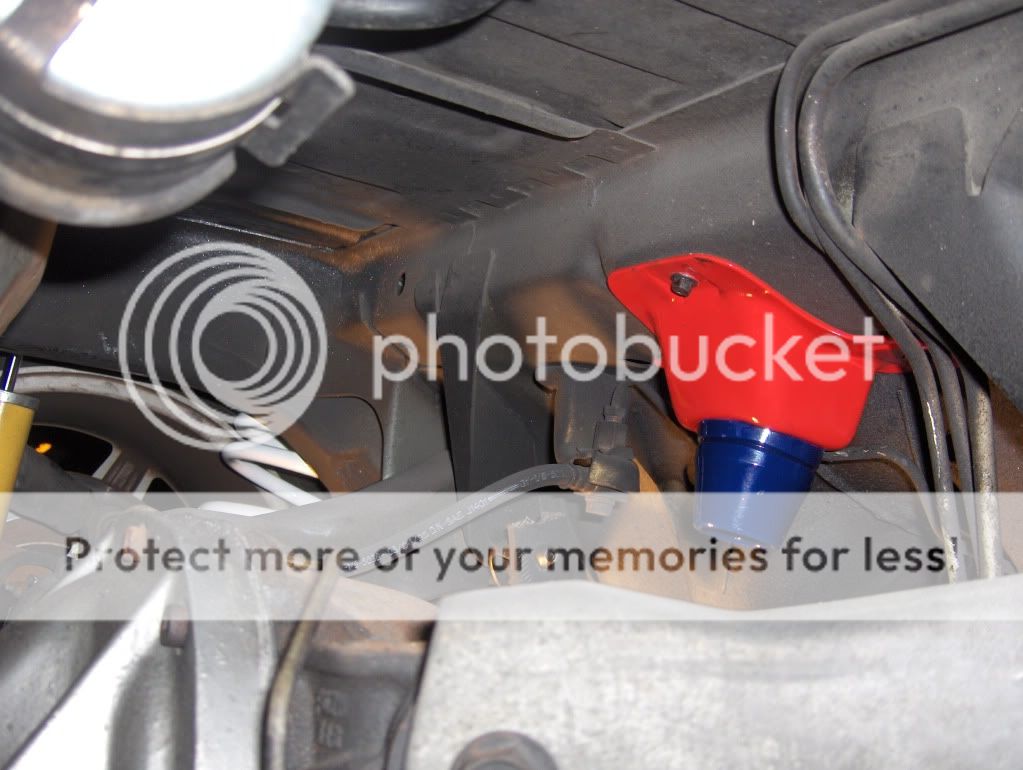
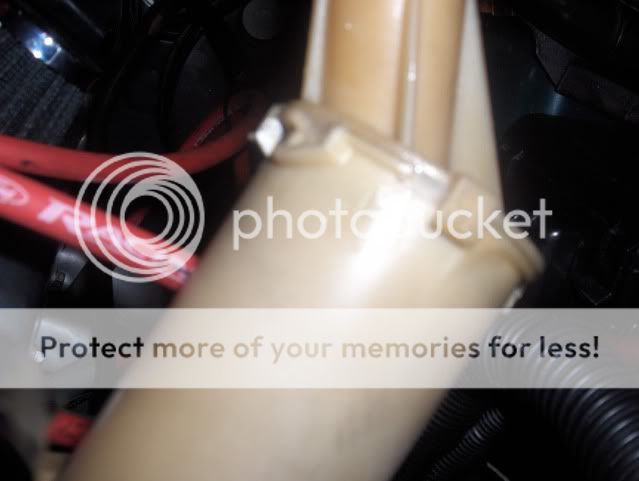
Last thing I did was address the spilling over issue of my power steering fluid. When cornering hard for long periods of time my PS fluid spills out of the pump on to the headers making allot of smoke and getting me flagged of the track. I bought this trick PS cap that was designed for turbo and supercharges applications that supposed to prevent this. Well for some reason when installed correctly it kinda still stays at an angle, defeating the whole purpose of it so I modified it to point straight up towards the hood. I had to take a file and grind away two new looking tabs on the top of the PS pump so that now when I installed the trick cap it would point upward and in turn, prevent the fluid from spilling out under heavy cornering. Once everything fit just rite I applied some silicon to the bottom of the cap so it would create a water tight seal since the new cap has it's own cap further up with a dipstick to monitor fluid levels. Here's the base of it with silicone.
Here it is now facing uprite.
It's hard to see but I did drill a small breather hole at the top.
Now all I need to do is re insure the car and get my tag back from the DMV so I can put some miles on it.
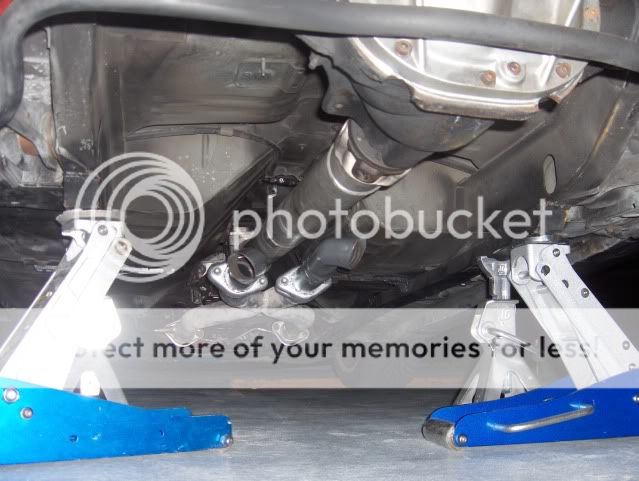
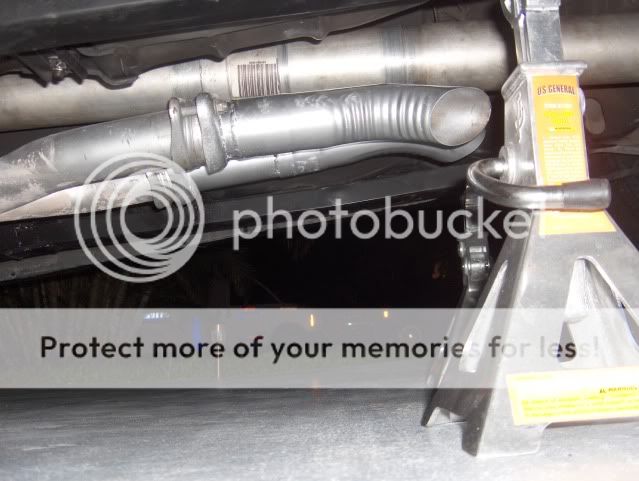
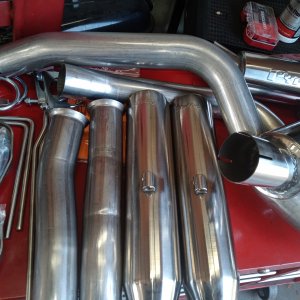
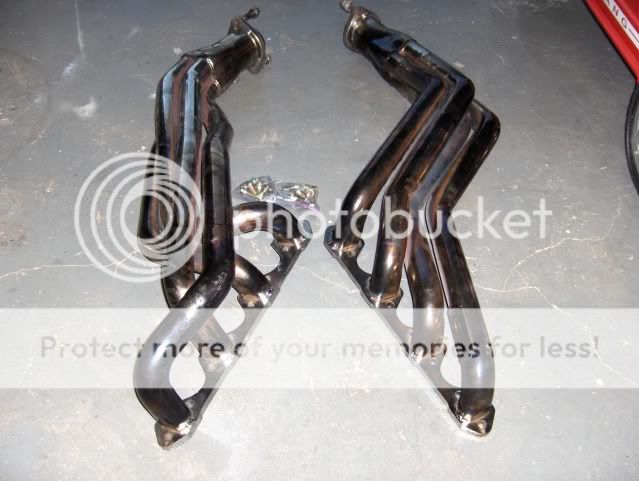
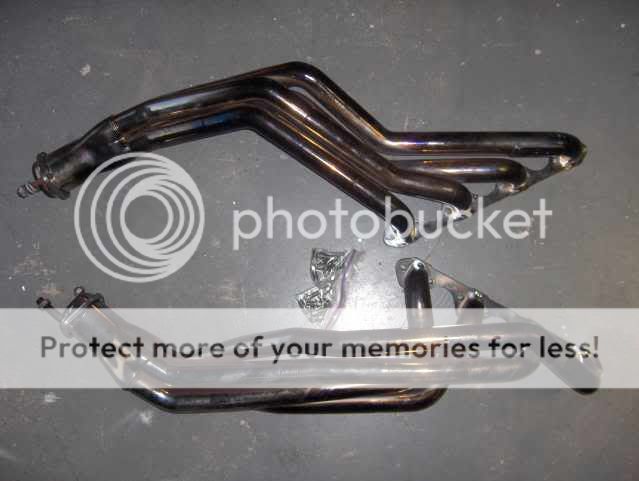
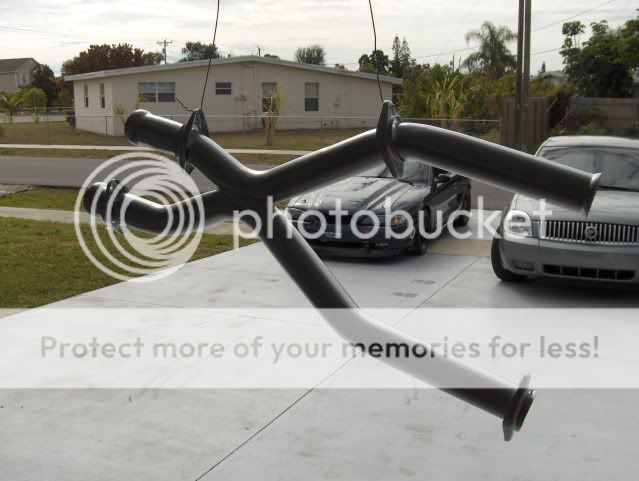
I finally got a set of long tube headers for my birthday from the family. Their BBK chrome units. I also bought a new X pipe from Ebay real cheap. It's a ***** installing them in a driveway but their in. Thanks to my stepfather Crazy Old Cuban for all the help the whole day in getting these in. You have to raise up the car as high as the jacks go and then unbolt the motor and jack it up for more room. On the passenger side you also have to remove the starter to make more room. I could have sworn that the only difference between long tubes in a fox and in a 94-95 was only that the Sn-95 5.0's have a tube that connects from the pass side header to the EGR. So since I eliminated the EGR when I dropped in the new engine I figured these long tubes from a fox would fit fine, NOOOO. I had a hugh issue with the driver side header hitting the clutch fork. Took a little "m$$$$ging" but all good now. The X pipe was an even bigger headache. When we mock fitted it one side butted up fine to the header but the other side was 3" too short and at the wrong angle. Thank god for the little tools I have like a sawzal, heat torch and welder cause I had to cut 3" off one side and re weld the end back on and make relief cuts to properly bend the tube to allow it to sit perfect against the header for a leak free seal. We probably test fitted and removed the X pipe 8 times before it was perfect. Last night I fired it up and it now has more of a deeper tone but not like Manny's car that has the same long tubes and H pipe but with Flow's. Since my car has race muffler's it has a higher pitch but it sounds better then before. NOW, when it's at wot it's another story. Car sounds real good.
First the bad.
About two weeks ago I decided to get the car tuned. Not looking for all the power I could get of the car or anything. I'm more concerned about the car running smooth and cool. If I could get that and some more ponies then hell yea. I took the car to Mustang Specialties for the tune. After speaking with John we decided that a chip was not necessary for me car. Just some fine tuning to optimize performance. During the first run on the dyno they noticed the headers glowing red. At first you'd think it's running lean but being the cars hooked up to the computer they could see the fuel was fine, something else is going on. These guys are good and had a good idea of what could be causing this issue. The conversation turns to timing and what timing set did I use and how did I install it. I replied that I document everything that gets done to this car so it's probably in a pic on my thread. We go online and I find my build pics and there it was. The Comps Cam timing set I installed has 3 different ways to install it, 0 for center, R for retard, and A for advance. Well the A looks more like a pointer then an A so of coarse I installed the cam in the advanced position and they could see it in the pic. Now being that this car is my DD but I do use for road racing and that's what I built it for I needed this problem fixed. Sure I could drive it normally around town but look what happened after a 20 second hit on the dyno. Imagine if I were to take this car out to the track. The engine would've blown up. So I leave the car there. Few days later I get the CALL. There's a bigger problem here. I take a ride down to see myself. John pressurizes cylinder 1 with 100psi with the lifters off. Now with the lifters off the valves are supposed to be fully closed rite, no, not here. The upper intake was off by now so you could here the air escaping up through the intake valve into chamber 1 of the lower intake. Talk turns to what was done to these heads by the previous engine builder. Long story short, the heads got a shitty valve job by the previous builder and there were things not addressed the first time around.
The good news:
Got the car back today. They put it back together and dynoed it. It made 270 which is basically what it made 10 months ago on another dyno. The heat and humidity of coarse played a part in that but no big deal. That means my car is making between 297/310hp at the crank if you figure in 10/15% powertrain loss. Not bad for a car with a stock bottom end and stock cam. These cars were rated @215hp from Ford but I'm sure it was underrated then also. Went this morning to pick it up @ Mustang Specialties. Had a nice talk with John about mods that would allow the car to run even better. While the car was on the dyno they noticed the small intake filter I've been running since I've owned the car. They switched it out with a bigass filter and it picked up 10hp. John told me about getting a bigger MAF from Pro-M and a bigger filter to match. Also the cylinder honing that I performed was wrong in how slow I moved the stones up and down the walls. This left more of a round mark then the X pattern that's required for new engines. A stupid mistake but no big deal. I'll need to get one of those Moroso catch cans for the extra oil that builds up inside the intake because of this.
BACK TO BUSINESS:
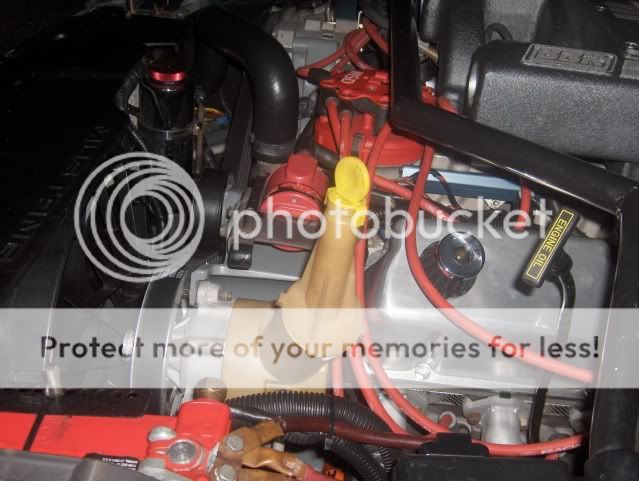
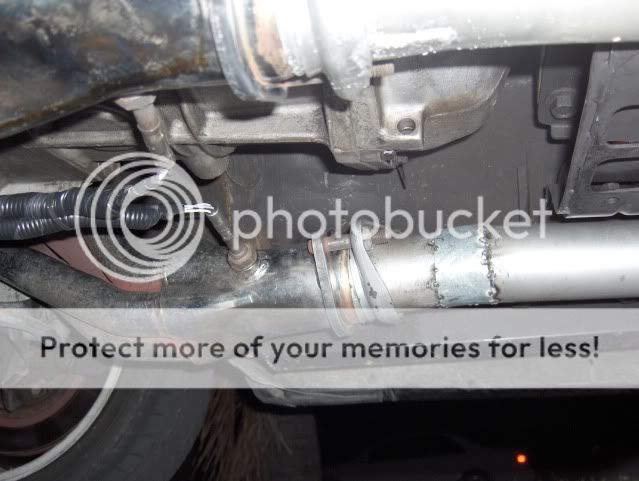
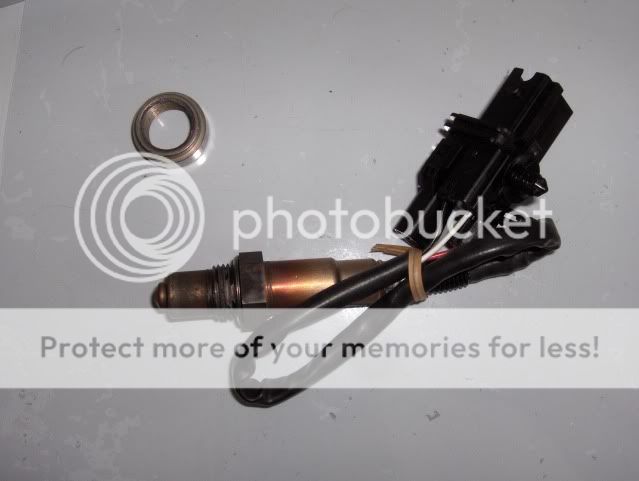
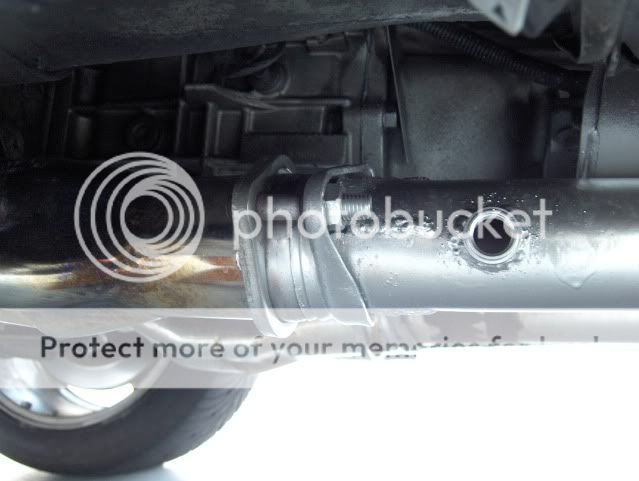
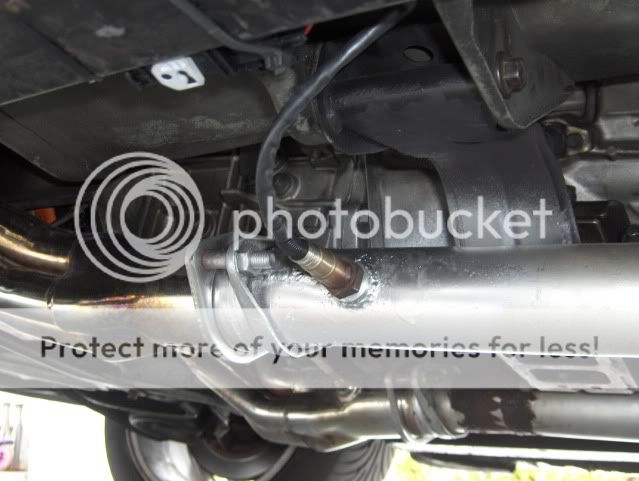
Before the car went in for a tune and all this crap was found I finally got myself a wideband o2 sensor and had George at TMS install it and run the wiring for me. When I got home I went ahead and attached the new Bosch sensor to the X pipe. I had to drill a hole and weld the provided threaded nipple onto the side of the pipe. Works much better then the narrowband I had in there before.
Took the car to George @ TMS today to get a manual switch for the radiator fan installed. I wanted to use another fog light switch for this in the extra spot on the center console but never got ahold of one so George made one even better. He used the spare oval insert used for coins and grounded out the center to fit a blue switch. Looks and works great. This'll be nice at the track to cool the engine down after a run. It's wired so it could be on even if the ignition isn't.
Custom made intake box:
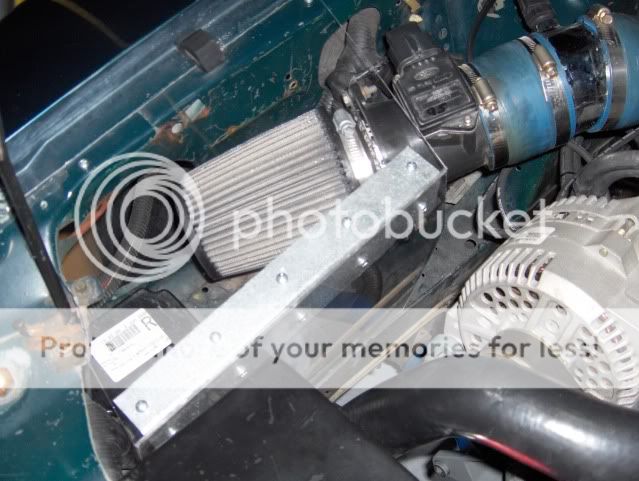
Today was hot and even though the engine temp doesn't go over 195, when I got home and opened the hood the intake pipe was very hot. Even the plastic MAF was freaking hot. Can't be good for power having all that hot air sucked up from the bay. So, since I was board I felt like fabricating some type of divider from the intake and bay area. First I used cardboard to make my templates and then traced them out on two pieces of plexy glass. I used a thin L angle and self tapping screws to hold both side together. I was going to paint it all black but the clear looked trick. I'll need to place another piece in back under the MAF to completely seal it off from the bay and force it to suck cooler air from the fender. Whatcha think?
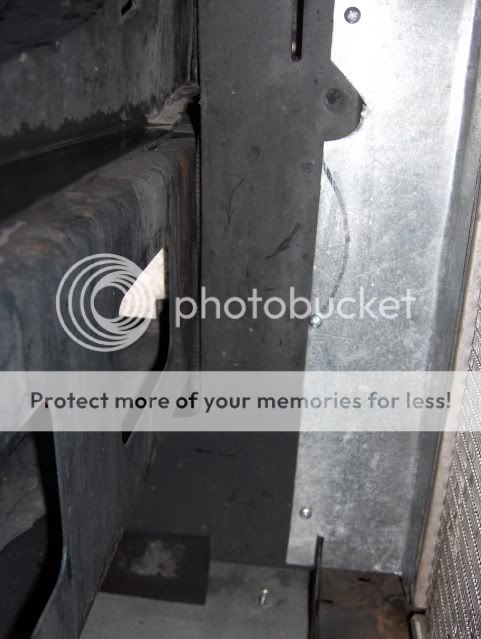
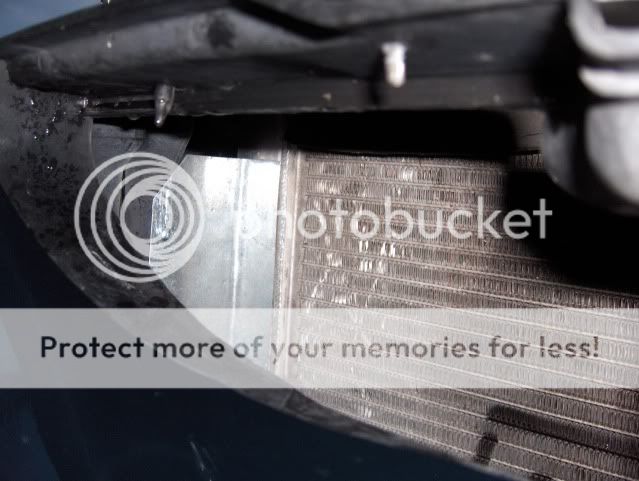
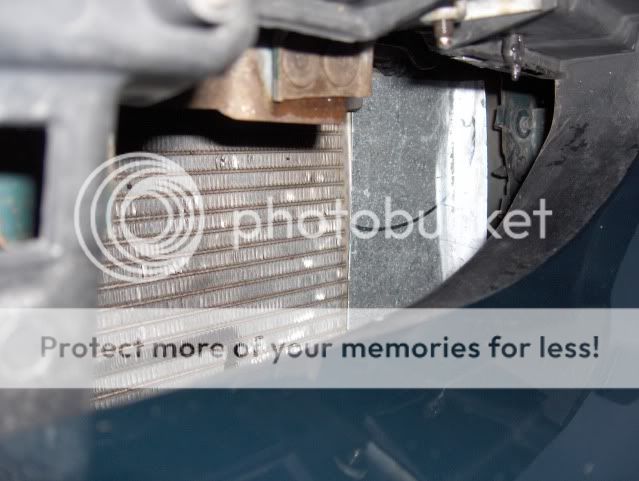
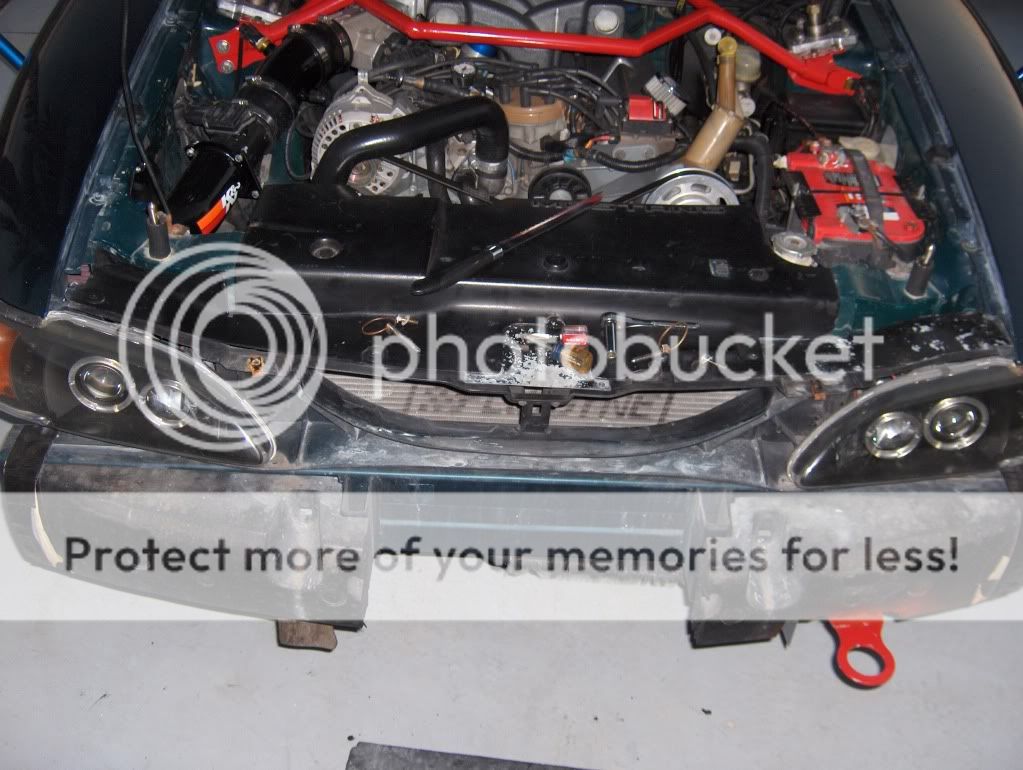
Just finished up boxing in the radiator. This is a common practice in road racing and the purpose of it is to force all incoming air through the radiator to keep temps down. It's a great mod to perform and I recommend it to anyone having cooling issues or running in HPDE's. Since now I can manually turn the cooling fan on or off it was a great way to test this new mod. Also I removed the 180 thermostat that I had in the car only for break-in purposes for the new engine. I normally run the car without a stat and this allows the car to run real cool. Another note is I no longer have AC so the rad that normally sat in front of the main one is gone. All I have is a 2 core Fluidyn.
I drove the car on the highway Wednesday afternoon around 6M at MPH. The air temp at that time was around 78 degrees. The water temp stayed @ 165 from my house in Boynton Beach to PGA Blvd where I finally turned the fan on since I was going to be driving in the city again. I figure as long as the car is doing at least 50 mph, the air being forced through the radiator is much more then the fan could ever pull. The real test will come this May at Sebring Raceway in the real heat. Last year the car ran cool the whole day so I expect it'll only be better since now the radiator is completely boxed in. Passenger side:
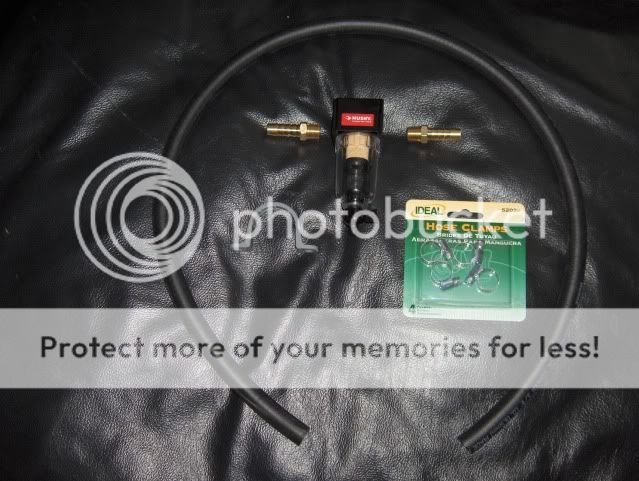
I get allot of oil inside my intake after a while, especially after a track day so I was in the market for a oil catch can like one from Moroso. The cheapest I saw was a Steeda unit for around $80. All others started around $100. I could do without it for those prices. I put out a feeler to see if maybe someone had a used one but nothing came up. My stepfather Manny=CrazyOldCuban suggested using one normally used on air tanks. That same day another guy showed me a few links on how to build your own for under $25 bucks from Home Depot. So, I went and got everything I needed and it works great. Mounted it on the firewall on the pass side away from the headers, just in case ever it leaks. It also has a drain valve and I connected a small rubber hose to the nipple at the bottom for draining. This way in case it ever fails and starts to leak the drain hose is directed away from the headers into the fender. The way I mounted it I can unscrew the bottle to empty it out when it gets full. Its nice and secure and in good view.
Parts:
Ended up using a metal strap instead of the plastic one.
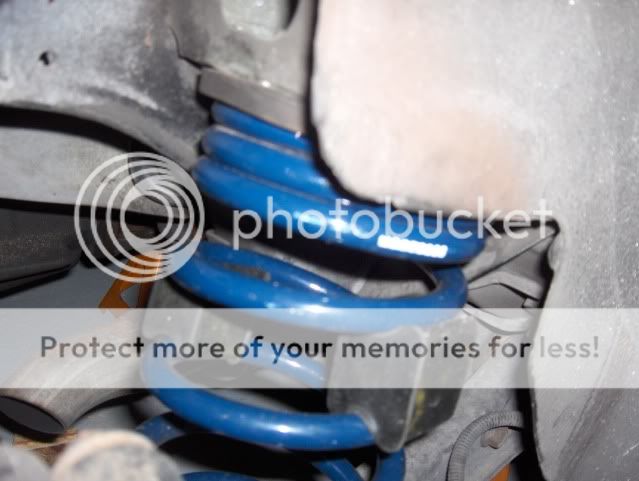
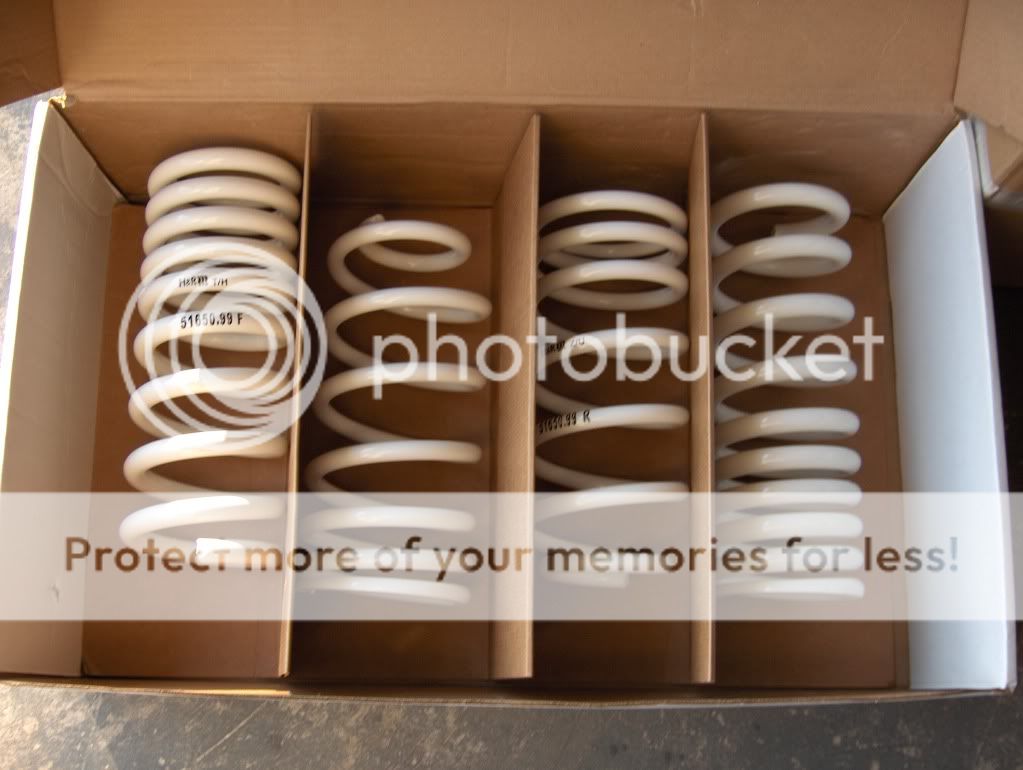
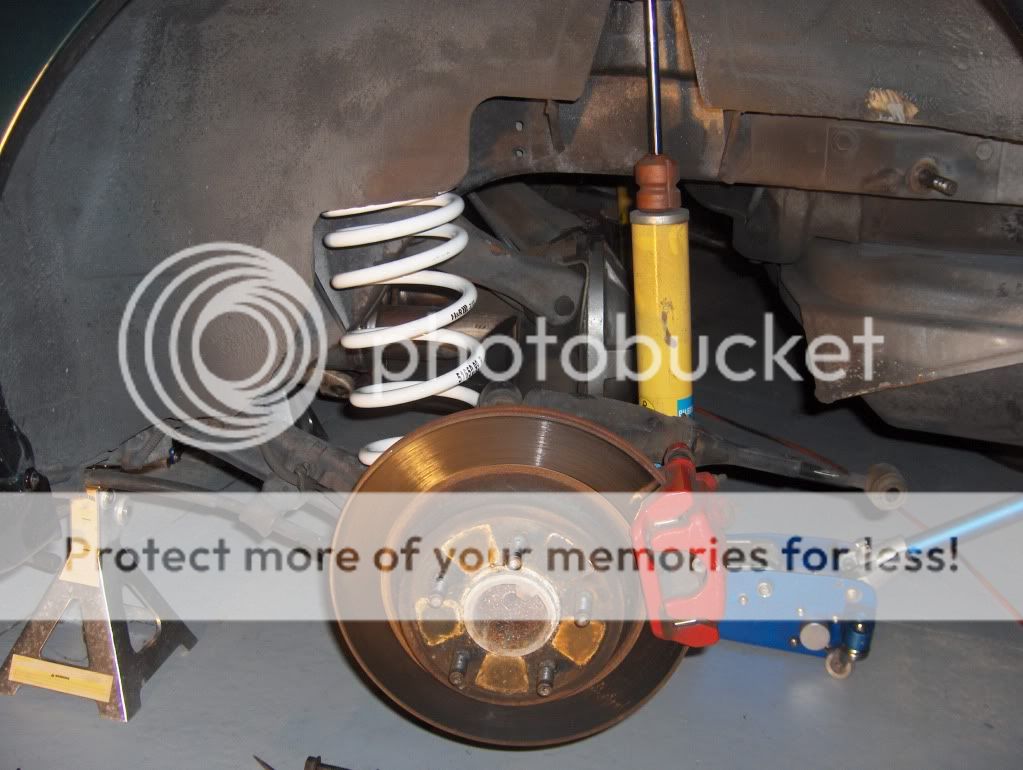
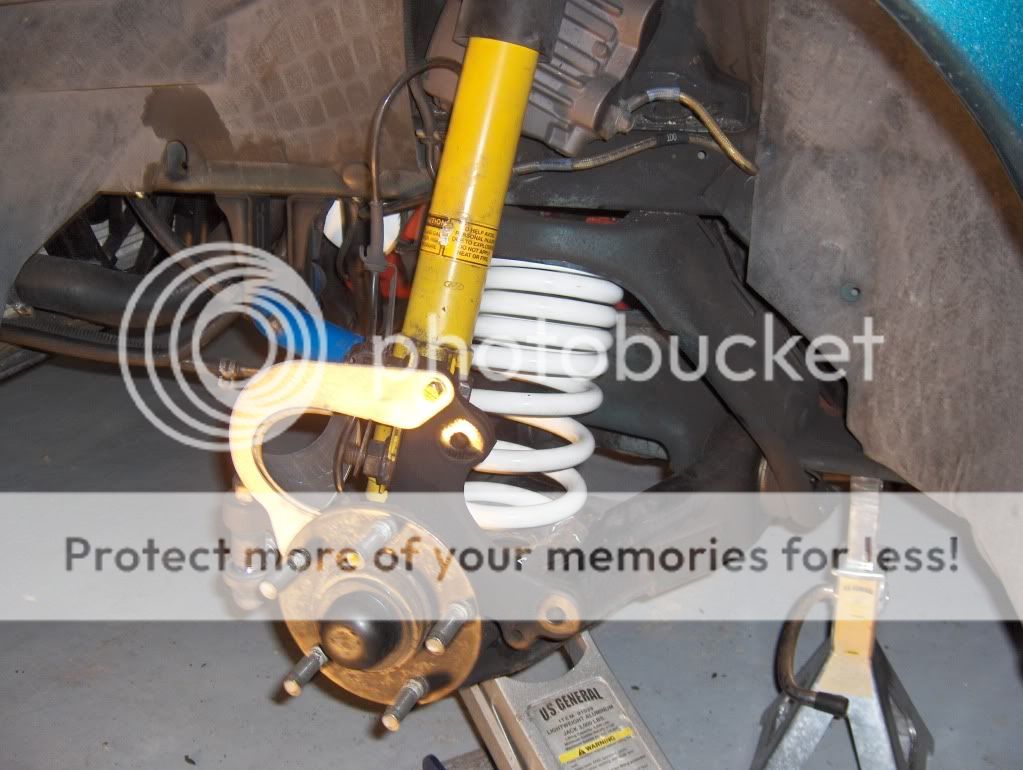
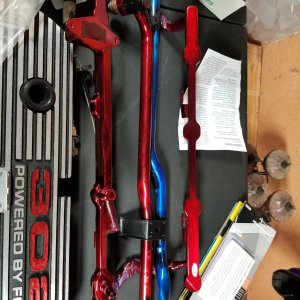
Around the time that I installed the Steeda V8 Competition springs on my car I've noticed that every once in a while the car would bottom out badly when I hit a big dip in the road. First I thought it was old shocks so I replaced the rears with new Bilsteins, nothing. Then I thought it was because I threw away the bump stops on the new shocks not knowing what they where for. So I ended up ordering new ones and still nothing. What's going on is the drive shaft is what's hitting the bottom of the car. It hits the bracket that holds the parking brake. I've grinded down this bracket as much as safely possible but there's still contact. It's left a grove in the DS and I feared sooner or later the DS would get sliced in half. I ended up giving a call to Steeda and spoke to a rep there about what's going on. I wanted stiffer rear springs but I also wanted to find out what I had in the rear now. Turns out the V8 comp setup comes with 1000# fronts and 260#rears. I asked if they had a stiffer option and sure enough they had 2 more, 350# and 400#. We came to the conclusion that the 350's would be the sweet spot. Much better for road racing and no more bottoming out. I ended up picking up a set of H&R rear race springs from a PBMC member for a real good price. These are the progressive kind from around 320 to 380 pounds. I've driven the car around with them on for about a week now and no bottoming out. I even hit the highway to drive over a well known dip in it with the car loaded up with tools. This is useful info for someone with a SN-95 lowered with Steeda's race springs and running an aluminum drive shaft. The kit I guess comes standard with the 260 pound rears. You'd have to request for the stiffer rears.
Steeda spring with perches from the auto parts store. I used these for about a week to raise the rear a bit until I got the new springs.
Today I got board and decided to take my Magnaflow race mufflers off and replace them with dumps. Took the car to Manny's house cause he had some exhaust pieces around. We fab'd up two dumps and installed them on the car. Here's a quick sound clip. http://www.youtube.com/watch?v=To_YfFA3qAc
Drove the car home and decided to finish up the work. I took the dumps off to cut them shorter and even them out since one was longer then another. Here they are off the car ready to be cut.
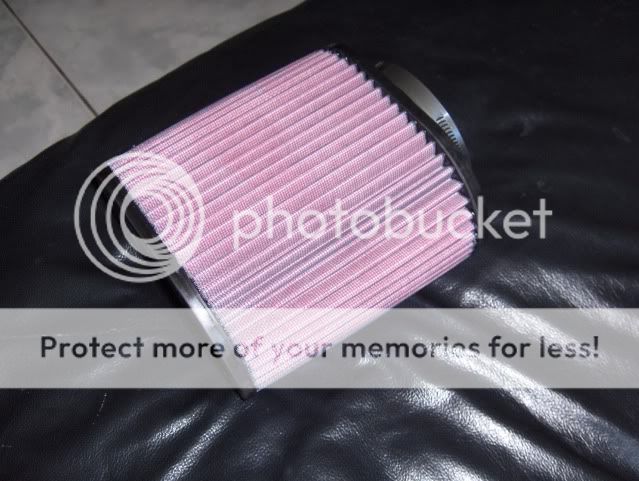
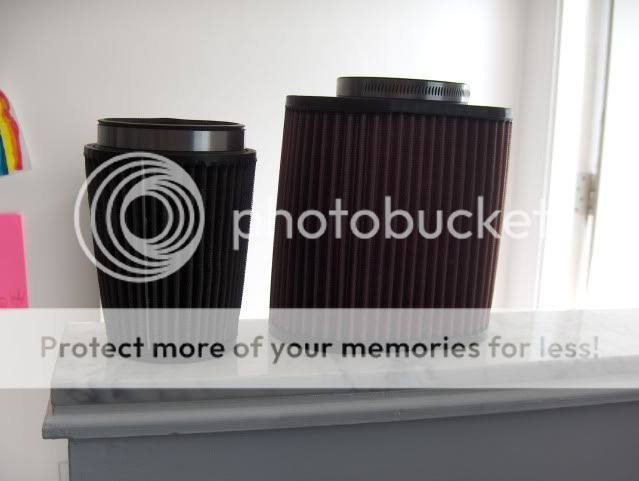
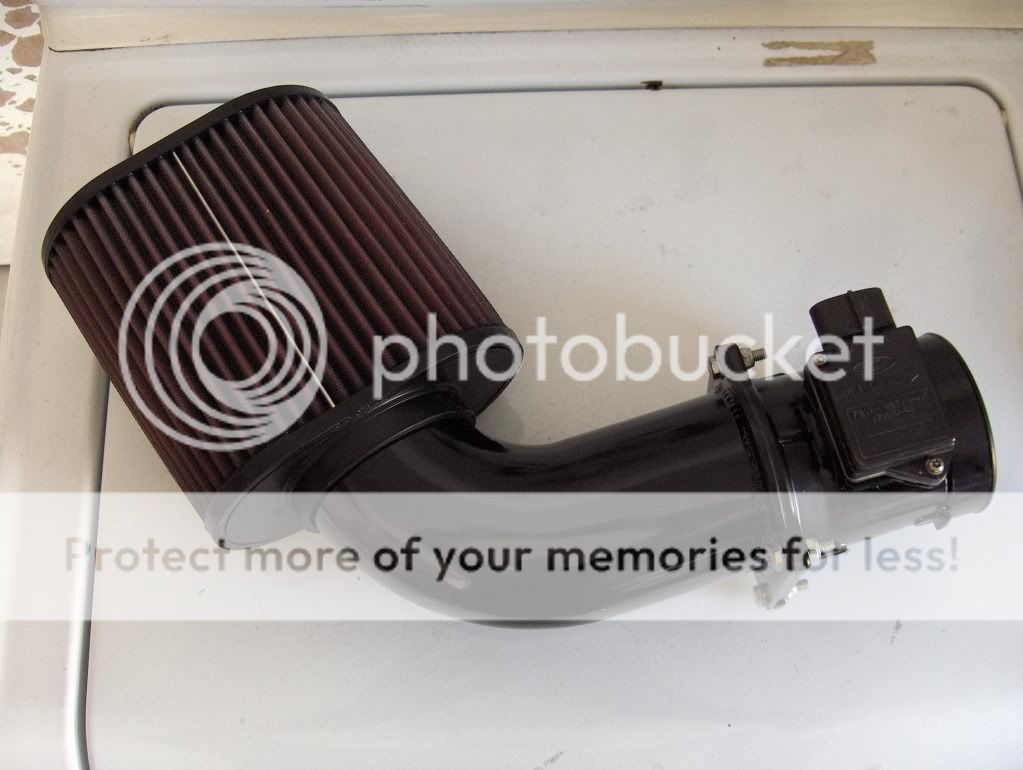
Got myself a new cheap CAI from Ebay for $30 bucks to replace the old worn out UPR one I've had since I bought the car. The intake was the first thing I can remember ever getting for the car. I have modded it and cut it up over the years and it was looking like crap. Also while I was at it I got myself a new big ass K&N filter to replace the little one I've always had. I was told almost a year ago when my car was being dyno'd that it made more hp when they changed out the small filter with a bigger Cobra one so I was advised to get a bigger one for better performance. The new one is big and it required I take 2.5'' off the end of the 90 degree elbow to allow it to fit in the fender.
I scored myself a good deal on a new, better looking R hood by Boss Inc. This was the one I wanted in the first place back in the day but was very expensive and I basically got the old R for free so I couldn't complain. This new one was in perfect condition and is even lighter then the old one. What I love about it is that it really resembles the real deal with it's high smooth rounded out cowl vs mine that has more sharp corners. This one is probably around an 1" higher then the old one. Also I added a set of Steeda's new hood pin plates. These are aluminum and resemble the Shelby one's. I fasten them on with SS screws for no more rust like the old one's.
Big thanks go out to Mitch for picking the hood up for me all the way from Tampa and Manny for helping me on getting it fitted and installed.
I was bored so I decided to repaint my custom tower brace red since it was out of the car. I grounded down some rough spots with an angle grinder and then used a paint stripper on a drill and took the rest of it down to bare metal. Painted it and used SS hardware to install. How's it look? I plan later to get a matching red K member.
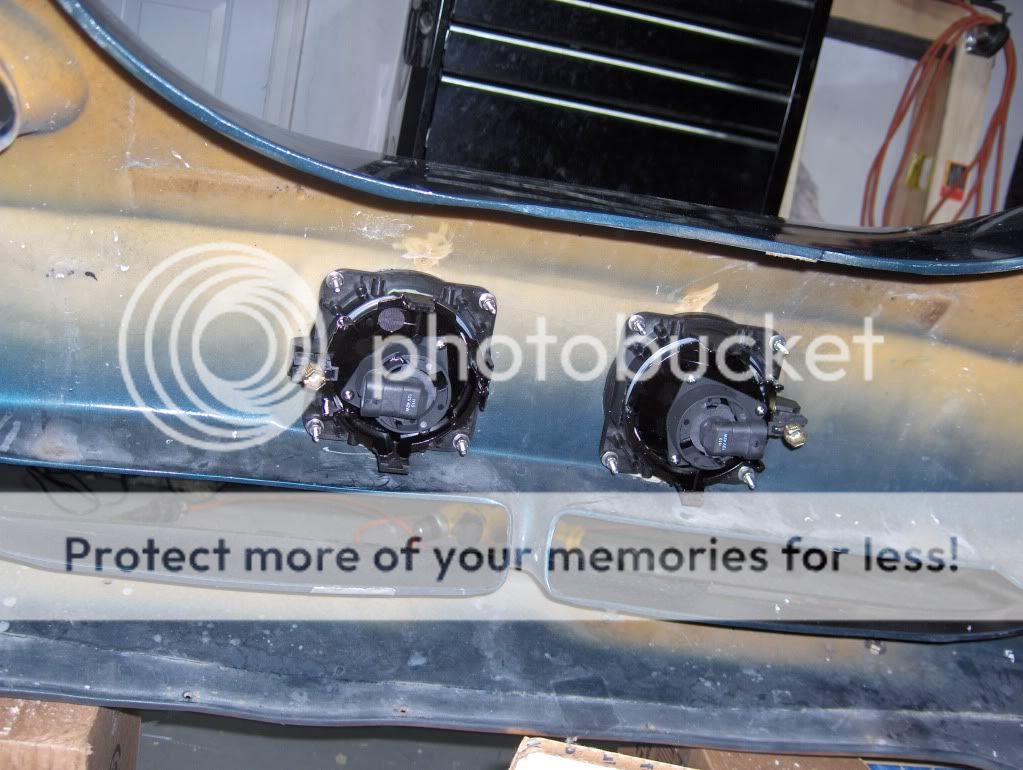
I knew sooner or later that I'd like to install a brake cooling kit on the car. Thing was that I didn't want to get rid of the fog lights and that was a problem because the lights are rite were the scoop would go for the brakes. My idea was to research and find other fog lights that I could use and replace if damaged or easily find replacement bulbs. I decided that the 03/04 Cobra fogs would do the trick. I knew I wanted round lights around 3" to 4" and these are rite on the money. I got the idea of putting the fogs in the center of the bumper a long long time ago when I was a teen going out. I saw a white Corvette downtown and it had some type of custom fog lights in the center of its bumper with a clear glass cover over them. It looked so nice and the only cars I've seen that on was the race versions. It stuck with me all this time. So I ordered the fogs. Meanwhile I needed to address how I was going to attach the 3 1/2" cooling tubes I had put away for this job. I got these 3 years ago after doing a job that required hoses that could stand up to high heat and paint. There was allot of it left over and it ended up at my house
I decided to fab up my own brake scoop. I used a 5" to 4" reducer used for home AC from Home Depot. With this I knew I could bend the 5" side into an oval to fit around the whole opening of the fog light hole and modify the 4" side down to 3 1/2" to attach the cooling tube to. I was up till 1AM Fri night doing all this. I was smart and bought a rivet gun with all size rivets. It helped allot. What was funny is how the back side of my bumper on the fog light holes there are two mounting holes for who knows what.
It looks like Ford put them there for a reason. Maybe for a race program, odd. Anyways I used them to secure the scoops.
While the bumper was still on the car I went ahead and cut the two 4 1/4" round holes for the new fog's. After I took the bumper off I cut out the whole center section of styrofoam to allow plenty of room for bulb or fog light replacement.
Originally I was going to use a strong glue for holding the fogs in place but instead I went with SS hardware. I know for sure with hardware the lights will stay put and it'll make things easier if I have to replace one in the future.
Here is a bad picture of the completed bumper backside.
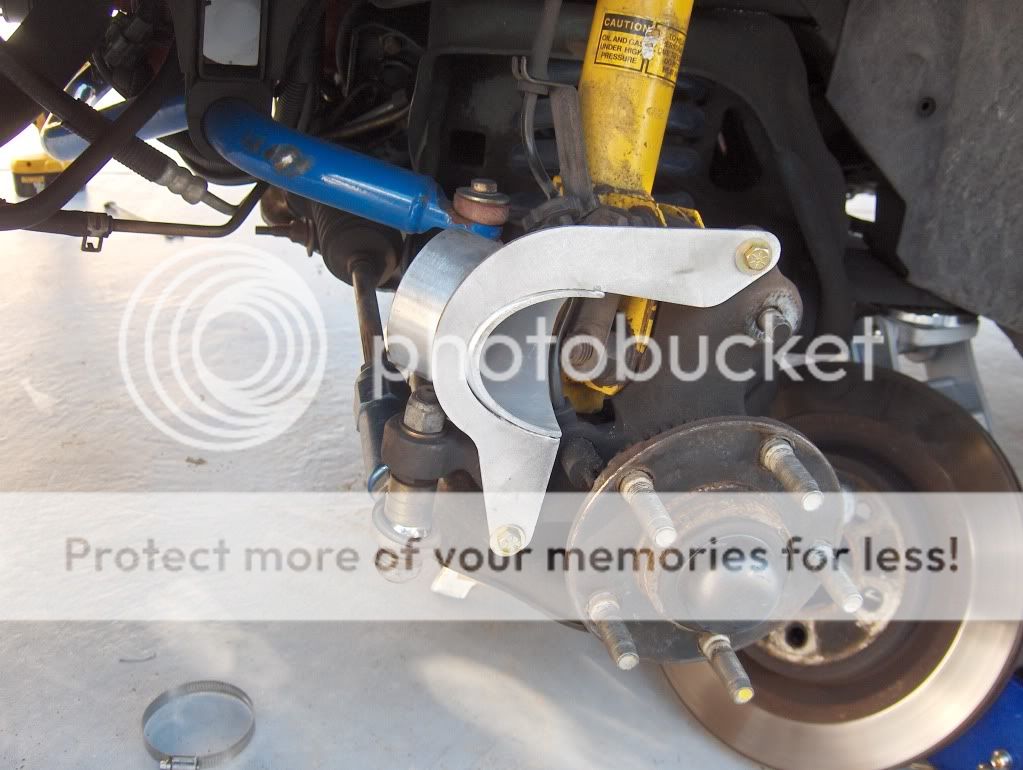
I found out that the 94-04 V/GT fog light pigtail's are different then the 03/04 Cobra one. I want to do this the rite way so I ordered the new pigtails from Ford instead of trying to use small pin connectors. For the plate that goes at the spindle I decided to just buy some instead of fabbing some up. I don't have all the tools I used to at work so this would've been an impossible mission to try. I'll just spend the $75 and get nice 3" race versions from Quantum Motorsports
Here is the almost finished project. I'm waiting on the spindle brackets to finish up the brake cooling kit. Cool thing too is the fogs have adjusters to point the beam were you want.
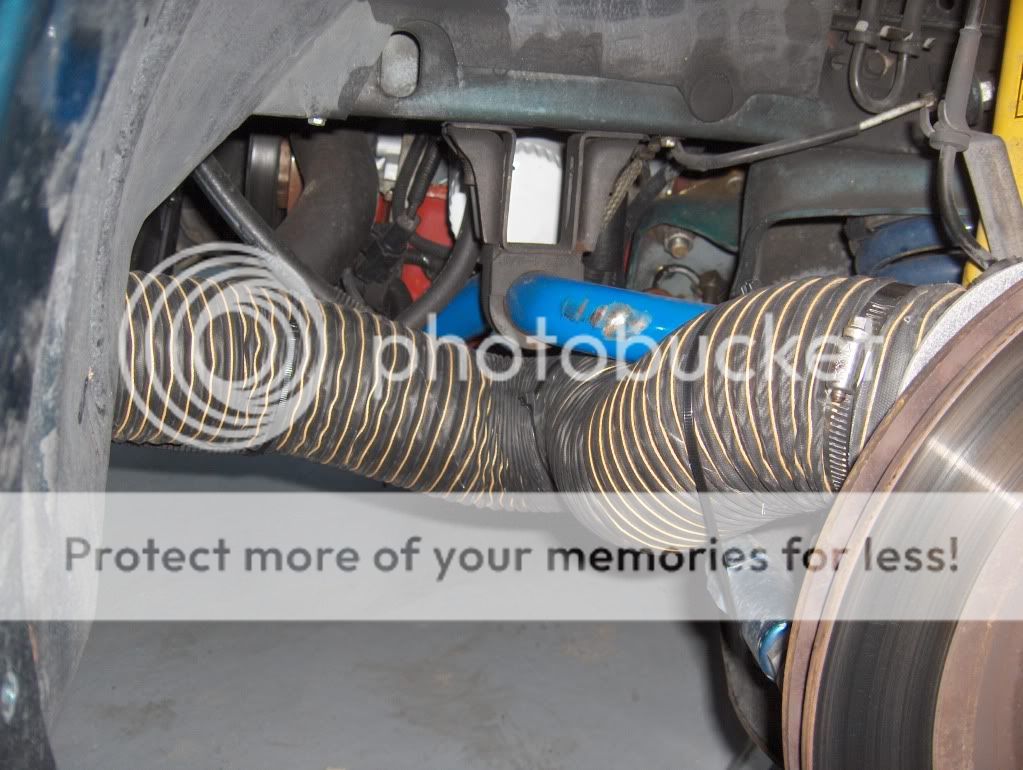
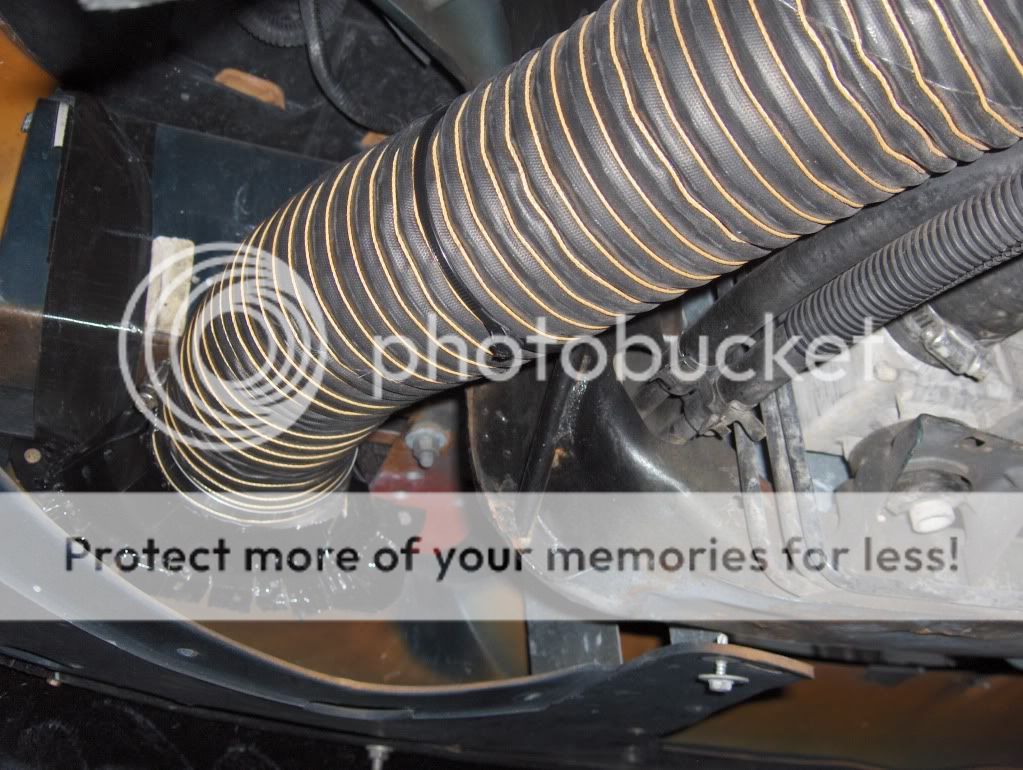
Finished up the brake ducts tonight. I had to customize it a little for a good strong fix. The spindle pieces have a 3"od tube but the duct that I had was 3.5" and because it's a real tough type of hose it was impossible to tighten the strap all the way before it started breaking so I had to buy one of those cheap autozone intake couplers and cut it in half to wrap one piece around each spindle plate tube. Here's what it looks like with the rubber coupler to take up the extra slack between the 3.5" duct and 3" tube. Here's the plate bolted in.
Here it is with the half piece of intake coupling on the end.
Now I was able to finish up the kit. I had to be careful and check for clearance of the inside of the wheel to the duct being it's 3.5" and not the normal 3" duct. Tie wraps came in handy for this.
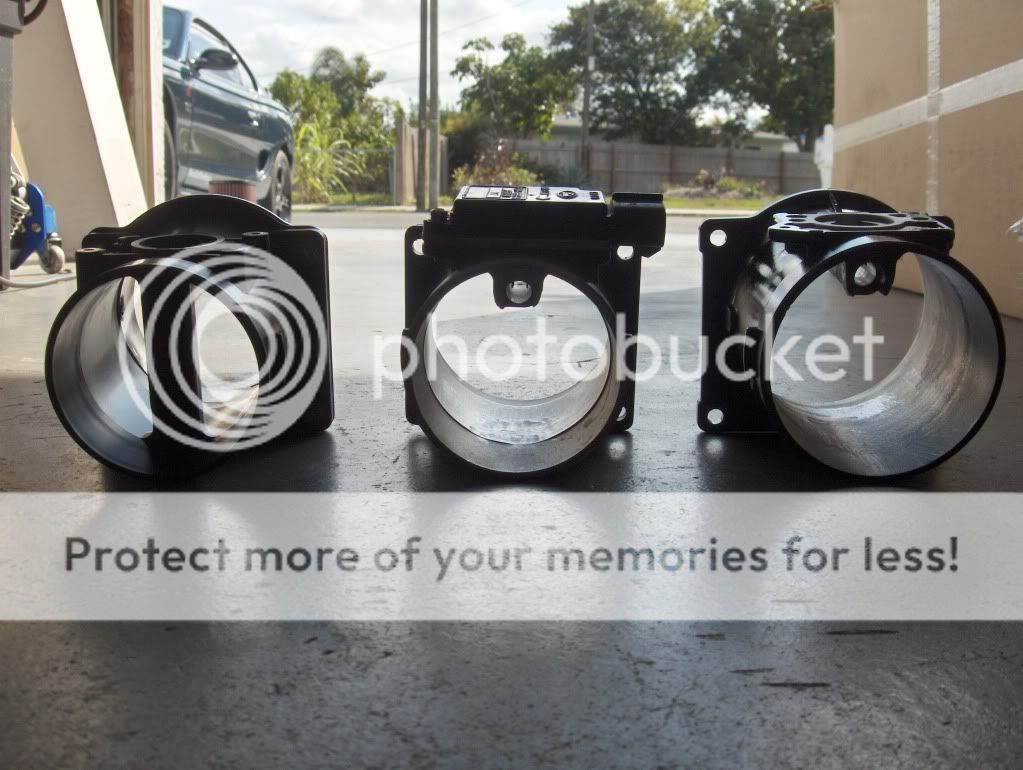
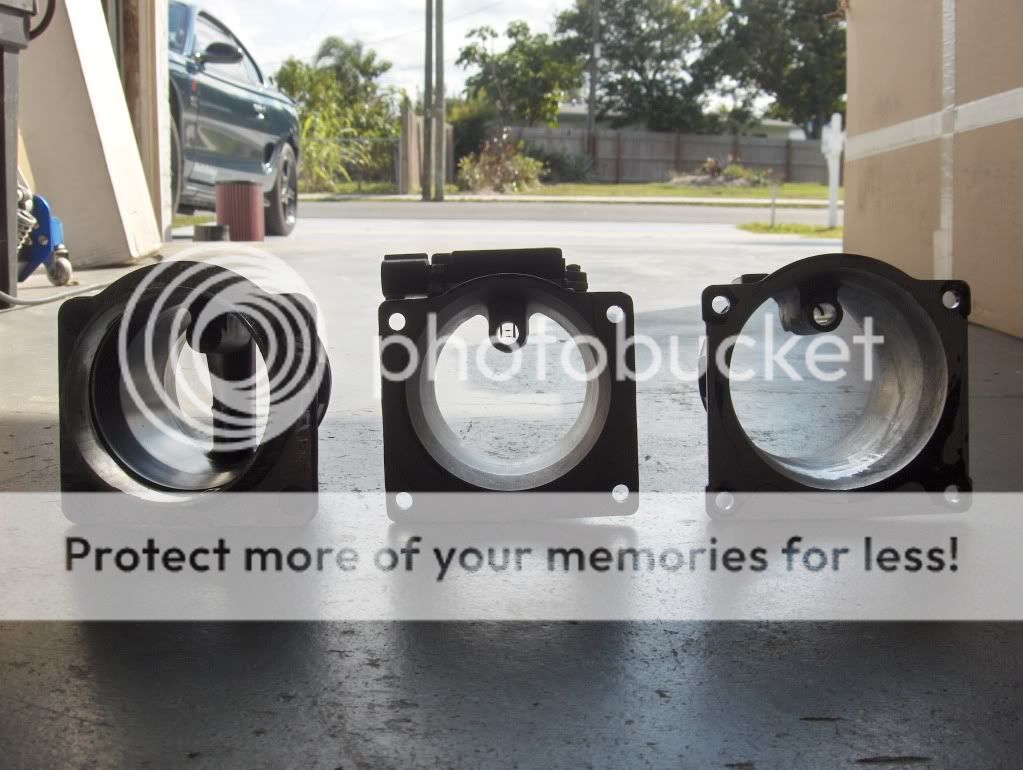
I was at the junk yard yesterday and my brother found a maf that belonged to a 5.4 Navigator. It's 1/2 bigger in diameter then my stock unit. I modified it like my stock one before I installed it. By modifying I mean cutting, grinding, and smoothening the inside out to look just like one of those C&L meters. This is how I've been running my stock one for years now. Because of it's bigger size 3.5" vs the 3" stock unit, the new maf fits perfectly with the size of the CAI pipe which is also 3.5" for a nice smooth flow. No more of that big CAI piping with the maf chocking it at the center. I had to make a quick run today to RacePartsSolutions for a new rubber coupler 3.5" to 3.5" to adapt the new maf to the existing CAI pipe.
In the pics below you can see the difference between a stock housing on the left. My modified stock housing in the center. And the new bigger modified housing on the right. Painted it all black to match.
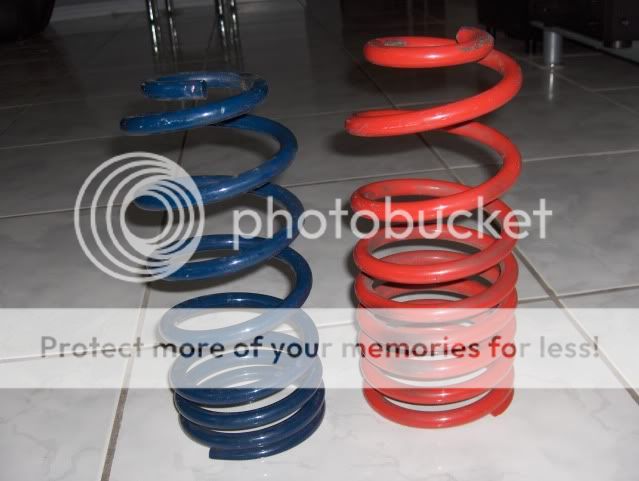
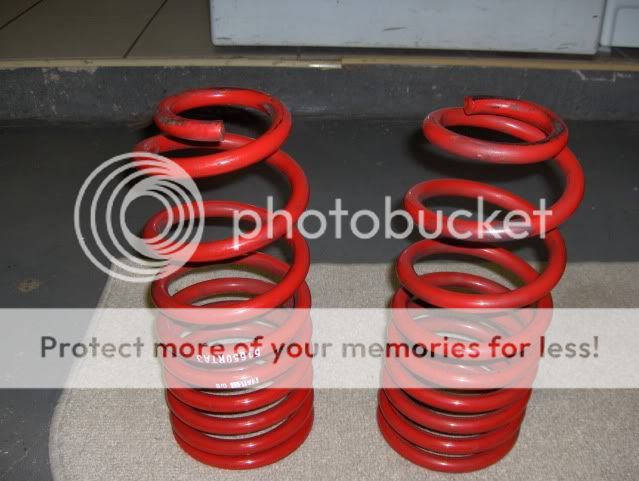
I decided to order a set of the H&R super race springs. I already had the Steeda competition setup but not long ago I sold off the rears and got a set of stiffer H&R springs after I found out the Steeda rears were just the sport one's so I had mismatched springs. My brother hotmustang96 needed a new set of springs since he's getting rid of the drag suspension setup that came with the car so we decided to go halves on the new set for my car and I'd give him my old setup. I got the springs for a great price from the Tire Rack and since we went halves on it they only cost me $125. I got them in last night. The only difference between these and the Steeda's are the H&R front are 950 to 1050 pounds in front vs Steeda's 850 to 1000 pound. And the new H&R rears are 350 vs the the progressive 280 to 350 H&R's that were in there.
Forgot about the new pinion snubber that came with the new springs. I had no clue what this was so I never installed it. Found out later what it was and what it was for. I took the old one out and cleaned and painted the bracket, slapped the new one on and installed it.


 M at MPH. The air temp at that time was around 78 degrees. The water temp stayed @ 165 from my house in Boynton Beach to PGA Blvd where I finally turned the fan on since I was going to be driving in the city again. I figure as long as the car is doing at least 50 mph, the air being forced through the radiator is much more then the fan could ever pull. The real test will come this May at Sebring Raceway in the real heat. Last year the car ran cool the whole day so I expect it'll only be better since now the radiator is completely boxed in.