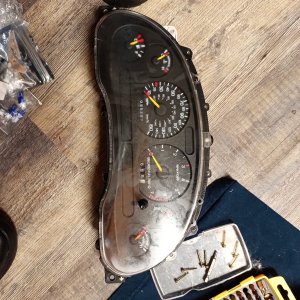
UGH!
You are using an out of date browser. It may not display this or other websites correctly.
You should upgrade or use an alternative browser.
You should upgrade or use an alternative browser.
96blak54 Reanimated
- Thread starter 96blak54
- Start date
Guess ill get over it!
Heads on, torqued down, lashers somewhat shimmed in, cams timed, ......I have tears of joy!!


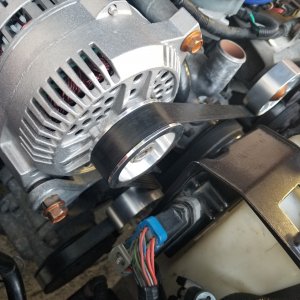
I made longer tentioner pistons that bottm out so they are locked. I dont want tentioner squishyness should a 2 step limiter ever goes on.


I made longer tentioner pistons that bottm out so they are locked. I dont want tentioner squishyness should a 2 step limiter ever goes on.

96laseredcobra
Well-Known Member
Do you have torque specs for the heads and cam retainer cap bolts and the cam gear bolt?
Sent from my SAMSUNG-SM-G890A using Tapatalk
Sent from my SAMSUNG-SM-G890A using Tapatalk
Sure do! Ill send a link for sequence procedure.
The cam caps are in in.lbs. just tighten them by hand will be fine, but keep in mind its a stretchy 6mm bolt and dont need much. Most folks dont have an in.lbs. torque wrench, but in case you do 70-100in.lbs. is the spec and to boot their is a sequence. No need to pay much attention to sequence here, but is good practice. I will say the torque spec is a bit loose for my feel. I always hand snug the bolts.
The head bolts are sequenced 30ft.lbs, sequence 90° turn, and then sequence loosen 1full turn. Repeat this scenario again but dont loosen. When finished add a final sequence, another 90° turn. Hold on to the engine stand with your foot. A breaker bar and proper socket helps. By proper I mean 6point for 6point bolt or 12point for 12point nut...
Be sure to thoroughly clean the engine deck surface before laying a gasket down. Take a clean shop towel with rubbing alcohol for final prep cleaning.
Good stuff. Now you need to get that engine sat in there. I want to hear this thing run, and you are obligated to do the first start up with open headers.
Lets say I dont want to. If im that close, ill just go ahead and bolt everything up.
Engine degree'd 3x's!!! My hacked tentioners still needed a few touches. One side was allowing the chain to slip on the crank sproket un-noticed. I had it all shimmed in and did a final check only to find the driver cam was off a few chain links...lol. I corrected the problem. All is good for go! ......untill I get the front cover on. Some machining is needed for the valve cover surfaces to match.
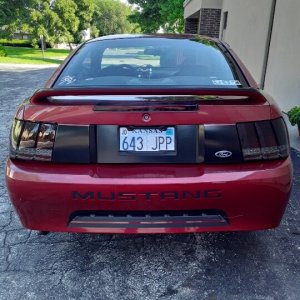
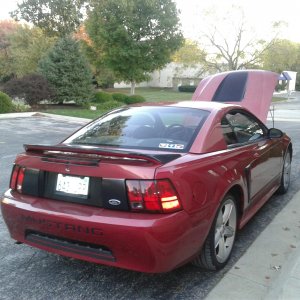
Ive been hack painting the car with bronze metallic rattle bombs. Paint is durable and has a good matte look to it. No need to have expensive body work with 4kids in my life! This will do for now.

Notice the rear tail light bezels on the windshield. I was testing rattle can acrylic over the paint and see how they dried. If clouded clear was a desirable thing, I nailed it! Now ill have to take time and hand sand the clear off. Im still testing the clear coat with different scenarios. Hoping the last test strip is it. Hot can, shook for 10min, one swipe, and dry. Multiple layers! We will see
Ive been hack painting the car with bronze metallic rattle bombs. Paint is durable and has a good matte look to it. No need to have expensive body work with 4kids in my life! This will do for now.

Notice the rear tail light bezels on the windshield. I was testing rattle can acrylic over the paint and see how they dried. If clouded clear was a desirable thing, I nailed it! Now ill have to take time and hand sand the clear off. Im still testing the clear coat with different scenarios. Hoping the last test strip is it. Hot can, shook for 10min, one swipe, and dry. Multiple layers! We will see
Burninriverdiver
Well-Known Member
- Joined
- Jan 1, 2014
- Messages
- 2,770
- Reaction score
- 234
Keep on plugging away at it! Good to see those heads torqued down
ARP is good. Arp has a Chinese copycat out there and those are sold on ebay. The true arp are awesome.
Here's were im at!

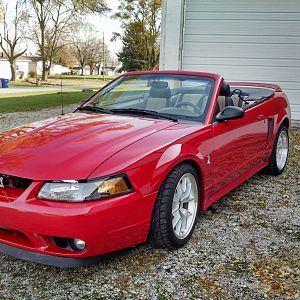
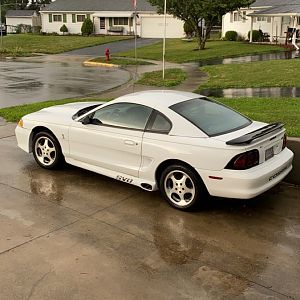
This pic shows how the copper paint is affected by light. The wing and wheels are the same color.

I attempt to wet sand the trunk thinking some acrylic clear will be next. Im not sure how to approach this with spray cans.

This pic shows how the copper paint is affected by light. The wing and wheels are the same color.

I attempt to wet sand the trunk thinking some acrylic clear will be next. Im not sure how to approach this with spray cans.
1998cobrasvt
Well-Known Member
- Joined
- May 4, 2015
- Messages
- 1,531
- Reaction score
- 9
Looking good Blak! Great pic pointing out how the sun affects the copper paint. I have never seen that copper paint used as a trim color. Im diggin' it on your ride!
Thanks man! Im having fun with it. Regardless of how the results are....fun is the factor here.
98snakehorse
Well-Known Member
Wow that paint looks pretty cool. Lookin good
96laseredcobra
Well-Known Member
Looks good. I dig it as well
Sent from my SAMSUNG-SM-G890A using Tapatalk
Sent from my SAMSUNG-SM-G890A using Tapatalk
I think you could safely wet sand at about 800 then go on to clear the car.
punched281
Active Member
Nice progress! Diggin the colors.
Thank you. I be seeing you prosper as well!
ARP is good. Arp has a Chinese copycat out there and those are sold on ebay. The true arp are awesome.
Why are you confusing me...

