Project Cherry Bomb: 90 LX

Boostr1

Active Member
Joined
Apr 17, 2020
Messages
923
Reaction score
643
Location
North Jersey
Did wires an stuff!! Will report more when I get a lil more of this rat's nest sorted out!!! An I'll have pics when I do!!! They outta frakkin outlaw black tape.........

I have a rats nest in my boat's wiring under my console... Don't even want to touch it.
 
OP
OP
Werecow

Werecow

Well-Known Member
Joined
Feb 3, 2020
Messages
1,043
Reaction score
785
Location
Virginia
Allllllllrighty.... I took @white95 's advice and hooked up another ground wire to the radiator support. Then after a lil research and a trip to HF to get a better multimeter than what I had, I tried leaving the hot connected and unhooked and bridged the ground with the meter to check for how much drain it had going on.. Meter was showing 15 milliamps... Interesting... Now mind you this is after I corrected some of the crap in the pics I'm gnna post.. IMG_20200720_114855550.jpg
IMG_20200720_114920547.jpg
IMG_20200720_114948712.jpg
Yeaaahhhhh..... Black tape outta be made illegal... I even found one of the main wires coming off the solenoid that just fell apart when I touched it.. I got all this crud fixed that I could find as best that I could, and the yellow butt connector in the first pic I put in even!! That was a black tape job too!! I patched it up cause it's got a fusable link in it... After all this I got enuff power to drop the power windows.. But the voltage inside the car still shows waaaaaaaaayyyy too low... Battery still shows a full charge.. No turn signals, flashers work, no headlights, electric fan (that's on a toggle switch) doesn't work, inside fans don't work, no brake lights.. soooooo I'm thinking either I've got a lot of bad switches, I need to start pulling fuses after hooking up the battery, or pour gasoline in it and throw a match on it..... Only thing that's keeping me from the fuse deal is I'm afraid by the time I figger out which one it is I'll have either drained the battery or shorted it out... So hopefully on next day I can work on it I can check more wiring...
 
OP
OP
Werecow

Werecow

Well-Known Member
Joined
Feb 3, 2020
Messages
1,043
Reaction score
785
Location
Virginia
Just had a thought... I may pull all the fuses except for the one I need for the dashboard then add one at a time and see how that goes.... Hmmm food for thought!!!!
 
OP
OP
Werecow

Werecow

Well-Known Member
Joined
Feb 3, 2020
Messages
1,043
Reaction score
785
Location
Virginia
Yup, that's the starter solenoid.. see what I've been talking about now with the wiring being all jacked up on this ride?? And that's not the worst of some of their wiring eff ups on this car!! Now you're getting an idea of why I've been a lil skittish about hooking up the battery on it!!
 
OP
OP
Werecow

Werecow

Well-Known Member
Joined
Feb 3, 2020
Messages
1,043
Reaction score
785
Location
Virginia
Allllllllrighty.... Doing a lil more testing, I've discovered that after doing some wiring repairs, pulling fuses, putting fuses back in, doing more research, I've come to two conclusions.. 1) with key on and nothing else turned on I have a 1.7 amp draw from the battery and the battery gauge in the car shows about 10-11 volts but the battery has 12.8 volts. And B) I'ma have to purchase a new electric fan.. I tried to hook the one on it straight to the battery and no go.. it's shot... Soooo project Cherry Bomb is gnna take a lot longer that I'd hoped for to get cranked up due to colored spaghetti mess giving me nightmares... Think I'll focus on getting the window in and checking for juice at the fuel pump then getting the tank in and give my brain a rest before getting back to elektirikal fits and insomnia...
 
OP
OP
Werecow

Werecow

Well-Known Member
Joined
Feb 3, 2020
Messages
1,043
Reaction score
785
Location
Virginia
So far today I yanked to valve covers off and soaked/brushed the upper valve train down really good and let it soak with kerosene... And yes I'ma change oil before firing her up.. I may just hook up a drill to the oil pump with all that in it just to flush out some of the crud in it.. haven't decided yet on how to go with that yet..IMG_20200725_122548570_HDR.jpg
IMG_20200725_122614244_HDR.jpg
This is the kerosene I was using.. it was Krystal kleen when I started with it...IMG_20200725_122623089_HDR.jpg

I may get into more shenanigans later today.. dunno yet.. ta!!
 
OP
OP
Werecow

Werecow

Well-Known Member
Joined
Feb 3, 2020
Messages
1,043
Reaction score
785
Location
Virginia
Was able to get one more thing done today. Pulled out the door glass and hardware for it and got to work on that lil project... IMG_20200725_133852535.jpg
Yup I re-used the plastic discs from the window bracket and sourced some small Allen bolts with locknut's and used locktite on em as well instead of the rivet deal, cause I know how my luck goes with stuff like this. I would have put it together wrong first time or broken the glass. But this way suits me just fine. I don't believe that it's gnna go anywhere with the bolts double locked in place..IMG_20200725_140347593.jpg

New glass on bracket and new guides on the bracket!! Now, just gotta wait for extra hands and a good weather day to get it all back together!! BTW!! Dunno if sn-95's are the same or if anyone out there's done a foxbody, but where do I need to put the bracket for the power window to make it easier to install the window? Anyone know??
 

ttocs

Post Whore
Joined
Oct 9, 2009
Messages
32,650
Reaction score
5,665
Location
Evansville Indiana
if you look at the bracket through the door panel at some point in the height you will see that there are 2 or 3 holes in the door that allow you to access the areas behind it on the bracket. Its about half way up. Be sure to get the front in the track as its possible to put it right in front of it and it looks good from most angles but you can feel it with your fingers.
 
OP
OP
Werecow

Werecow

Well-Known Member
Joined
Feb 3, 2020
Messages
1,043
Reaction score
785
Location
Virginia
Soooooo today since I don't have a helper yet on the window project I tackled something that's been bugging me but I've been wanting to do for a lil while... Since I'm gnna be using an electric fuel pump I'm not gnna be needing the old mechanical one on the engine.. sooooo.....IMG_20200727_165358654_HDR.jpg step 1 take the danm thing off!!! IMG_20200727_172109505.jpg
Part B) cut old pump up into pieces... IMG_20200727_182605428.jpg
Next: use our considerable talents as a homemade gasket maker!! IMG_20200727_190144404.jpg
Part 4: Reinstall modified mechanical pump.. sans arm and lines... IMG_20200727_192828033.jpg
Voila!!! One snazzy new home-made block-off done!!! Cost about $0.20 in gasket paper and whatever my time is...

I do take PayPal.... Thank you for your support... LoL!!! :p:p
 
OP
OP
Werecow

Werecow

Well-Known Member
Joined
Feb 3, 2020
Messages
1,043
Reaction score
785
Location
Virginia
Moar updates on Project Cherry Bomb!!! Today I had assistance for the X, we tackled the dreaded door window project. I can tell all of my faithful followers this was one job we had both dreaded... We were nervous about possibly scratching the new glass or even breaking it in a thousand little pieces!! First off we got the glass out the huge cardboard it was packed up in, and I must say LMR does a really good job packing glass up!! Mine was packed up with plenty of air pockets and cardboard to prevent and breakage, so if your considering getting glass from them I can recommend it!!IMG_20200731_135837186_HDR.jpg
Also used some 220 grit sandpaper to clean off any old plastic that was stuck to the old guide rod and gave it a shot of carb cleaner to clean it up good and let it dry. The actual install I don't have any pics of cause we both had our hands full so I'll just have to give you a play by play, and remember this is a foxbody, so there may be differences with your sn-95's... We did hook up the power window so we could raise and lower the Trac as needed, starting out we had the front of the glass angled down and the back up with the Trac about 3/4 of the way up and then we're able to slip the Trac into the window. Then came the guide rod. For that we had to even the window out and lower it most of the way down so we could spread the door apart enough to slide the guide rod down between the inner door and the glass while also feeding it thru both of the guide bushings in the glass holder. I'll have pics in a minute to show what I'm talking about. The tricky part here is the top of the guide rod has a stud on it that makes it hard to get down between the glass and the door and it will try to twist on you at the same time. The other part that makes it hard to get it all the way in, on the bottom of the guide is a stud the comes out the bottom of the door that you have line up as well. Getting the bottom stud lined up was probably the hardest part of the whole job honestly.. it was a blind hole and I could just barely get my arm in the hole to try and guide the rod into place!! IMG_20200731_142825792.jpg
Here's the guide rod already installed going thru the guide bushings in the glass holder,, liberally applied with lithium grease!!IMG_20200731_142828800.jpg
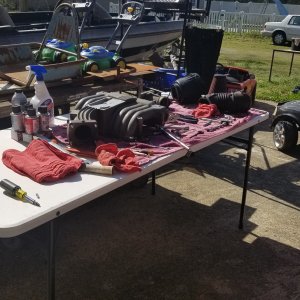
Also got the gears off the window motor!! IMG_20200731_142844793.jpg
And this is what I was calling the Trac.. all greased up as well!! IMG_20200731_161801601_HDR.jpg
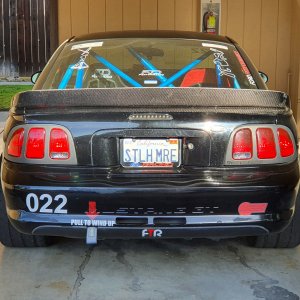
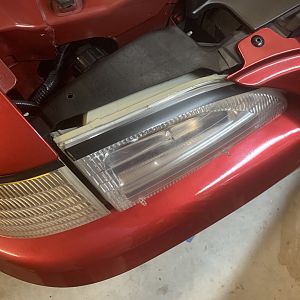
So here's my Cherry Bomb now!!!! New door latch, new door bushings, and a new door glass!!! Along with those spiffy Cragar wheels as well! She's come a loooonng way baby!!!!
 
OP
OP
Werecow

Werecow

Well-Known Member
Joined
Feb 3, 2020
Messages
1,043
Reaction score
785
Location
Virginia
Working at it @white95 !! I tried to be as thorough with the window installation as I could, I've not seen one that's really in depth in the interwebs anywhere so I hope that this one can help someone else that's trying it for the first time, I just wish I'd gotten more pics while we were doing it!!
 

white95

Apex Junky
Admin
Joined
Dec 30, 2007
Messages
20,616
Reaction score
8,757
Location
Prairieville, LA
Working at it @white95 !! I tried to be as thorough with the window installation as I could, I've not seen one that's really in depth in the interwebs anywhere so I hope that this one can help someone else that's trying it for the first time, I just wish I'd gotten more pics while we were doing it!!

I’ve never attempted that and your write-up would certainly help.
 
OP
OP
Werecow

Werecow

Well-Known Member
Joined
Feb 3, 2020
Messages
1,043
Reaction score
785
Location
Virginia
Oh!!! Btw!!! Meant to include in the write up!! It took us a total of about 30 minutes from start to finish to get it in!! That's counting greasing up all the gears and bushings, getting the old glass out of the window felt, and running it up and down a few times to get it all working smoothly!!!
 
OP
OP
Werecow

Werecow

Well-Known Member
Joined
Feb 3, 2020
Messages
1,043
Reaction score
785
Location
Virginia
Played with the colored spaghetti today trying to make a lil sense of how to get juice back to the fuel pump... I've got 12v to one side of the relay under the seat, but still working on trying to figger out how to get juice back to the safety button next to the taillights... Tried doing the jumper thingy at the service port but nothing... Will try again tomorrow weather permitting.. oh gots other stuffs to show y'all but it'll take a while to put all up and my brains is too toasty right now... Wiring ya know...
 
OP
OP
Werecow

Werecow

Well-Known Member
Joined
Feb 3, 2020
Messages
1,043
Reaction score
785
Location
Virginia
Ooooh.... Idk... I've reeeeeallllly been wanting to do the big block foxbody thing since the late 80's... Hell I'm 1/2 way there now...
 

Forum statistics

Threads
77,513
Messages
1,504,091
Members
14,981
Latest member
Cwacaser

Members online

Top