Damn shame about the gears. Do you have any pictures of the battle box installs? Id like to see some more of that set up.
You are using an out of date browser. It may not display this or other websites correctly.
You should upgrade or use an alternative browser.
You should upgrade or use an alternative browser.
Project Red Headed 3v
- Thread starter Thomas_W
- Start date
Thomas_W
Well-Known Member
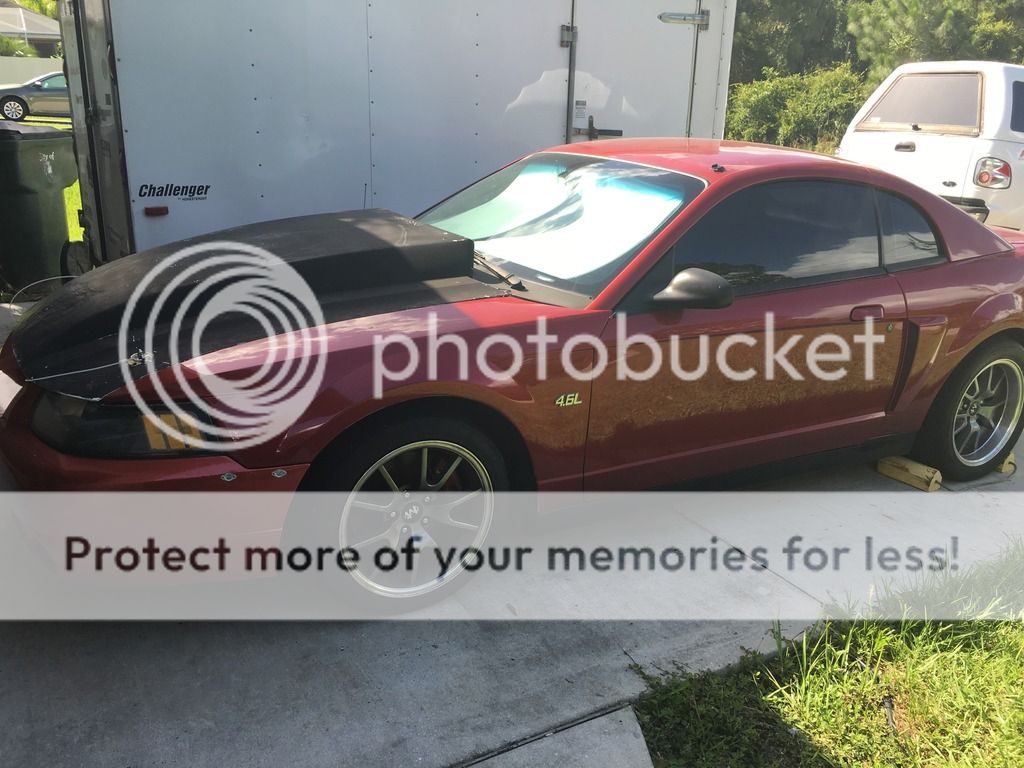
Decided to pull the factory shelf.. Err wing.. Off. I really like the wingless look of SN95's.


Thomas_W
Well-Known Member
Damn shame about the gears. Do you have any pictures of the battle box installs? Id like to see some more of that set up.
No kidding. It seems like every post about this car is "got X fixed, found 4 more messed up things" lol. Oh well. Maybe i'll get deal with the noise for now and start collecting 31 spline axle parts instead of fuel system stuff.
I didnt get anymore photos of the battle box install, it is all pretty easy really. That said, i do need to get back under the car to track down an exhaust leak, so i can get some when that happens.
Thomas_W
Well-Known Member
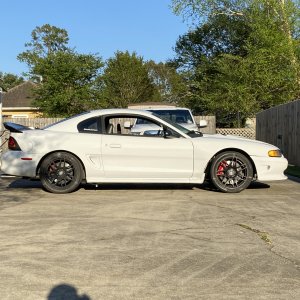
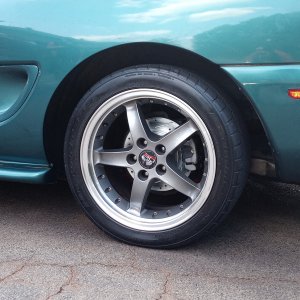
Out with the GT side skirts, in with the Termi side skirts. I think the black skirts actually look pretty decent. Doesnt matter though, once the rear bumper and replacement sheet metal parts arrive, its all getting repainted.


Thomas_W
Well-Known Member
I took the car in today to get an alignment and everyone there was pretty impressed with the car. Not really sure why, but it was good to hear. Car drives great now. Does sound like a tank though when you hit a bump with solid bushings everywhere. Lol
i also took it onto the interstate for the first time. 80mph and it was riding pretty dang smooth. No more decel or acceleration vibration anymore either, so super happy about that!
only one problem. The rear end is LOUD! I have never heard gear whine like this is all of my life, its horrible. So my plans for doing the fuel system next will be pushed back, looks like i'll be doing a built rear.
If anyone knows where to get a drop in rear with C clip eliminators, 31 spline ackes, etc, id love to hear it!
I also started working on trying to narrow down a few pesky CEL codes.
First one was pretty simple. The P1507 IAC code. Some doofus (me) hooked up the IAC adapter plate for the 3V swap wrong. It is a plate with two nipples to go to the intake that the IAC bolts two. Why it has two nipples i dont understand, but i put the hose on the wrong one.
The other is P0340. Cam position sensor.
Ive always assumed this code was becuase they had the camshaft position sensor on the passenger side of the motor hooked up to the computer instead of typically the driver side.
So i started looking into it and found butt splices on the factory harness to extend the sensor wire and one of them was broken. So i soldered in some new wire and the car fired right up. Then after about 1 minute died. Tried to restart and it just backfired. Unhooked the sensor and it started right up. So with the car at idle and the sensor unhooked, i plugged it in. Died immediately. Hooked up the passenger side sensor instead and it ran and started fine. Time will tell if the code comes back. Hopefully its just the broken wire that was the issue.
Thomas_W
Well-Known Member
Got a few more parts today:
passenger AC vent (all i need now is a headliner and the interior refurb is done)
autometer ultra-lite Elec. water temp and oil pressure, mech. Vac/Boost gauge
hi-temp electrical wire
Ford Racing Master overhaul kit for a 8.8
Motorcraft friction modifier
the rest of my stuff should be arriving tomorrow so i can install the gauges. Im also still trying to track down the Serp belt squeek. I have a new tensioner already, but i got a belt that is to short so i'll have to go get a longer one tomorrow.
I also figured out that the vent Duct that runs from the center ducts to the passenger AC vent is missing, which explains why no air ever comes out of that vent. Now i just need to find one.

Thomas_W
Well-Known Member
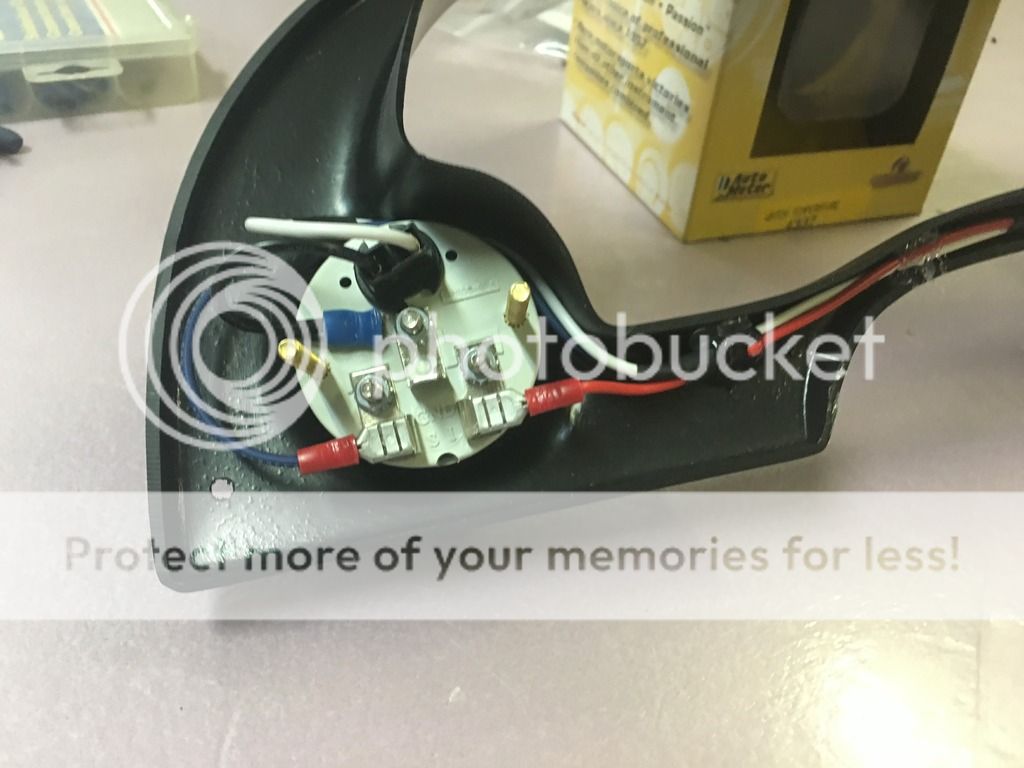
The autometer cluster bezel i picked up on ebay for $45 shipped (brand new) arrived today. As did the chrome plated metal 4.6L emblems and the 6 pin electrical connectors.

so i installed the gauges into the bezel:

Then i wires up the gauges.
Ive got the gauges wired as follows:
grounds are all run into a Single 18Ga wire (color- black).
Gauge power is a 18ga Red wire
gauge lights are a 20ga white wire
Water Temp signal wire is a 20ga Blue wite
Oil Pressure signal wire is a 20Ga Orange white
those wires will have male molex pins crimped on and placed into a female molex housing. This provides quick and easy disconnection of the cluster bezel anytime the bezel needs to be removed.
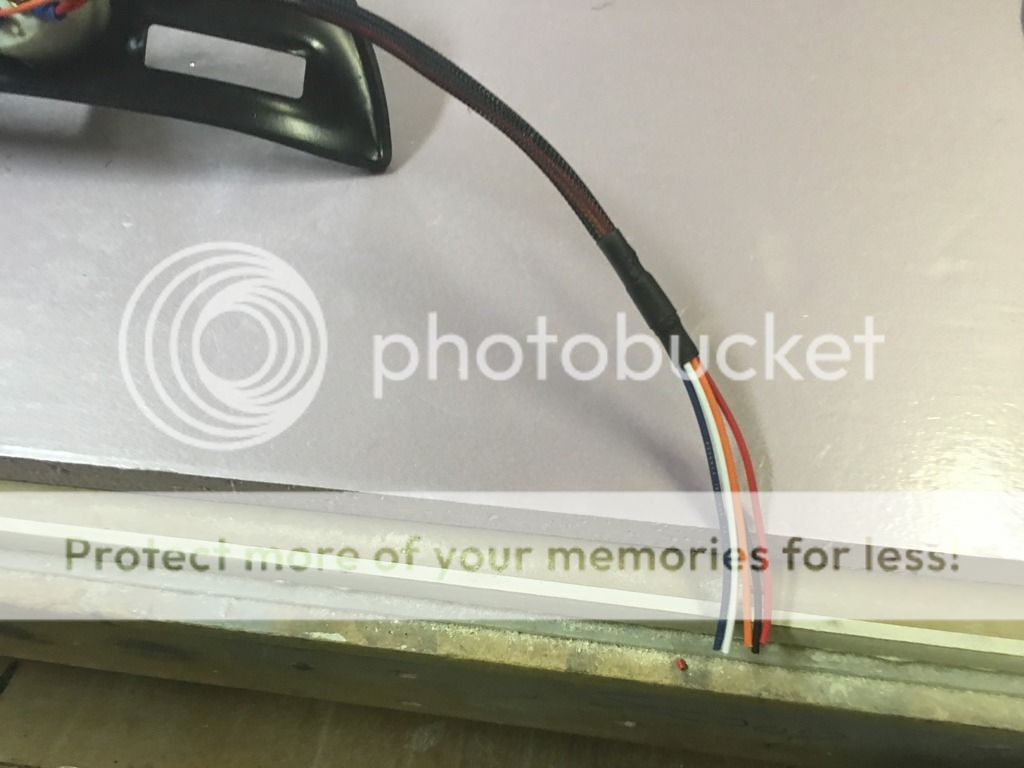
The cluster of wires running along the bottom of the bezel were all held together with small strips of heat shrink tubing and then a few globa of hot glue were used to hold the wite bundle into position on the bezel. The pigtail that then connects to the pigtail attached to the car (still to be made) was then covered in snake skin (plastic woven, expandable wire sleeve) and the ends of the snake skin covered with heat shrink tubing.


so i installed the gauges into the bezel:

Then i wires up the gauges.
Ive got the gauges wired as follows:
grounds are all run into a Single 18Ga wire (color- black).
Gauge power is a 18ga Red wire
gauge lights are a 20ga white wire
Water Temp signal wire is a 20ga Blue wite
Oil Pressure signal wire is a 20Ga Orange white
those wires will have male molex pins crimped on and placed into a female molex housing. This provides quick and easy disconnection of the cluster bezel anytime the bezel needs to be removed.
The cluster of wires running along the bottom of the bezel were all held together with small strips of heat shrink tubing and then a few globa of hot glue were used to hold the wite bundle into position on the bezel. The pigtail that then connects to the pigtail attached to the car (still to be made) was then covered in snake skin (plastic woven, expandable wire sleeve) and the ends of the snake skin covered with heat shrink tubing.


Thomas_W
Well-Known Member
I made up the harness for the car side:

Then i wired it into the defrost switch connector.
Switched power to the gauges was tapped into pin #3, ground to pin #4 and illumination +12v pin #5 (this is looking from the pin side of the connector and counting pins from left to right. Unfortunately i forgot the picture.
The gauge cluster was then removed to install LEDs and to route the bezel gauge connector.

the mounting studs cut short on the backsides of the gauges and then any exposed connections covered with heatshrink tubing as much as possible:

The cluster bezle mount brackets were installed and then the gauge connectors plugged together. The wire on the bezel was then looped around the headlight switch and into the cavity around the switch: the sending unit wiring was routed behind the dash so as to end up in the drivers floorboard.

then it was all screwed together:

i then routed the sending unit wires along the factory dash harness and then through the large rubber firewall grommet. I'll get photos of the under hood routing later:
Frank.JD.Perez
Legend
You're making me not want to get that gauge cluster...
Great work on the cluster! Im about to completely replace mine with the attometer gauges. This was informative and helped me understand whats in store for it.
Thomas_W
Well-Known Member
You're making me not want to get that gauge cluster...
Im not very impressed with the fit of the autometer bezel. It fits, but the cutout for the defrost and headlight openings is off. Which is surprising bc i put one of these in a buddies car 15 years ago and it was just as bad to. I figured they would of fixed it by now.
That said, im actually thinking if modifying the stock one and making a mold from it to do a carbon overlay that is attached to the stock bezel so the fit stays as nice as factory.
Thomas_W
Well-Known Member
So the wire routing is as follows:
From the firewall, the wire goes under the hydroboost unti following the wire harness for the brake reservoir sensor. It then follows the brake lines from the master cylinder to the proportioning valve and forward. Once it reaches the forward tube of the Tubular k, it follows that downwars and then makes the curve at the motor mount tube towards the engine. It then splits off, one wire to the oil pressure sensor, the other then goes between the motor mount and engine block and gets zip ties to the motor mount. It then goes aft towards the trans to the watee temp sensor:

Oil pressure sensor: i needed a 1/4 NPT union, Tee and a 1/8 NPT MIP to FIP. If you dont care about the factory gauge working, you dont need any of that. My OCD about stuff showing opposite indications would go crazy, so i elected not to do that.

For the water temp sensor, you'll need the 3/8 NPT adapter included with the gauge. This fits perfect in the threaded freeze plug location on the driver side rear of the engine block. Have the sensor and adapter preassembled prior to pulling the freeze plug out and you can pull the plug and install the sensor without loosing to much coolant. I probably lost 1 cup, just go fast!
You'll also notice in this photo i put heatshrink over the crimp ring terminal to seal it up from the elements. I did the same for the oil pressure sensor connector.

I also changed the bezel and face plate for the AEM wideband to match the rest of the gauges.

And here is going to be the next big project:

That is the driver side front subframe rail directly under your feet. My guess is someone used a bottle jack to lift the car, causing the subframe to collapse.
To fix it, im likely going to slot the floor between the inside surface of the rails. Then take a BFM and a 2x4 and beat the rails back out as much as possible.
Then i will either place 2x2 .120" wall square steel tubing or 2x3 .120"wall rectangular tubing in the slot from the firewall all the way to the rear frame rail and weld it all in.
The other option is to just take it to a chassis shop, have them minitub it, replace the torque boxes, narrow the rear end and 25.5 a cage in the car for me as time will be short foe the next year.
And a couple of pictures for the hell of it.
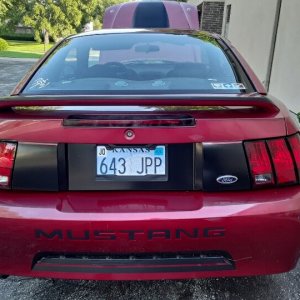
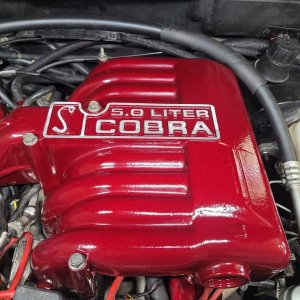
Oh, which brings up a funny story. So i pulled the cobra emblems off the fenders to replace them with something else since this thing is a cobra. So that protective film that is on the double sided tape that your supposed to remove to attach the emblems..... Yea that was attached to the car when i pulled the emblems off. They SUPER GLUED the emblems to the car Without removing the film from the tape.
Its little things like this that reassure me that whoever did the work to this car was a Complete Moron!


From the firewall, the wire goes under the hydroboost unti following the wire harness for the brake reservoir sensor. It then follows the brake lines from the master cylinder to the proportioning valve and forward. Once it reaches the forward tube of the Tubular k, it follows that downwars and then makes the curve at the motor mount tube towards the engine. It then splits off, one wire to the oil pressure sensor, the other then goes between the motor mount and engine block and gets zip ties to the motor mount. It then goes aft towards the trans to the watee temp sensor:

Oil pressure sensor: i needed a 1/4 NPT union, Tee and a 1/8 NPT MIP to FIP. If you dont care about the factory gauge working, you dont need any of that. My OCD about stuff showing opposite indications would go crazy, so i elected not to do that.

For the water temp sensor, you'll need the 3/8 NPT adapter included with the gauge. This fits perfect in the threaded freeze plug location on the driver side rear of the engine block. Have the sensor and adapter preassembled prior to pulling the freeze plug out and you can pull the plug and install the sensor without loosing to much coolant. I probably lost 1 cup, just go fast!
You'll also notice in this photo i put heatshrink over the crimp ring terminal to seal it up from the elements. I did the same for the oil pressure sensor connector.

I also changed the bezel and face plate for the AEM wideband to match the rest of the gauges.

And here is going to be the next big project:

That is the driver side front subframe rail directly under your feet. My guess is someone used a bottle jack to lift the car, causing the subframe to collapse.
To fix it, im likely going to slot the floor between the inside surface of the rails. Then take a BFM and a 2x4 and beat the rails back out as much as possible.
Then i will either place 2x2 .120" wall square steel tubing or 2x3 .120"wall rectangular tubing in the slot from the firewall all the way to the rear frame rail and weld it all in.
The other option is to just take it to a chassis shop, have them minitub it, replace the torque boxes, narrow the rear end and 25.5 a cage in the car for me as time will be short foe the next year.
And a couple of pictures for the hell of it.
Oh, which brings up a funny story. So i pulled the cobra emblems off the fenders to replace them with something else since this thing is a cobra. So that protective film that is on the double sided tape that your supposed to remove to attach the emblems..... Yea that was attached to the car when i pulled the emblems off. They SUPER GLUED the emblems to the car Without removing the film from the tape.
Its little things like this that reassure me that whoever did the work to this car was a Complete Moron!


Thomas_W
Well-Known Member
Got rid of the cobra emblems today and stuck these on:


Thomas_W
Well-Known Member
I finally got some other project out of the way and cleaned/rearranged the garage this past weekend. This allowed me to get the car inside the garage. So with it now inside (its near impossible to work outside in florida during the summer, either from rain or 9.68482742 billion percent humidity), i can get back to work finishing the hood.
Heres a photo showing it as i got it:

Then i hit the hood with a sanding block with some 80 grit paper. You can see how horrible the attempted repair was:

I then when over all the low spots with some 80 grit paper off a block. Then cleaned it all up with acetone:

Then i mixed up some chocolate icing. I mean Epoxy laminating resin and phenolic microballoons. The phenolic balloons thicken the epoxy mixture the more you add. I added enough to give if a slightly thicker consistency of mayo. This was then slapped over all the low spots and a 6" flexible steel body filler spatula to smooth it all over. I purposely left it thick in some areas to allow more leverage in shaping the hood properly.

Once that is all sanded down and the last minute filling and shaping done, i'll sand the entire hood with 80 grit to remove what paint is left, then put a layer of fiberglass down to lock all the phenolic filler down to the hood.
Another option is to make the last fiberglass layer, Carbon Fiber instead.
And the final option is,
Mold the entire hood and just do a custom vacuum bagged Carbon Fiber hood. Im pretty confident i could make this hood weight about 5-6 pounds. And if i mold the fenders to do Carbon fenders (race car status for later) it'd be easy to do a one piece front end
I give you props on all that hood work. I started to do some work to my hood and Im really second guessing myself. Youve got some real skill working with this stuff.
Also, for the record, a one piece front end would be totally awesome!
Now kind of related, kind of not, If the thread inserts where the hinges mount were stripped out how would you fix that? Thats the biggest reason I hate my hood.
Also, for the record, a one piece front end would be totally awesome!
Now kind of related, kind of not, If the thread inserts where the hinges mount were stripped out how would you fix that? Thats the biggest reason I hate my hood.
Thomas_W
Well-Known Member
I give you props on all that hood work. I started to do some work to my hood and Im really second guessing myself. Youve got some real skill working with this stuff.
Also, for the record, a one piece front end would be totally awesome!
Now kind of related, kind of not, If the thread inserts where the hinges mount were stripped out how would you fix that? Thats the biggest reason I hate my hood.
Thanks man!
I'm doing alot of head scratching on exactly what i want this car to become. In one hand, it'd be nice to have a badass street car with ~750-1000rwhp that i could take the family out in to cruise inns and stuff. But in the other hand, theres alot of metal work to be done to fix issues i dont like. When doing all that metal work it would be pretty dang easy to just go ahead and mini-tub the rear, replace both upper and lower torque boxes with stronger drag race oriented stuff, narrow and brace the rear end, put in a cage, tubularize everything forward of the shock towers (the core support needs replaced, i'd rather do a tubular setup).
If it goes more towards race car, i have to keep it somewhat streerable so my son (5) can go for rides as he loves this thing and he has only gotten to ride in it twice.
Decisions decisions.
As far as your hood, i would try a helicoil first
if that doesnt work, i'd buy a cheap $15-20 boroscope off ebay to see exactly what the mounting plate looks like and how its installed. Then i'd come up with a plan from there.
I like the idea of having an truly bad ass street car. I like to drive my stuff so it has to keep some sort of street-ability. Even then, you are talking way outside my league. Im over here with a n/a car lol. I also like driving hard on the street and in the turns so the tubbed rear end just doesnt work out for me.
As for my hood, well, it seems like the inserts were put into the fiberglass and the insert isnt holding anymore. Ive been thinking about ways to cut into it and install a steel plate that is tapped but I dont know how to go about it.
Thomas_W
Well-Known Member
Hmm.......
in that case, if there is a flat area on the inner liner where it hits the firewall, i would try and cut out a rectangular window as small as possible to get a good look inside. Then do like you mention with a steel plate that has been tapped. I would probably flush pop rivet it in place as getting in there to bond ig will be difficult without making a sizeable hole.
in that case, if there is a flat area on the inner liner where it hits the firewall, i would try and cut out a rectangular window as small as possible to get a good look inside. Then do like you mention with a steel plate that has been tapped. I would probably flush pop rivet it in place as getting in there to bond ig will be difficult without making a sizeable hole.
Thomas_W
Well-Known Member
Now that im home for a few days, i did some sanding on the hood.


so far there are a few low spots in the sanded areas, most are very small so there looks to be definitely at least one more application of filler.


so far there are a few low spots in the sanded areas, most are very small so there looks to be definitely at least one more application of filler.
Frank.JD.Perez
Legend
I sense carbonium fibers...