the momstang rebuild begins TOOK A TRIP AROUND THE BLOCK!

OP
OP
ttocs

ttocs

Post Whore
Joined
Oct 9, 2009
Messages
32,623
Reaction score
5,653
Location
Evansville Indiana
yea its nice to see it coming along and motivating at the same time. The lack of the perfect gap between the panels sent me out for another hour after dinner with the file to line it up better. I need to weld in a piece behind what was the stock lower fender(now the upper rocker) so that the fender will rest aginst it but I think when everything is smoothed out it should be ok. Will probably leave that side as it is now until the frame gets tweeked and then feather it in perfectly.
 
OP
OP
ttocs

ttocs

Post Whore
Joined
Oct 9, 2009
Messages
32,623
Reaction score
5,653
Location
Evansville Indiana
I am leaving just a mm of extra material right now that I will take down the rest of the way when its ready. I know about measure twice cut once, and when I can't measure it means trim/fit/repeat 12 dozen times.
 
OP
OP
ttocs

ttocs

Post Whore
Joined
Oct 9, 2009
Messages
32,623
Reaction score
5,653
Location
Evansville Indiana
12 dozen times so the 144th time actually. Work will be delayed a little bit as my brother just got into town. He will be showing me how to work the welder I bought last month though so its not wasted time as much as studying for the big test to do it on my car. Got some more parts from stage 3 today! Who would not love to get this box?!
16296917_large.jpg
 
OP
OP
ttocs

ttocs

Post Whore
Joined
Oct 9, 2009
Messages
32,623
Reaction score
5,653
Location
Evansville Indiana
16297074_large.jpg

Should make it run nice and cool as well as look cool. Decided to polish the tanks just because it will save money since I already have all the stuff to do polish it with.
 
OP
OP
ttocs

ttocs

Post Whore
Joined
Oct 9, 2009
Messages
32,623
Reaction score
5,653
Location
Evansville Indiana
Progress today but no pics as it would not look much different then I left it above. I spent some time and got the pass side fender cuts lined up at the bottom and was even able to put the fender bolts in and get everything lined up. The fender now ends at the same point as the door, and I will weld a piece on the bottom so the fender can rest against it and be lined up. Damn mosquito's chased me out tonight as they were thick and they have found west nile nearby. Will return tomorrow with repellant and the welder to finish the job.
 
OP
OP
ttocs

ttocs

Post Whore
Joined
Oct 9, 2009
Messages
32,623
Reaction score
5,653
Location
Evansville Indiana
1239647_515551415193010_1491705322_n.jpg

I started off by plug-welding a "flange" to the bottom of the old fender. Be kind on the welds, its the 5th time I have ever turned the a machine on and the first time doing it on the car and by myself. Any ideas on how to make them better I would love to hear. Later I will fill the area from the rocker to just above those holes with filler all the way down the door to smooth everything out the way it should be.
1235123_515551438526341_1578992241_n.jpg

I think they line up fairly nicely and after they are finished/painted it should not draw much attention to the change.
1235394_515551391859679_1474729133_n.jpg

Tired of it looking like this, only one way to fix that.....
 
OP
OP
ttocs

ttocs

Post Whore
Joined
Oct 9, 2009
Messages
32,623
Reaction score
5,653
Location
Evansville Indiana
same thing on the drivers side.
1187304_516077118473773_757956853_n.jpg


They are both ready for filler now. Guess I need to see how the hood fits between them with the gaps and then its time to pull the motor and frame tweek.
 
OP
OP
ttocs

ttocs

Post Whore
Joined
Oct 9, 2009
Messages
32,623
Reaction score
5,653
Location
Evansville Indiana
559229_516413798440105_1698498430_n.jpg

1234694_516413781773440_96520036_n.jpg

:slowclap:This is just layed on top now to test the fit/gaps so excuse the bump in the back but the gaps are good-to-go! Will talk to the body shop tomorrow to see if they want the motor in/out to do the core replacement and if so then yank it out, if not I will drop it off tomorrow afternoon.
 

Stanimal

Member
Joined
Jan 1, 2013
Messages
186
Reaction score
4
Location
North Jersey
ive never seen a body shop want the motor out to do a rad support or even strut towers. you should be good to go man. looks great
 
OP
OP
ttocs

ttocs

Post Whore
Joined
Oct 9, 2009
Messages
32,623
Reaction score
5,653
Location
Evansville Indiana
The real reason its coming out is for the scot-rod panel installation and painting of the bay. With the radiator out its not like it runs anyway so I thought it might be easier to move around and to replace with the motor out. The shop doing it is a friend of a friend and said they will work with me on the price as long as they can keep it or a week or so and work it between some other projects. Just trying to make it as easy as I can on them to reduce the price...
 
OP
OP
ttocs

ttocs

Post Whore
Joined
Oct 9, 2009
Messages
32,623
Reaction score
5,653
Location
Evansville Indiana
went to the body shop today to see if they had time to do the core support and of course they are busy. Went and ordered the core support, also stopped by pivco to get some filler/sanding blocks and then to harbor freight. I have been wanting a tool-roll-around/dolly to have a place to put tools down while working rather then on/around/under the car. They had this one marked down from $259 to 150, $110 with coupon. Gives me some space to grow into and plenty of space to work.
16313498_large.jpg

Not gonna lie, was feeling good and wanting to do something on the car mainly some welding so I figured I DON'T NEED NO STUPID ANTENNA!!! I started off by putting masking tape over the hole and then carefully cut the hole out so I had a pattern to use.

16313505_large.jpg

I put the tape down on the other fender on the other side about the same location so the bend would be the same and then carefully cut it out.
16313508_large.jpg

After cutting it out I used magnets to hold it in place so I could weld it.
16313509_large.jpg

after some sparks.
16313520_large.jpg

I was able to fill one of the mounting holes but not the other two. Should I just throw a screw in them and then tach them or or wad up some welding wire?
16313523_large.jpg

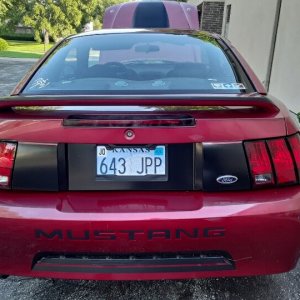
Needs some more sanding work and then a thin layer of putty(after the rest of the fender is stripped) and WHAT ANTENNA?! Going to start stripping the trunk lid so I can mold the S281 spoiler and the license plate frame-thingy. Was looking for panel bonding adhesive today and it seems only napa has it available and its $60 for the tube and $85 fore the special gun that mixes the epoxy as it exposes it. Anyone have any other suggestions? I need to bond the S281, license plate frame and the shinoda chin to the front bumper so $60 a tube I might start to look at a case to cover the area I need too..
 

the5.ohh

Legend
Joined
Oct 15, 2012
Messages
9,561
Reaction score
129
Location
Shaolin, NY
Looks good man. $110 for that tool tray is a steal! You could try the top of a bolt to weld into place or just cut a small piece of metal that exact size and weld that, you might be better off.
 
OP
OP
ttocs

ttocs

Post Whore
Joined
Oct 9, 2009
Messages
32,623
Reaction score
5,653
Location
Evansville Indiana
I am not going to say its snap-on quality by any means while putting it together I noticed a run in the paint the chrome/metal lock rails for the top were slightly rusting already. But some WD40 on those, who gives a crap about the paint, it actually has bearings on the drawers and heavy duty casters and the rubber drawer lining included. When I pulled out of napa they had one that the only difference I could see(other then nice paint) was that it had some plastic bumpers on the corners, and a $380 price tag. Deal is supposed to be good till sept 30 if anyone else has needed one.
 
OP
OP
ttocs

ttocs

Post Whore
Joined
Oct 9, 2009
Messages
32,623
Reaction score
5,653
Location
Evansville Indiana
Anyone ever realized how stupid it is to have a hole in your trunk besides me? I mean water could get in, or a thief might jimmy the lock and get into your trunk so what they heck good is a keyhole in it anyways?! It also doesn't look all that great either, so OFF IT GOES! In reality I am moving the lock/key to behind the license plate behind a flip up plate so its still there and can still be used but just not ugly. I will have my cake and eat it too although I can't tell you how disappointed I was to realize as soon as the cutting wheel hit it that it was a plastic/composit piece and not metal. I WANTED TO MAKE SPARKS and learn a little more I mean this putty crap I know about already.
543435_517336005014551_611145681_n.jpg
 

chris91

Well-Known Member
Joined
Apr 20, 2007
Messages
3,761
Reaction score
200
Location
Cincinnati, OH
Nice progress man! I picked up that same cart about a year ago and have most of my tools in it. Its really amazing everything you can fit in it. I have the top full of all my sockets and rachets and the drawers house everything else. Definitely worth the price.
 

Musturd

Post Whore
Joined
Feb 12, 2011
Messages
10,486
Reaction score
2,241
Awesome progress man ... Can't wait to see more updates I love the shaved antenna and the keyhole shaving on the trunk
 

Latest posts

Forum statistics

Threads
77,497
Messages
1,503,773
Members
14,965
Latest member
wbarter

Members online

Top