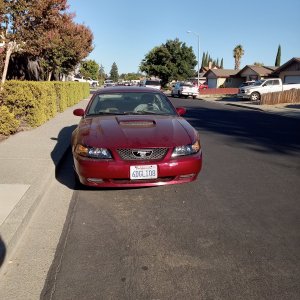
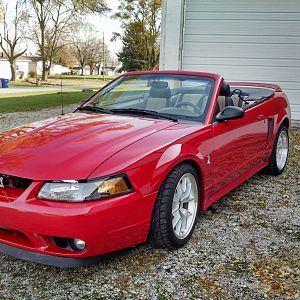
FastballRacing
New Member
- Joined
- Oct 10, 2021
- Messages
- 92
- Reaction score
- 84
** ALL PICTURES POSTED IN COMMENTS - IM OVER MY FORUM WORD COUNT **
My Mechanical Experience: 24 Years Old Novice, Have only installed basic Bolt Ons. Decided to Jump Straight into this.
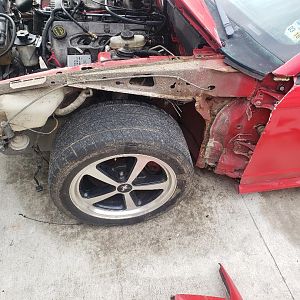
Day 1 - Teardown Down:
Removed Hood
Removed Front Bumper
Removed Crashbar
Removed Cold Air Intake
Removed Intake
Removed Cooling Fan
Removed AC Pulley
Removed Smog Pulley
Removed Injectors
Removed Spark Plugs
Removed Headers
Drained Oil

Day 2: Cutting day/Boost/AFR Guage Install
There wasn't too much cutting involved in this kit, I have read in the past about this kit needed a ton of modifications for Installation. I believe ON3 has revised this kit and it is way better this time around. I have friends that have the older Kit on their car and had to cut a ton & modify pipes etc.
Cuts Needed:
Passenger Inner Fender Well so I can fit cold side piping through it on the angle needed to fit into the BBK 70mm Throttlebody

Directly Below the Turbo to run hosing to the oil pan

Boost Guage/AFR Guage Install

AFR Guage Wiring Was Ran But Not Installed, Decided to not do Clock Bezel and needed to order a different Guage Pod
Day 3: Sourcing Bolts since the Kit didn’t come with every bolt/nut.
{Description} of Bolts, I needed to Source
Day 4: Injectors Install/Spark Plugs/Headers
I installed 44# Injectors/I gapped the Spark Plugs to .026 - Advice from my buddies who are running an on3 kit already.
Headers
This was a fairly easy Install, On3 Supplied the Header Bolts & Gaskets in my Kit.
Two Steps I wish I did before I put the passenger Header on the car.
1) Angle the Bottom Right Bolt hole on the turbo connection, The Bolts hit the header it self making it impossible to get a bolt on.
1A) Grind down the hole enough to angle a bolt in there.
2) Mount the Turbo on the header before installing the header.
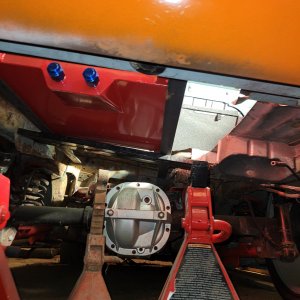
Day 5: Removed Bell Housing on Trans/ Dropped Oil Pan & Replaced with a Tapped Pan
I Unfortunately do not have any pictures from this day. It was a very long and frustrating day lol.
On the Bell Housing there is bolts on the front of it that need to be removed.
Once you have those removed, you will need jack to motor up (I used a cherry picker).
When the Motor is up high enough you will need to drop the Oil Pan from the bottom of the motor and finagle it forward out of the car.
Luckily, I have a friend that had an extra Tapped Pan for me to use.
I had installed the new pan with the new Gasket {Insert Gasket Link}
Dropped the Motor back on the Motor Mounts
Day 6: Clocked Turbo & Mounted Turbo onto Header / Tucked all Wires that ran too close to Pipes/Headers
Clocking the Turbo was fairly easy, You just need to make sure your Oil Feed Line Adapters are 100% Vertical.
On the back of the Turbo there is bolts covered in Yellow residue that need to be loosened enough to spin the turbo.
I recommend keeping them semi loose until you have cold piping ran, that way you can make the angle perfect.
Day 7: Ran Hotside pipes/Crossover Tube, mounted Intercooler
Hotside Pipes were honestly the hardest pipe.
My issue I was having is the first pipe that comes off the Turbine is touching my valve cover & the strut tower.
Which made getting a clamp on there difficult, while making sure I had clearance from the Throttle body under full WOT.
Next was running the downpipe off the turbine pipe, Biggest thing is to look under the car and make sure you have ground clearance.
On that Downpipe is where you will hook up your Sensor that feeds into your Boost Guage.
Crossover Tube
From Videos I have seen on YouTube and read on forums. People complain that On3 did not give the best clearance for the Crossover Tube.
My Experience was very different, it fit great there was no clearance issues. Clamped right up to both set of headers with no issues.
Mounted Intercooler
As you guessed it, the Intercooler goes right up front lol.
On3 Supplied Intercooler brackets, pop off the bolts that are holding the airbag sensors in place.
Place the Brackets underneath those airbag sensors bolt it back in and your bracket is mounted.
Day 8: Ran Coldside Pipes, Mounted BOV & Wastegates
So remember where I was talking about cutting your inner passenger fender well?
This is why it is important.
Coldside Pipe running off your Throttlebody (You should have a MAF welded onto it, if not you'll have to order one from ON3)
This Pipe runs into your Inner Fender well and connects to the Intercooler U-Pipe.
Once you have that Coupled together, you'll work on the Drivers side of the Intercooler piping.
Which is the U shaped pipe that feeds into the long cold side pipe that feeds off the turbo.
Last but not least you have that really long cold side pipe that comes off the turbo, you'll have to snake that under the car and under pulleys to get the angle correct.
BOV
In my kit I received a 50mm BOV.
The BOV mounts right on the U-pipe coming off the intercooler
Wastegates
In my Kit I have dual Wastegates
The First Wastegate the easier one to access, attaches right on the Crossover Tube
The Second Wastegate which is easy to install as well is underneath the Passenger Header, you'll see an open hole on the header itself.
Day 9: Sending Unit Oil Extension/Oil Breather/Vacuum Lines/Added Fluids
This wasn't too bad of a process other then, cramming your hand in a tight space and the bloody knuckles.
In the Kit there is a Brass Tee with two male ends and Female End & an angled end.
The Oil Feed goes into the 45 Degree fitting
While your sending unit goes into the Straight End
Oil Breather
I planned on doing a canister but, I ran out of room in the engine bay for the size I had so I improvised.
I fed a small line off the valve cover oil cap and attached a breather filter. It is temporary.
Vacuum Lines
Since I do not have a Boost controller yet, My vacuum lines are ran without it.
Since my Speed Control Doesn't work in my car. I opted to run my lines off S/C
The First Line I ran came off the BOV, I fed that along the bodylines and zip tied it away from the header and kept it hidden as much as possible.
Once I got that to where i'd like in length, I cut the hose and teed off the line into the boost guage module.
Wastegate Vacuum Lines
There is a port feeding off the backside of the Intake, I ran my line from there.
I ran the line along my firewall down into the fender well, zip-tieing it there away from hotside pipes.
Once you get to the Wastegate since I am not running a boost controller. I only attached the line to do the bottom port.
From there I teed off and ran the line to the other bottom port of the second wastegate
Vacuum Line only took about 20 minutes to run & make sure it wasn't touching any hotside/headers.
I added Oil Back into the Car this day.
Day 10: Swapped ECU/Put back interior of Car
The ECU is a fairly easy process.
Remove the kick panel
Inside there you will see the ECU & sensors etc.
Grab a 7/32 Socket for the small bolt on the white bracket, 8MM for the ground bolt, & 10mm for the ECU Bolt.
Install the New ECU & Put bolts back in placed
Put the Kick panel back together
Day 11: Startup Day - No Spark. Bought new Coil, No Spark. Checked all grounds, they’re tight and in the right spot. Bought new Distributor, testing today.
Startup DAY!!!
Well.. Start up day did not go as planned. No Spark, Checked Every Ground all were in place and tight.
Purchased New Coil - No Luck
Purchased New Distributor - Testing Today (10/12/21)
Reason For New Coil: The one I had on it before was probably 8 years old, time for a new one anyways.
Reason for New Distributor: Its the OEM Distributor, After looking at it there was some rust/metal debris inside of it. To note also, ran test lights on it and the PIP was coming out "dead" so hopefully assuming the Distributor is the issue here.
Tested:
Grounds.
Battery.
Old ECU created No Spark, so can't be the new ECU.
Did not touch Distributor during the whole process so timing should be correct.
Spark Plugs are fully in place.
Day 12: Dropped Fuel Tank/Install of Fuel Pump
I haven't done this step yet, Trailering car up to my work to put it on a Lift to do this process.
Vehicle Mods/Parts I Ordered and Needed During Process
In Comments
Waiting on Dyno Time & Tuning Time
Pictures will be updated throughout the week so will the description. Just setting the page up as much as I remember for now!
Drop a Follow on IG: www.instagram.com/Fastballracing
My Mechanical Experience: 24 Years Old Novice, Have only installed basic Bolt Ons. Decided to Jump Straight into this.
Day 1 - Teardown Down:
Removed Hood
Removed Front Bumper
Removed Crashbar
Removed Cold Air Intake
Removed Intake
Removed Cooling Fan
Removed AC Pulley
Removed Smog Pulley
Removed Injectors
Removed Spark Plugs
Removed Headers
Drained Oil
Day 2: Cutting day/Boost/AFR Guage Install
There wasn't too much cutting involved in this kit, I have read in the past about this kit needed a ton of modifications for Installation. I believe ON3 has revised this kit and it is way better this time around. I have friends that have the older Kit on their car and had to cut a ton & modify pipes etc.
Cuts Needed:
Passenger Inner Fender Well so I can fit cold side piping through it on the angle needed to fit into the BBK 70mm Throttlebody
Directly Below the Turbo to run hosing to the oil pan
Boost Guage/AFR Guage Install
AFR Guage Wiring Was Ran But Not Installed, Decided to not do Clock Bezel and needed to order a different Guage Pod
Day 3: Sourcing Bolts since the Kit didn’t come with every bolt/nut.
{Description} of Bolts, I needed to Source
Day 4: Injectors Install/Spark Plugs/Headers
I installed 44# Injectors/I gapped the Spark Plugs to .026 - Advice from my buddies who are running an on3 kit already.
Headers
This was a fairly easy Install, On3 Supplied the Header Bolts & Gaskets in my Kit.
Two Steps I wish I did before I put the passenger Header on the car.
1) Angle the Bottom Right Bolt hole on the turbo connection, The Bolts hit the header it self making it impossible to get a bolt on.
1A) Grind down the hole enough to angle a bolt in there.
2) Mount the Turbo on the header before installing the header.
Day 5: Removed Bell Housing on Trans/ Dropped Oil Pan & Replaced with a Tapped Pan
I Unfortunately do not have any pictures from this day. It was a very long and frustrating day lol.
On the Bell Housing there is bolts on the front of it that need to be removed.
Once you have those removed, you will need jack to motor up (I used a cherry picker).
When the Motor is up high enough you will need to drop the Oil Pan from the bottom of the motor and finagle it forward out of the car.
Luckily, I have a friend that had an extra Tapped Pan for me to use.
I had installed the new pan with the new Gasket {Insert Gasket Link}
Dropped the Motor back on the Motor Mounts
Day 6: Clocked Turbo & Mounted Turbo onto Header / Tucked all Wires that ran too close to Pipes/Headers
Clocking the Turbo was fairly easy, You just need to make sure your Oil Feed Line Adapters are 100% Vertical.
On the back of the Turbo there is bolts covered in Yellow residue that need to be loosened enough to spin the turbo.
I recommend keeping them semi loose until you have cold piping ran, that way you can make the angle perfect.
Day 7: Ran Hotside pipes/Crossover Tube, mounted Intercooler
Hotside Pipes were honestly the hardest pipe.
My issue I was having is the first pipe that comes off the Turbine is touching my valve cover & the strut tower.
Which made getting a clamp on there difficult, while making sure I had clearance from the Throttle body under full WOT.
Next was running the downpipe off the turbine pipe, Biggest thing is to look under the car and make sure you have ground clearance.
On that Downpipe is where you will hook up your Sensor that feeds into your Boost Guage.
Crossover Tube
From Videos I have seen on YouTube and read on forums. People complain that On3 did not give the best clearance for the Crossover Tube.
My Experience was very different, it fit great there was no clearance issues. Clamped right up to both set of headers with no issues.
Mounted Intercooler
As you guessed it, the Intercooler goes right up front lol.
On3 Supplied Intercooler brackets, pop off the bolts that are holding the airbag sensors in place.
Place the Brackets underneath those airbag sensors bolt it back in and your bracket is mounted.
Day 8: Ran Coldside Pipes, Mounted BOV & Wastegates
So remember where I was talking about cutting your inner passenger fender well?
This is why it is important.
Coldside Pipe running off your Throttlebody (You should have a MAF welded onto it, if not you'll have to order one from ON3)
This Pipe runs into your Inner Fender well and connects to the Intercooler U-Pipe.
Once you have that Coupled together, you'll work on the Drivers side of the Intercooler piping.
Which is the U shaped pipe that feeds into the long cold side pipe that feeds off the turbo.
Last but not least you have that really long cold side pipe that comes off the turbo, you'll have to snake that under the car and under pulleys to get the angle correct.
BOV
In my kit I received a 50mm BOV.
The BOV mounts right on the U-pipe coming off the intercooler
Wastegates
In my Kit I have dual Wastegates
The First Wastegate the easier one to access, attaches right on the Crossover Tube
The Second Wastegate which is easy to install as well is underneath the Passenger Header, you'll see an open hole on the header itself.
Day 9: Sending Unit Oil Extension/Oil Breather/Vacuum Lines/Added Fluids
This wasn't too bad of a process other then, cramming your hand in a tight space and the bloody knuckles.
In the Kit there is a Brass Tee with two male ends and Female End & an angled end.
The Oil Feed goes into the 45 Degree fitting
While your sending unit goes into the Straight End
Oil Breather
I planned on doing a canister but, I ran out of room in the engine bay for the size I had so I improvised.
I fed a small line off the valve cover oil cap and attached a breather filter. It is temporary.
Vacuum Lines
Since I do not have a Boost controller yet, My vacuum lines are ran without it.
Since my Speed Control Doesn't work in my car. I opted to run my lines off S/C
The First Line I ran came off the BOV, I fed that along the bodylines and zip tied it away from the header and kept it hidden as much as possible.
Once I got that to where i'd like in length, I cut the hose and teed off the line into the boost guage module.
Wastegate Vacuum Lines
There is a port feeding off the backside of the Intake, I ran my line from there.
I ran the line along my firewall down into the fender well, zip-tieing it there away from hotside pipes.
Once you get to the Wastegate since I am not running a boost controller. I only attached the line to do the bottom port.
From there I teed off and ran the line to the other bottom port of the second wastegate
Vacuum Line only took about 20 minutes to run & make sure it wasn't touching any hotside/headers.
I added Oil Back into the Car this day.
Day 10: Swapped ECU/Put back interior of Car
The ECU is a fairly easy process.
Remove the kick panel
Inside there you will see the ECU & sensors etc.
Grab a 7/32 Socket for the small bolt on the white bracket, 8MM for the ground bolt, & 10mm for the ECU Bolt.
Install the New ECU & Put bolts back in placed
Put the Kick panel back together
Day 11: Startup Day - No Spark. Bought new Coil, No Spark. Checked all grounds, they’re tight and in the right spot. Bought new Distributor, testing today.
Startup DAY!!!
Well.. Start up day did not go as planned. No Spark, Checked Every Ground all were in place and tight.
Purchased New Coil - No Luck
Purchased New Distributor - Testing Today (10/12/21)
Reason For New Coil: The one I had on it before was probably 8 years old, time for a new one anyways.
Reason for New Distributor: Its the OEM Distributor, After looking at it there was some rust/metal debris inside of it. To note also, ran test lights on it and the PIP was coming out "dead" so hopefully assuming the Distributor is the issue here.
Tested:
Grounds.
Battery.
Old ECU created No Spark, so can't be the new ECU.
Did not touch Distributor during the whole process so timing should be correct.
Spark Plugs are fully in place.
Day 12: Dropped Fuel Tank/Install of Fuel Pump
I haven't done this step yet, Trailering car up to my work to put it on a Lift to do this process.
Vehicle Mods/Parts I Ordered and Needed During Process
In Comments
Waiting on Dyno Time & Tuning Time
Pictures will be updated throughout the week so will the description. Just setting the page up as much as I remember for now!
Drop a Follow on IG: www.instagram.com/Fastballracing
Last edited: