94 GT build thread

riored4v

Member
Joined
Feb 25, 2015
Messages
204
Reaction score
12
Location
Aurora, CO
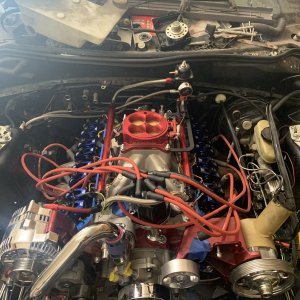
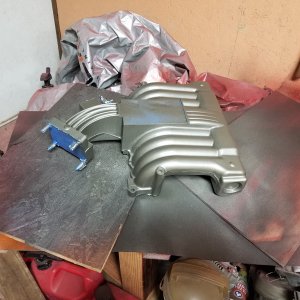
Figured I'd finally post a build thread now that I have made some decent progress. Long ways still to go though.

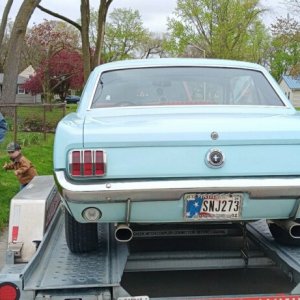
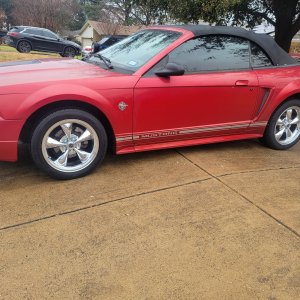
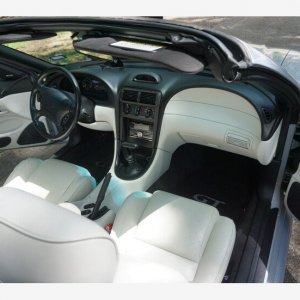
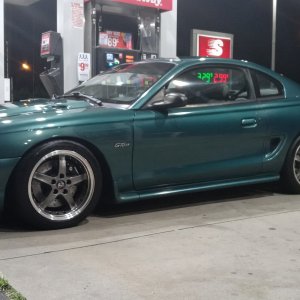
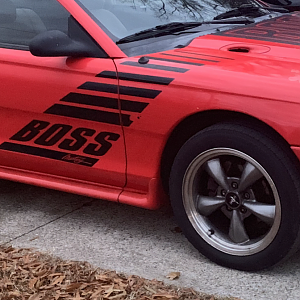
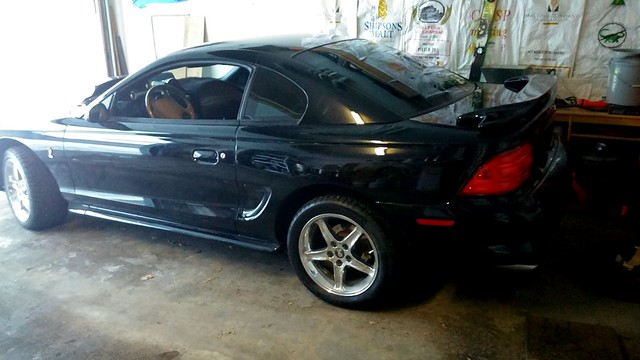
Picked up the car in Feb. 2015. Met the guy half way, looked decent enough and decided to bring it home. Had some decent mods already done to it that I would have done anyways so that helped factor in to the decision along with it being clean overall.
0224152039a by riored4v, on Flickr


0225151740 by riored4v, on Flickr

0225151739 by riored4v, on Flickr

0225151738 by riored4v, on Flickr

0225151739a by riored4v, on Flickr

0606151336 by riored4v, on Flickr

0606151337a by riored4v, on Flickr
 
OP
OP
R

riored4v

Member
Joined
Feb 25, 2015
Messages
204
Reaction score
12
Location
Aurora, CO
OP
OP
R

riored4v

Member
Joined
Feb 25, 2015
Messages
204
Reaction score
12
Location
Aurora, CO
With interior somewhat completed I figured I'd give the taillights the coat of paint they needed.

IMG_20150507_184904 by riored4v, on Flickr

0516151359 by riored4v, on Flickr

This ended up being a major pain in the a**. The paint didn't like the primer and decided to wrinkle/peel off the plastic.
0517151432 by riored4v, on Flickr

.. starting over
0521151632 by riored4v, on Flickr

repainted but now the housing was jacked thanks to cleaner used (totally my fault)
0522151803 by riored4v, on Flickr

Sooo.. sanded and smoothed the housing. I actually think it turned out better this way.
0526151802 by riored4v, on Flickr
 
OP
OP
R

riored4v

Member
Joined
Feb 25, 2015
Messages
204
Reaction score
12
Location
Aurora, CO
Moving back to the interior and gauges.

Overlays that previous owner installed were something I didn't care for.
0724152123 by riored4v, on Flickr

Received the new ones from Black Cat and painted the gauge needles with some fingernail paint. But, having never done the needles before I didn't realize I needed to take them totally apart before painting lol. Oops. I also installed the new Speed of Sound gauge pod and Speedhut gauges.

0822151545 by riored4v, on Flickr

As part of the additional gauges, I chose to keep the stock oil pressure gauge functional and added in a second sensor.
1010151311 by riored4v, on Flickr

Another pic along with the new Wazee idler pulley
1010151311a by riored4v, on Flickr

Also decided to upgraded the audio a bit. I'll end up finishing this later on. For now just upgraded the door/deck speakers.
0723151848 by riored4v, on Flickr

0723151832 by riored4v, on Flickr

More refreshing with some Redline Goods products
0826151759d by riored4v, on Flickr

shift boot
1023151951a by riored4v, on Flickr

ebrake boot
1024151323 by riored4v, on Flickr

New DIY rear seat delete
1010151606 by riored4v, on Flickr

1024151547b by riored4v, on Flickr


aaaand back to repainting the needles. Found some fluorescent red paint on eBay that looked like it would match well.
1023151951 by riored4v, on Flickrworked out pretty good!
1107151340_HDR by riored4v, on Flickr
 
OP
OP
R

riored4v

Member
Joined
Feb 25, 2015
Messages
204
Reaction score
12
Location
Aurora, CO
OP
OP
R

riored4v

Member
Joined
Feb 25, 2015
Messages
204
Reaction score
12
Location
Aurora, CO
While working on the interior and with it being winter, I decided to add more power since the car was a total turd. I'll focus back on the interior once I get this portion of the build done.

Decided to add:
FTI prepped TW170's
FTI cam
Comp Cams Magnum rockers
Rollmaster timing set
all ARP bolts/studs
Pioneer SFI balancer
BBK ceramic LT's
VRS catted X-pipe
Borla XR1 catback
braided fuel lines
AFM power pipe
new pullies
Lightning MAF
42lb injectors
Aeromotive 340lph fuel pump
several other items that I know i'm forgetting. Do all this to prep for boost later on.

engine torn down
2016-02-22_03-41-40 by riored4v, on Flickr

cleaned up the ports on the BBK headers
-before-
0208161414 by riored4v, on Flickr

-after-
0222161813a by riored4v, on Flickr

some cleaning and painting done
0305161119 by riored4v, on Flickr

installing the cam
0319161128 by riored4v, on Flickr

and where i'm currently with the car
0319161538 by riored4v, on Flickr
 
OP
OP
R

riored4v

Member
Joined
Feb 25, 2015
Messages
204
Reaction score
12
Location
Aurora, CO
Thanks man. Yea, it's been a busy year with it. I just received notice to renew registration and was making the joke how its costing me more in registration than it is gas lol. It's been fun so far though!
 
OP
OP
R

riored4v

Member
Joined
Feb 25, 2015
Messages
204
Reaction score
12
Location
Aurora, CO
After talking it over with a few people, we figured out that the pushrod length seemed wrong. Turned out the checking tool was bent so I measured again this weekend. Now I can FINALLY get those ordered:headbang:

Once I re-measured those I made some more progress on getting things back together. Got the driver side accessories put back in place and then I realized the previous owner only used 1 bolt on the accessory bracket. So, now I have to find two more bolts for that before putting it back together.

Hoping this next weekend I can get rest of the accessories done, intake on, pushrods in and get the majority of it all buttoned up so I can finish up installing the exhaust and suspension parts.

New balancer:
0402161722 by riored4v, on Flickr

0402161724 by riored4v, on Flickr

Not much progress, but it's slowly getting there.
0402161723a by riored4v, on Flickr
 
OP
OP
R

riored4v

Member
Joined
Feb 25, 2015
Messages
204
Reaction score
12
Location
Aurora, CO
Went back at it for a bit this weekend. Received my new Comp Cams Hi-Tech pushrods (6.850") so I installed those and finished up adjusting the rockers.

0409161217 by riored4v, on Flickr

Had a dilemma thanks the previous owner. Realized he didn't install 2 of the 3 driver side accessory bracket bolts. So after spending some time tracking those down I was finally able to secure it like it should have been. Also got around to installing the lower intake and some more of the emission stuff.

0409161455 by riored4v, on Flickr

Also installed my new Lokar dipstick

2016-04-11_11-49-32 by riored4v, on Flickr

Went to go install the valve covers, but those no longer fit. Working out figuring a solution for those next so that I can continue putting it all back together.
 

ElrodKTPQ_89

Legend
Joined
Aug 6, 2013
Messages
5,439
Reaction score
794
Location
Crossett, AR
What rockers are those? They look like the same kind I just bought... Also what dipstick is that? I will have to have one for my 347 once I get it together.
 
OP
OP
R

riored4v

Member
Joined
Feb 25, 2015
Messages
204
Reaction score
12
Location
Aurora, CO
What rockers are those? They look like the same kind I just bought... Also what dipstick is that? I will have to have one for my 347 once I get it together.

Yup, same rockers I believe. Comp Cams Ultra Pro Magnums (1.6). Be prepared to look for new valve covers lol. Dipstick is a Lokar (http://www.summitracing.com/parts/lok-ed5004). Fitment was great on it.
 

Latest posts

Forum statistics

Threads
78,527
Messages
1,535,650
Members
16,185
Latest member
dmen76

Members online

Top