94 GT build thread

OP
OP
R

riored4v

Member
Joined
Feb 25, 2015
Messages
204
Reaction score
12
Location
Aurora, CO
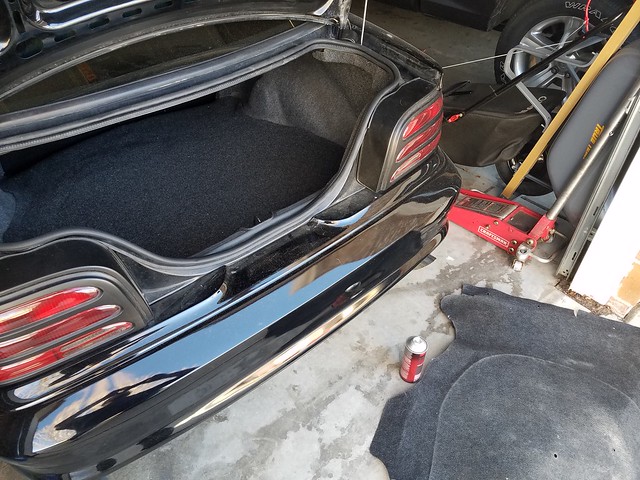
Hadn't really done much with the car while I was fightning to get it through emissions. 5th try I was finally able to get it to pass though. Finished up installing my door lock rods that had been missing, installed new door locks and ignition tumbler so I'll have a set of matching keys finally too.

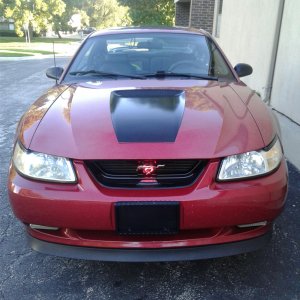
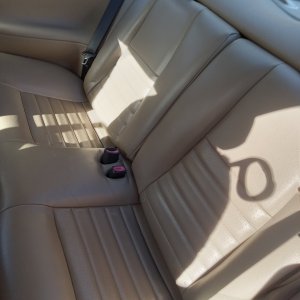
Since I was able to get the door panels back on I decided to clean it up and take it out for a drive.

2017-07-11_11-56-24 by riored4v, on Flickr
 
OP
OP
R

riored4v

Member
Joined
Feb 25, 2015
Messages
204
Reaction score
12
Location
Aurora, CO
Finally found someone to swap seats with. Decided to take the SVE seats out since I pretty much hated them aside from their looks. Found someone with a set of s197 seats to swap straight across with. Picked up a set of manual seat rails to go with them and tossed them in the car. I'm liking these WAAAY more. More comfortable, perfect height and I think they still look great in the car.

Removed the factory rails on the s197 seats:
20170928_171624 by riored4v, on Flickr

Installed a set of 94-98 manual rails:
20170928_180301 by riored4v, on Flickr

All cleaned up and conditioned:
20171006_151221 by riored4v, on Flickr
 

stingracer

Member
Joined
Feb 8, 2009
Messages
170
Reaction score
8
Finally found someone to swap seats with. Decided to take the SVE seats out since I pretty much hated them aside from their looks. Found someone with a set of s197 seats to swap straight across with. Picked up a set of manual seat rails to go with them and tossed them in the car. I'm liking these WAAAY more. More comfortable, perfect height and I think they still look great in the car.

Removed the factory rails on the s197 seats:
20170928_171624 by riored4v, on Flickr

Installed a set of 94-98 manual rails:
20170928_180301 by riored4v, on Flickr

All cleaned up and conditioned:
20171006_151221 by riored4v, on Flickr
Seats look perfect in there. Nice effort!

Sent from my Nexus 5X using Tapatalk
 
OP
OP
R

riored4v

Member
Joined
Feb 25, 2015
Messages
204
Reaction score
12
Location
Aurora, CO

ElrodKTPQ_89

Legend
Joined
Aug 6, 2013
Messages
5,319
Reaction score
487
Location
Crossett, AR
Just noticed that your car has some tiny exhaust tips lol. I like what you did with the trunk. I actually am planning on doing something like that with mine one day this week. What did you use for the new trunk floor over the spare tire?
 
OP
OP
R

riored4v

Member
Joined
Feb 25, 2015
Messages
204
Reaction score
12
Location
Aurora, CO
Just noticed that your car has some tiny exhaust tips lol. I like what you did with the trunk. I actually am planning on doing something like that with mine one day this week. What did you use for the new trunk floor over the spare tire?

Somehow overlooked this, sorry about that. Tips are probably 3" or so since the piping is 2.5". It's a Borla catback.

For the floor I just used some 1/2" MDF i had laying around. I put that factory piece on top of it and just traced around it, and added about 1" extra to give it more overlap. Quick and easy project.
 
OP
OP
R

riored4v

Member
Joined
Feb 25, 2015
Messages
204
Reaction score
12
Location
Aurora, CO
Got around to finishing up the stereo. Between vacation and house projects, it's been pretty slow going.

Didn't like how the front speakers sounded so I decided to ditch them in favor of a set of components.
20180331_135914 by riored4v, on Flickr

20180509_180805 by riored4v, on Flickr

With the trunk floorboard and panels all being cleaned up and redone, I was able to install the new subs and box.
20180612_180929 by riored4v, on Flickr

Ran all my wiring, fuses, etc and mounted everything to my rear seat delete.
20180612_180903 by riored4v, on Flickr

For a somewhat budget stereo, i'm happy with how it turned out.

Moving on to my next project (gauge courtesy of Speedhut to match my other gauges).....

20180612_181023 by riored4v, on Flickr
 

TollRoad

New Member
Joined
Feb 6, 2018
Messages
1
Reaction score
0
what a great job, wow....Backspacing on rear wheels? And rear wheel size? Any spacers? Thank you sir..
 
OP
OP
R

riored4v

Member
Joined
Feb 25, 2015
Messages
204
Reaction score
12
Location
Aurora, CO
what a great job, wow....Backspacing on rear wheels? And rear wheel size? Any spacers? Thank you sir..

Thanks!

Rears are 18x10.5 (ET22). There is a small 1/8" spacer on there only because they tossed them in when I bought the wheels.
 
OP
OP
R

riored4v

Member
Joined
Feb 25, 2015
Messages
204
Reaction score
12
Location
Aurora, CO
1 step forward, 2 steps back. Before moving forward with the Vortech install I wanted to clean up a few things. Some of the brittle plastic vacuum were broken and patched so I'm going to replace all those with silicone lines. I discovered some oil in on the lines in the PCV system while pulling it apart so I'm also going to replace all the PCV lines. I found a small crack in the line that connects the PCV valve so I'm hoping that is was caused the oil in the line. While I'm replacing all of them, I decided to just replace rest of the vacuum lines.

The other project will be to replace all the nuts on my header studs. Right now they are the bigger style nuts and I'm swapping them out to the small ARP 12pt nuts which should make them easier to install/remove. I might replace the header gaskets while I'm in there since I think I might have a small leak.

Last piece is my front main seal. I noticed it has been seeping so I wanted to replace it. When I put my cam in I didn't use loctite on the cam bolt and it's always been in the back of my mind, hopeful that it never backed out even though it was torqued. Sooo, since replacing the front main seal I decided to just yank the timing cover and take care of that bolt.

20180630_111747 by riored4v, on Flickr

20180630_111756 by riored4v, on Flickr
 
OP
OP
R

riored4v

Member
Joined
Feb 25, 2015
Messages
204
Reaction score
12
Location
Aurora, CO
Front timing cover is all sealed back up. New vacuum lines ran for under the intake and from the inside the fender. The nuts I ordered for the header studs were the wrong thread pitch so my new ones should get here today and then that will finally be done too.

In the process of installing the Vortech, the 8rib setup and SVE radiator with factory fan wasn't fitting. The pulley was hitting the fan. For the time being I've swapped back to a factory radiator (Spectra) from Summit. I'm hoping this will be enough to support the setup, I've heard mixed results.

Rather than cutting up the factory coolant tubes I decided to make my own. I think it looks a bit cleaner.
2018-07-18_11-52-27 by riored4v, on Flickr

20180717_182051 by riored4v, on Flickr

Had some issues getting the pan tapped for the AN fitting. First fitting I installed had all the threads pulled off when I threaded it in. I bought a new AN fitting along with a brass one to test with. I was hoping I could clean up the threads a little with the brass and it seemed to work. Brass one went in fine so I pulled it out and tossed in the AN fitting and it's ready for some oil. Hoping tonight I can wrap up the exhaust nuts and smog equipment and then move on to mounting the head unit.

20180717_181938 by riored4v, on Flickr
 
OP
OP
R

riored4v

Member
Joined
Feb 25, 2015
Messages
204
Reaction score
12
Location
Aurora, CO
I don't think I ever took any pics of it when I picked it up. I'm pretty excited to get it installed though and see how the car responds.
 
OP
OP
R

riored4v

Member
Joined
Feb 25, 2015
Messages
204
Reaction score
12
Location
Aurora, CO
Found a thread on Corral a while back about converting the stock Vortech drain line over to AN fittings. I liked this idea since I didn't want to use the stock line anyways after reading so many people complaining about it leaking.... plus it's ugly. Grabbed all my fittings and hoses for a -10an setup and went to install it last night...

Lesson learned, it doesn't work. You need to use an extension piece off the blower to make room for the fitting on the hose itself. The problem I ran in to is the angle doesn't work well with the bracket, and since I can't attach the fitting on the hose to the blower itself, there isn't enough room to make it all work. Sigh. Money wasted and lesson learned. Guess it works fine on a Fox setup, not so much on a SN95. So I'm scraping that plan and am going to grab some push-lock hose and fittings and just run a barb off of the blower instead.

20180726_182723 by riored4v, on Flickr

20180726_182613 by riored4v, on Flickr
 
OP
OP
R

riored4v

Member
Joined
Feb 25, 2015
Messages
204
Reaction score
12
Location
Aurora, CO
Found some push-lock locally so I was able to make some more progress. The push-lock setup cleared with no issues. The hole for the power pipe needed to be cut about 3 different times. Their instructions of making a 4.5" hole are inaccurate to say the least. I also plumbed the pcv line from the oil fill neck over the intake and threaded the discharge tube for the ACT sensor. I was missing a couple bolts and random things that I've now picked up. Getting really close to having this thing installed and moving forward.

20180727_171433 by riored4v, on Flickr


20180727_171444 by riored4v, on Flickr
 

ttocs

Post Whore
Joined
Oct 9, 2009
Messages
32,644
Reaction score
5,661
Location
Evansville Indiana
I thought the same thing about the power pipe hole instructions myself they were WAY off. Thankfully I had learned to weld..
 
OP
OP
R

riored4v

Member
Joined
Feb 25, 2015
Messages
204
Reaction score
12
Location
Aurora, CO
Finally got the Vortech install wrapped up. Ran in to some snags with sizing belts and a couple AN fittings pissing oil all over the floor. Turned out there was to much sideways pressure on the tee and the fitting was getting a good seal. Once I got the leak resolved it went pretty smooth from there. Fired right up and is running great. Working on trying to find some time to get in to get retuned

20180823_165653 by riored4v, on Flickr

20180823_165633 by riored4v, on Flickr

20180823_165619 by riored4v, on Flickr

20180823_164739 by riored4v, on Flickr
 

ttocs

Post Whore
Joined
Oct 9, 2009
Messages
32,644
Reaction score
5,661
Location
Evansville Indiana
Finally got the Vortech install wrapped up. Ran in to some snags with sizing belts and a couple AN fittings pissing oil all over the floor. Turned out there was to much sideways pressure on the tee and the fitting was getting a good seal. Once I got the leak resolved it went pretty smooth from there. Fired right up and is running great. Working on trying to find some time to get in to get retuned

20180823_165653 by riored4v, on Flickr

20180823_165633 by riored4v, on Flickr

20180823_165619 by riored4v, on Flickr

20180823_164739 by riored4v, on Flickr

Which an fittings were pissing? I had the same on my fuel rail recently. Not a good place to be pissing....
 

Forum statistics

Threads
77,506
Messages
1,503,996
Members
14,978
Latest member
jarthur1995

Members online

Top