Completed my Coyote Swap

OP
OP
P

Paul

Legend
Joined
Apr 30, 2007
Messages
9,894
Reaction score
247
A couple new parts came in this week while I was working in Vegas.


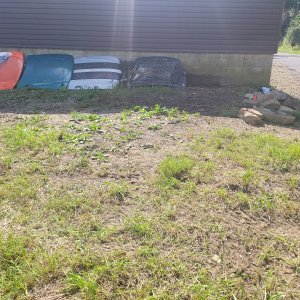
Left - new evap system since my charcoal canister is cracked. This happened while the car was under warranty, but the dealer predictably told me to go **** myself. I might have hit something they said. Morons. Like I can hit something with the underside back of my car so hard that it would crack the canister residing safely BEHIND A HUGE PLASTIC SHIELD. Ridiculous. Meh, I don't have time/patience to fight with stupidity. The whole assembly was only $130 from Tousley.

Middle - new seat warmers to install on my Recaros! Planning on finishing up that project this weekend and enjoying my badass new seats.

Bottom - Roush rear splitters. They match my side splitters.

Top - front mud flaps.


I've got a little work ahead of me to install all this stuff, but nothing particularly difficult I think. The seats will be the toughest part for sure.

Paul.
 

g36 monkey

Post Whore
SN95 Supporter
Joined
Nov 15, 2008
Messages
14,081
Reaction score
596
Location
Orlando, Fl
I'm so excited to see that nailed down! Also interested in the roush stuff!
 

Dalamar

Post Whore
SN95 Supporter
Joined
Feb 3, 2006
Messages
13,863
Reaction score
124
Location
SLC, UT
what button/control goes with the heaters.?

Kinda like you guys in 120 degree phoenix, ;) - I also want to add seat warmers to my build?
where did you get the warmer? would you shoot me some info on it?
 

pilks

Active Member
Joined
Jun 5, 2009
Messages
590
Reaction score
11
Paul this may be a dumb question but how do you know the rear is off center (besides an obvious eyeball) and how do you go about measuring to correct this with the new pan-bar.
 
OP
OP
P

Paul

Legend
Joined
Apr 30, 2007
Messages
9,894
Reaction score
247
Paul this may be a dumb question but how do you know the rear is off center (besides an obvious eyeball) and how do you go about measuring to correct this with the new pan-bar.

I just put a straight-edge from my fender to the ground, then measured the distance to the tire. It's not scientific, but it works.

what button/control goes with the heaters.?

Kinda like you guys in 120 degree phoenix, ;) - I also want to add seat warmers to my build?
where did you get the warmer? would you shoot me some info on it?

Jeff, my seat heaters are OEM. My car had the "comfort package" which provides dual power/heated seats. All the wiring is already in place. However, installing aftermarket heated seats is pretty easy from what I've heard. I know some of the Shelby guys have had luck with the stuff from: http://www.heatedseatkits.com/ These have nice OEM-looking buttons, relays, heater pads, everything. They're actually much warmer than the ones that came in my car.


Paul.
 
OP
OP
P

Paul

Legend
Joined
Apr 30, 2007
Messages
9,894
Reaction score
247
My heated, power, leather Shelby Recaro passenger seat is in… and it works!

Not gonna lie, this is kind of a lot of work. I started this project at 11:30 a.m. today, having already stripped the Recaros down previously, and didn’t finish until after 7 p.m. Of course, I was taking my time and stopped for lunch, but still, it was no picnic. My back is sore and my fingers are cut up.

…and it was so worth it.


Here’s my best shot at a how-to, keeping in mind that I’ve omitted the overwhelming majority of seat disassembly as Tob has covered that exhaustively already.

Here is my factory 401A black premium leather passenger seat. My car has the comfort package so both my front seats are power and heated.

First things first, remove the negative battery cable, and prepare yourself for some work. You need to remove the airbag fuse for safety and to help prevent a potential airbag light later. Or so I’m told. Don’t know where the interior fusebox is? I didn’t either. After some Google-Fu on the internetz, I discovered that it’s in the passenger kick panel. There’s a little door that you pull off, then a paper cover that is taped and velcro’d on.

Bam! Fusebox. Pull the red 10 amp fuse - #31. It’s already missing in this picture.

It’s that one – where the hole is. (your car may have less fuses than mine, I have pretty much all the options so virtually every slot is filled)

You can look at the map on the cover.


Then unbolt the four bolts (13mm and 15mm) that are holding the seat in place. If you have power seats, you actually might want to remove these bolts before you pull the batter so you can slide the seat forward/backward for easy access to the bolts. I did. Once that’s done, put on your weightlifting, and prepare to jack up your back. My OEM passenger seat weighed in at 57.8 pounds. (using my ultra-scientific bathroom scale)


I brought it inside, and flipped it on its side on the rug. Here’s what it looks like underneath.


Found this tag with a date on it. Neat.


I highly recommend you have a set of trim tools for this job. I bought this cheap seat at Harbor Freigh years ago and they’ve served me well.


Then, follow TOB’s incredibly detailed instructions on seat disassembly. This will take a little bit. DON’T LOSE THE DANG CLIP THAT HOLDS THE SEAT TILT LEVER! That thing loves to go flying and traverse different dimensions of time and space.

Once I was far enough along to split the seat back and bottom, I snapped a few pics of the seat heater wiring and connectors.


Note that the seat back heater goes through the upholstery. You have to disconnect it at the seat base, then pull it out.


Here’s the two seat heater connectors. The grey one does the seat back, the green one is the seat cushion heater.


Seat back and cushion are officially separated.


When you pull the cushion, it exposes the OCS. (occupant classification system)


Here’s a pic of the cushion and foam.


When you peel the leather back, you can see the seat heater. Note that these are not Velcro’d in like the Recaros. There appears to be a rod and some hog rings retaining the leather skins.


Here are the two bare seat bases before I started swapping stuff.


OP
OP
P

Paul

Legend
Joined
Apr 30, 2007
Messages
9,894
Reaction score
247
This is the Recaro OCS sensor. It looks quite a bit different from my OEM one.


It is riveted onto the frame.


This is the OCS sensor from my factory seat. It’s much larger, and held in with three rivets. Two up front and one through the top of the seat frame.


While the Recaro should be totally plug ‘n’ play as far as OCS systems go, I am paranoid, and figured I might as well swap everything since I’m neck-deep in this mess already anyway. Sooo, I started drilling rivets.


Pop the green push-pins holding the OCS bladder in place to reveal the top rivet.


There it is.


To remove the OCS bladder from the seat, you have to slide the connector retainer off of a metal tab on the seat. It’s held in by a very small metal tab that you just pry up gently with a screwdriver. Then it will slide right off. Disconnect the connectors too.


Should look like this.


Seat tracks with OCS removed before swappage occurs.


I don’t have a welder, and even if I did, I’m a colossally crappy welder, so rather than cut and re-weld the extra metal bolster supports from the Recaro to my original seat, I unbolted the “tops” of each seat track assembly and swapped them. Remove the four nuts on each seat track.


This is everything blown apart. Recaro manual track on left. OEM power assembly on right.


Recaro track.

OEM track. There is some wiring that you’ll need to remove using a trim tool so you can reinstall it on the new upper half from the Recaro.


Using my big rivet gun that I got to put new door handles on my foxbody notch, I riveted the OCS modules back onto the now-swapped upper halves. Then I reinstalled all the wiring.


This is the completed power, heated Recaro seat track.


Here are both seat tracks next to each other after the swap.

 
OP
OP
P

Paul

Legend
Joined
Apr 30, 2007
Messages
9,894
Reaction score
247
Now onto the seat warmer pads themselves. On the left is the seat back warmer. Right is seat bottom warmer.


Seat back warmer PN.


Seat bottom warmer PN.


Side-by-side upholstery.


Note that the cushions themselves are different. The Recaros have a Velcro groove in the bottom that the OEM seat cushion doesn’t.

This is problematic because the seat heater covers that groove completely.


The seat heater pads are held in place by double-side tape strips on either side of the pad. Lifting up the OEM pad, you’ll find a small recess cast into the foam to accommodate the heater element terminal thingy. This is also problematic because no such provision exists on the Shelby foam.


Time to get creative. Here you’ll notice the Velcro groove on the Recaro cushion that holds the leather skin tightly in place.


This strip sewn into the covers gets pushed down into that groove.


When I put the heater over the top of the cushion, I paid close attention to where the heater wire passed through the pad. There was a “straight” section where the wire itself didn’t interfere with the groove, but the pad did.


See what I’m talking about? The wires pass on either side of the groove.


I used a sharpie to draw some straight lines across the pad, paying close attention to avoid the heater wires. Then I grabbed my scissors, and got to cutting.


I got most of it out of the way. There was still a section in the center that had to remain because I can’t cut the wires. Still, most of the groove was exposed. This was a good thing.


Next up, I had to do something about making a recess in the foam for the little connector thingy.


After mocking it up, I used a sharpie to mark where I was gonna do some damage.


Then I used a razor blade to cut a little hole with a “pigtail” provision on it.


Then after taking some measurements, I VERY CAREFULLY cut away some of the material that gets pushed down into the groove. My goal was to ensure that it didn’t stick up too much and create a bump in the upholstery once installed. Don’t cut your expensive leather covers!


Then I mocked up the cover to see how it fit before I peeled the tape and installed the heater pad for the last time. It tucks in perfectly, and everything looks nice and toight. Toight like a Toiger.


Pull the cover back off. Flip the heater pad. Pull off the orange film to expose the tap.


Install the pad for the last time.
 
OP
OP
P

Paul

Legend
Joined
Apr 30, 2007
Messages
9,894
Reaction score
247
Install your leather, being careful to ensure that all the Velcro is pushed down into the grooves and is held tightly. If you don’t do this, your upholstery will look like crap.


Seat back heaters were next.


The seat back heaters have this weird gap in the middle, presumably to fit the architecture of the OEM seat backs I’m sure. However, since I didn’t disassemble the OEM seat backs (because they were held together with hog rings and rods) I don’t have pictures. I just tried to figure out how these pads might fit best on the Recaro foam. I used a sharpie to mark the wires to ensure I didn’t cut them.


I cut a slot in the top like I did before to provide for attaching the Velcro.


I didn’t want the big gap in the middle because it pushed the seat heater down pretty far to a section that your back wouldn’t be resting against while driving. I resolved that somehow I would bring the sections together, kinda like this.


So, I VERY CAREFULLY trimmed away all the pad around the wires so I could manipulate everything more easily and not create a lump in the upholstery. Not sure if this was the best solution, but it was the best I could come up with at the time.


Cut away a small section in the upholstery again.


Mock up a provision for the connector thingy again.


Cut the hole.


Made sure that things fit to my satisfaction, then installed the heater pad.


Installed the skin per TOB’s instructions. By the way TOB, thanks for the advice on zip-typing the leather flaps up where the clamshells pass through the seat. Mine were cut just like yours, and your trick worked perfectly. In this picture, you can see the seat heater connector on the left, and the yellow airbag connector on the right.


Bolt the halves together, and reconnect all of the various electrical connectors, harnesses, and clips. Then do any final reassembly per TOB’s instructions.


BAM! Here you have a heated, power, Shelby leather Recaro passenger seat. This is quite an endeavor, and this is a pretty expensive seat. The completed passenger seat weighs in at 62.2 pounds, which is 4.4 pounds heavier than the seat that came out. These are NOT lightweights.


After installing it in the car, I went for a quick drive with my girlfriend so she could verify that her butt was, in fact, being warmed by my new seats. She did confirm that she had a hot ass, and all was right with the world. :)


Driver side, which should be easier, is still to come. I’m going to tackle that this weekend. More to come. I hope this write-up is helpful.

Paul.
 

white95

Apex Junky
Admin
Joined
Dec 30, 2007
Messages
20,630
Reaction score
8,816
Location
Prairieville, LA
Great write-up! It's always an added bonus to receive verification of the hot ass.. Speaking of hot asses, my wife has been asking for me to add heated seats to her s197 for quite sometime now. Thanks for the idea.
 

Dalamar

Post Whore
SN95 Supporter
Joined
Feb 3, 2006
Messages
13,863
Reaction score
124
Location
SLC, UT
Thanks for the info Paul.

Excellent walk through.
I picked up some 14 fusion seats for the 67, bottom of the seat looks similar.
am currently modifying the floor pan to get them in there and low enough to keep my head off the ceiling.
Will get some pics in my thread and probably do something similar to what you did here but not with so many pictures and thorough instructions.
Nice work man!
 
OP
OP
P

Paul

Legend
Joined
Apr 30, 2007
Messages
9,894
Reaction score
247
Glad I could help Jeff! I'm excited to see your updates.


C'mon Monkey - you know I have good attention to detail. LOL
 

Steven

Legend
Joined
Jun 3, 2007
Messages
8,177
Reaction score
118
Location
SC
Paul, hows the lateral support in these? Good job by the way. Perfect attention to detail as always.
 
OP
OP
P

Paul

Legend
Joined
Apr 30, 2007
Messages
9,894
Reaction score
247
wow. very cool.

Thanks. A ton of work, and a ton of money, but unique and cool in the end I think.

Paul, hows the lateral support in these? Good job by the way. Perfect attention to detail as always.

It's pretty frikkin' fantastic, especially for an OEM seat. Once I sat in my buddy's '13 Shelby, I knew I had to have them.

Since pretty much all Mustangs start to look alike at some point, I try to separate mine through attention to detail. :)

Paul.
 

MustangChris

Post Whore
SN95 Supporter
Joined
Aug 20, 2008
Messages
27,425
Reaction score
910
Location
Aurora, CO
I dig how you're doing the detailed work on your factory car... not a crazy pro-touring thing..... reminds me of how i got my 96. Painted rear bumper insert, chrome intake, chrome STB, exhaust, new wheels --- clean, nice, polished.
 
OP
OP
P

Paul

Legend
Joined
Apr 30, 2007
Messages
9,894
Reaction score
247
Thanks dude. I'm come to realize the value of a dead-reliable car. I really enjoy modding the car, but I don't ever want to worry whether it's gonna start in the morning. You can have a really nice without being a street terror out hunting TT Lambos.


I just changed the oil. Now I'm gonna work on the driver's side Recaro. This will probably take the rest of the day.

Paul.
 
OP
OP
P

Paul

Legend
Joined
Apr 30, 2007
Messages
9,894
Reaction score
247
Got the in today. This was quite a bit of work, and even more money. However, the end result is worth it. I wonder if anyone else has done power / OEM heated Recaros yet? If not, hopefully someone will take the writeups by TOB and me and tackle it for themselves.

So a quick wrap up... Here's the breakdown of what it took to do this:
- OEM "Comfort Package" with dual power/heated seats
- (2) Upper and (2) Bottom seat heater pads from Tousley - ~$310
- FRPP Cloth Recaros, I paid $2500 private party. The best I've seen is about $2800 new
- Shelby Leather skins, I paid $800 from Rehagen because I wanted white stripes, which are a little more rare than all black
- About 20 hours of work total I think. You may be able to do it more quickly... I'm slow.
- Various small prying tools, trim tools, picks, screwdrivers, torx driver, 13mm and 15mm sockets
- Lots of patience and attention to detail

Everything works just like factory. The support on these seats is NIGHT AND DAY different from my stock 401A seats. They are so much more comfortable and supportive, and having the adjustable lumbar swapped into the Recaro is nice. It's a little soon to tell, but I have feeling this will be absolute favorite mod on the car. Having a nice seat and a nice steering wheel makes all the difference in a car - especially if you drive it daily like I do. I'm thrilled with the result. The heated seats are really nice too, except on a day like today where it was 85* in Phoenix while the rest of the country is under feet of snow and ice.


Overall, if you have the means, I highly recommend it.


Here's a pic of my new front mudflaps.


...and my new rear splitters.


This car has so many wings, it should be able to fly!! :p :lol:


Paul.
 

Latest posts

Forum statistics

Threads
77,566
Messages
1,505,051
Members
15,030
Latest member
IDTag

Members online

Top